Dell A960 Owner's Manual
Dell A960 - Personal All-in-One Printer Color Inkjet Manual
 |
View all Dell A960 manuals
Add to My Manuals
Save this manual to your list of manuals |
Dell A960 manual content summary:
- Dell A960 | Owner's Manual - Page 1
Dell™ Personal All-In-One Printer A960 Owner's Manual Look Inside For: • Ordering Supplies • Getting Started • Understanding the Software • Ink Cartridge Maintenance • Troubleshooting www.dell.com/supplies | support.dell.com - Dell A960 | Owner's Manual - Page 2
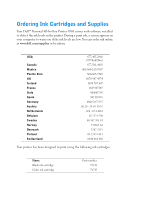
Ordering Ink Cartridges and Supplies Your Dell™ Personal All-In-One Printer A960 comes with software installed to detect the ink levels in the printer. During a print job, a screen appears on your computer to warn you if the ink levels are low. You can order ink online at www.dell.com/supplies or by - Dell A960 | Owner's Manual - Page 3
problem. CAUTION: A CAUTION indicates a potential for property damage, personal injury, or death Information in this document is subject to change without notice. © 2003 Dell Data and Computer Software clause at DFARS 252.227-7013 and in applicable FAR provisions: Dell Inc., One Dell Way, Round Rock, - Dell A960 | Owner's Manual - Page 4
.dell.com/supplies | support.dell.com Caution: SAFETY INFORMATION Use the following safety guidelines to help ensure your own personal and easily accessible. • Refer service or repairs, other than those described in the user documentation, to a professional service person. CAUTION: Do not use the - Dell A960 | Owner's Manual - Page 5
Parts 10 Accessing Your User's Guide 13 Setting up Your Printer 13 Installing the Operator Panel 14 Using the Operator Panel 15 Operator Panel Menus 17 Understanding the Automatic Paper Type Sensor 23 Loading Paper 25 Print Media Guidelines for the Paper Support 26 Load Your Document - Dell A960 | Owner's Manual - Page 6
Images or Documents 39 Faxing 40 Using Dell Printer Fax Tools Fax Software 41 Using Fax Console (Windows XP Only 43 Access the Fax Setup Utility 44 Software Understanding the Printer Software 56 Using the Dell All-In-One Center 56 Access the Dell All-In-One Center 56 The All-In-One Main Page - Dell A960 | Owner's Manual - Page 7
62 Access Dell Picture Studio 62 4 Ink Cartridge Maintenance Replacing Ink Cartridges 64 Aligning Ink Cartridges 65 Cleaning the Ink Cartridge Nozzles 67 5 Troubleshooting Setup Problems 70 General Problems 70 Black and White Copy Quality Is Unsatisfactory 72 Fax Does Not Work 73 Printer Is - Dell A960 | Owner's Manual - Page 8
7 Appendix Limited Warranties and Return Policy 98 Dell Inc. Ink and Toner Cartridges Limited Warranties 109 Dell Software License Agreement 111 Regulatory Notices 113 8 Contents - Dell A960 | Owner's Manual - Page 9
SECTION 1 Getting Started Understanding the Printer Parts Accessing Your User's Guide Setting up Your Printer Installing the Operator Panel Using the Operator Panel Understanding the Automatic Paper Type Sensor Loading Paper 1 - Dell A960 | Owner's Manual - Page 10
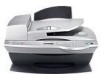
www.dell.com/supplies | support.dell.com Understanding the Printer Parts 1 2 3 8 4 5 7 6 # Use the: To: 1 Automatic Document Feeder (ADF) Scan, copy or fax multiple page documents and/or legal sized documents. 2 Paper support Load paper into the printer. 3 ADF input tray Load - Dell A960 | Owner's Manual - Page 11
1 2 3 # Use the: 1 Printer (scanner unit) 2 Scanner lock 3 Scanner support 4 Express Service Code 4 To: • Lift to install or change ink cartridges. • Lift to lock or unlock the scanner. Lock or unlock the scanner. • Push the scanner lock away from you for unlocking. • Pull the scanner - Dell A960 | Owner's Manual - Page 12
dell.com/supplies | support.dell.com 1 4 3 2 # Use the: To: 1 Power supply connector Supply power to the printer. 2 Wall jack connector Connect your printer to an active telephone line to send and receive faxes. Your printer services digital network), or cable modem to the printer. - Dell A960 | Owner's Manual - Page 13
's Guide. Setting up Your Printer NOTE: The Dell Personal All-In-One Printer A960 supports the Windows XP and Windows 2000 operating systems. Follow the instructions on your printer Setup Diagram to install the hardware and software. For setup troubleshooting, see page 70. You can use the Dell™ AIO - Dell A960 | Owner's Manual - Page 14
www.dell.com/supplies | support.dell.com Installing the Operator Panel The following instructions apply only if you received an additional language operator panel with your printer. 1 Remove the operator panel (if one is installed). 2 Choose the correct operator panel for your language. 3 Position - Dell A960 | Owner's Manual - Page 15
on the far right. 1 17 18 19 2 3 4 5 6 7 8 11 9 10 13 12 16 14 15 Use the: To: 1 Mode area Select a Mode (scan, copy, or fax). 2 Start area Start a color or black and white scan, copy, or fax job. 3 Power Turn your printer on or off. 4 Stop/Clear (Cancel) • Cancel a scan, print - Dell A960 | Owner's Manual - Page 16
www.dell.com/supplies | support.dell.com Use the: 10 Lighter/Darker 11 Select 12 Speed Dial 13 A keypad number or symbol 14 Redial/Pause 15 Color you want is lit. View printer status, messages, and menus. Customize the size of your original document by a percentage, Fit to Page, or to poster size. - Dell A960 | Owner's Manual - Page 17
Messages • Menus Selecting Operator Panel Menu items 1 Press one of the available Mode buttons on the printer operator panel. 2 Press Options repeatedly until the menu heading operator panel, see your User's Guide. NOTE: The option currently selected is noted with an asterisk (*) on the display - Dell A960 | Owner's Manual - Page 18
5x7 8x10 L 2L POWER SAVE Immediately After 10 min After 30 min After 60 min Never KEY PRESS TONE Off Low High MAINTENANCE Ink levels Change Align Clean Test REPEAT IMAGE 1x per page 4x per page 9x per page 16x per page COLOR Press + or - to adjust the color intensity, and then press Select. CLEAR - Dell A960 | Owner's Manual - Page 19
Scan Mode Menu Items ORIGINAL SIZE Letter B5 A4 A5 A6 Wallet 3x5 4x6 5x7 8x10 L 2L POWER SAVE Immediately After 10 min After 30 min After 60 min Never CLEAR SETTINGS After 2 min Never SET DEFAULTS Use Factory Use Current LANGUAGE English French German Spanish Italian - Dell A960 | Owner's Manual - Page 20
dell.com/supplies | support.dell TYPE Auto Detect Plain Coated Photo Transparency SPEAKER VOLUME Off Low High PERSONALIZE FAX Name Number ORIGINAL SIZE Letter B5 A4 A5 A6 Wallet After 1 ring After 2 rings After 3 rings After 5 rings Manual-Press # Fax tone heard DELAY UNTIL Do not delay Enter Time - Dell A960 | Owner's Manual - Page 21
Fax Mode Menu Items (continued) MAINTENANCE Ink levels Change Align Clean Test CLEAR SETTINGS After 2 min Never SET DEFAULTS Use Factory Use Current FAX CONFIRMATION Off Print for all Print for errors FIT FAX TO PAGE Try to fit Two pages RING PATTERN Normal Distinctive Ring 1 (Double) - Dell A960 | Owner's Manual - Page 22
www.dell.com/supplies | support.dell.com Advanced Fax Mode Menu Items REDIAL ATTEMPTS 0 times 1 time 2 times 3 times 4 12000 14400 16800 19200 21600 24000 26400 28800 31200 33600 ERROR CORRECTION On Off COUNTRY CODE Select from one of the available countries. CALL DIAGNOSTICS Off Audio on Print - Dell A960 | Owner's Manual - Page 23
paper types: • Plain paper. • Coated paper. • Glossy/photo paper. • Transparencies. If you load one of these paper types, the printer detects the paper type and automatically adjusts the paper type settings. NOTE: Your printer cannot detect the paper size. To choose the paper size on which you want - Dell A960 | Owner's Manual - Page 24
www.dell.com/supplies | support.dell.com To permanently turn it off: 1 Click Start → Control Panel → Printers and Other Hardware → Printers and Faxes (Windows XP). Click Start → Settings → Printers and Faxes or Printers (Windows 2000). 2 Right-click the printer icon. 3 Click Printing Preferences or - Dell A960 | Owner's Manual - Page 25
, learn how to load paper into your printer with the following instructions. Continue with "Using the Printer" on page 29 to learn how to print, copy, scan, and fax. Loading Paper 1 Place the paper against the guide on the right-hand side of the paper support. 2 Squeeze and slide the left-hand paper - Dell A960 | Owner's Manual - Page 26
sheets of coated, photo, or glossy paper 10 transparencies Make sure: • The paper is loaded vertically against the right-hand side of the paper support. • The paper guide is against the left edge of the paper. NOTE: Load letterhead paper into the printer upside down with the letterhead facing you - Dell A960 | Owner's Manual - Page 27
sure: • The print side of the paper faces you. • The paper guide rests against the left edge of the paper. • Your paper size fits in. • You follow the loading instructions on the iron-on transfer packaging. • The blank side of the transfers faces you. • The paper guide is against the left edge of - Dell A960 | Owner's Manual - Page 28
www.dell.com/supplies | support.dell.com Load Your Document on the Scanner Glass 1 Open the top cover. 2 Place the item you want to copy face down on the scanner glass in the upper left corner. 3 Close the top cover. 28 Getting Started - Dell A960 | Owner's Manual - Page 29
SECTION 2 Using the Printer Using the ADF Printing Copying Scanning Faxing 2 - Dell A960 | Owner's Manual - Page 30
www.dell.com/supplies | support.dell.com Using the ADF Load Your Document Into the ADF NOTICE: Do not load more . You can load up to 50 sheets of your original document (text side up with page one on top) into the ADF for scanning, copying, and faxing. The ADF is recommended for loading multiple - Dell A960 | Owner's Manual - Page 31
guide is against the edge of the paper. 50 sheets of A4 size paper • The document is loaded text side up. • The paper guide is against the edge of the paper. 50 sheets of legal size paper • The document is loaded text side up. • The paper guide paper guide is paper guide is guide guide ink - Dell A960 | Owner's Manual - Page 32
dell.com/supplies | support.dell.com Printing 1 Make sure your computer and your printer are on. 2 Load paper. For help, see page 25. 3 With your document open, click File → Print. 4 To change the printer as how to print collated photocopies and banners, see your User's Guide. 32 Using the Printer - Dell A960 | Owner's Manual - Page 33
Software 1 Make sure your computer and your printer are on. 2 Load paper. For help, see page 25. 3 Load your document on the scanner glass or into the ADF. For help, see page 28 or page 30. 4 Click Start → All Programs (or Programs) → Dell Printers → Dell AIO Printer A960 → Dell All-In-One Center - Dell A960 | Owner's Manual - Page 34
Click Start → All Programs (or Programs) → Dell Printers → Dell AIO Printer A960 → Dell All-In-One Center. The All-In-One Main Page appears on your computer screen. 4 Click Preview Now. NOTE: If the size of the scan (found in the lower right of the preview window) appears in red, you do not have the - Dell A960 | Owner's Manual - Page 35
All Programs (or Programs) → Dell Printers → Dell AIO Printer A960 → Dell All-In-One Center. The All-In-One Main Page appears on your computer screen. 4 Click Preview Now to see your scanned image. NOTE: If the size of the scan (found in the lower right of the preview window) appears in red, you do - Dell A960 | Owner's Manual - Page 36
→ Dell AIO Printer A960 → Dell All-In-One Center. The All-In-One Main Page appears on your computer screen. 4 Click Preview Now to see your scanned image. NOTE: If the size of the scan (found in the lower right of the preview window) appears in red, you do not have the system resources available - Dell A960 | Owner's Manual - Page 37
→ All Programs (or Programs) → Dell Printers → Dell AIO Printer A960 → Dell All-In-One Center. The All-In-One Main Page appears on your computer screen. 3 From the Productivity Tools section, click Edit text found in a scanned document (OCR). 4 Follow the instructions on your computer screen. 5 When - Dell A960 | Owner's Manual - Page 38
dell.com/supplies | support.dell.com Save an Image on Your Computer 1 Click Start → All Programs (or Programs) → Dell Printers → Dell AIO Printer A960 → Dell All-In-One Center. The All-In-One Main Page the instructions on the screen to prepare the photograph for e-mail. 9 Click Attach Now. 10 Write - Dell A960 | Owner's Manual - Page 39
in the paper support. For help, see page 25. 2 Load your document on the scanner glass or into the ADF. For help, see page 28 or page 30. 3 Click Start → All Programs (or Programs) → Dell Printers → Dell AIO Printer A960 → Dell All-In-One Center. The All-In-One Main Page appears on your computer - Dell A960 | Owner's Manual - Page 40
to fax using the printer software: • Your computer must have Dell Printer Fax Tools or Microsoft Fax Console installed and configured - See "Using Dell Printer Fax Tools Fax Software" on page 41 to use Dell Printer Fax Tools. - See "Using Fax Console (Windows XP Only)" on page 43 to use Fax Console - Dell A960 | Owner's Manual - Page 41
you have either of these entries, skip to "Configure Dell Printer Fax Tools Fax Software." 3 Click on the desktop. The All Programs window closes. 4 Insert the Dell Personal All-In-One Printer A960 Drivers and Utilities CD. An installation window appears. 5 Click Cancel. 6 Click Start → My Computer - Dell A960 | Owner's Manual - Page 42
Configure Dell Printer Fax Tools Fax Software NOTE: Fax service is set by default to automatically answer your phone line after two rings if you click to select the Enable Receive check box. Change these settings as desired. 1 Click Start → All Programs (or Programs). 2 Click Dell AIO Printer A960 - Dell A960 | Owner's Manual - Page 43
Windows Components. 4 Click to select Fax Services. 5 Click Next. If prompted, insert the Microsoft Windows XP CD, and then click OK. Close the Welcome to Microsoft Windows XP window -down menu to the right of this field to select Dell AIO Printer A960 if you want to print all received faxes. 9 To - Dell A960 | Owner's Manual - Page 44
www.dell.com/supplies | support.dell.com Access the Fax Setup Utility • Click Start → All Programs (or Programs) → Dell Printers → Dell AIO Printer A960 → Fax Setup Utility • From the Dell All-In-One Center, click the Maintain/Troubleshoot tab, and then click Display the Fax Setup Utility. 44 Using - Dell A960 | Owner's Manual - Page 45
the number. • Choose whether to use error correction. • Select when to print a fax to print a footer (date, time, and page number) on each page. • Automatically reduce an incoming fax to fit PBX). • Enter a dialing prefix. • Choose how (manually, if fax tones are detected, or after a certain amount - Dell A960 | Owner's Manual - Page 46
.dell.com Send a Fax NOTE: You can send and receive color faxes using the operator panel only. In order to send a color fax from your printer, the machine to which you are sending the fax must also support color faxes. You can send faxes using the printer operator panel or the printer software - Dell A960 | Owner's Manual - Page 47
ADF. For help, see page 28 or page 30. 3 Make sure your printer is connected to a computer with a data/fax modem and the modem is connected to an active telephone line. 4 Click Start → All Programs (or Programs) → Dell Printers, → Dell AIO Printer A960 → Dell All-In-One Center. 5 Place the document - Dell A960 | Owner's Manual - Page 48
www.dell.com/supplies | support.dell.com Using Dell Printer Fax Tools Fax Software 1 Click Start → All Programs (or Programs) → Dell Printers → Dell AIO Printer A960 → Dell All-In-One Center. 2 Click See More Scan Settings. 3 Click Advanced. 4 Click to select Scan multiple items before output ( - Dell A960 | Owner's Manual - Page 49
the number of rings that you set is detected, the printer automatically receives your fax. NOTE: For your printer to receive a color fax, the machine from which you are receiving must also support color faxes. Receive Faxes Manually 1 From the operator panel, press Fax. 2 Press Options until Answer - Dell A960 | Owner's Manual - Page 50
www.dell.com/supplies | support.dell.com Receive Faxes Through an Answering Machine 1 From the operator modem in your printer: 1 With your document open, click File →Print. 2 In the printer list, select Dell Printer Fax Tools. 3 Click Print. 4 To Print to fax, follow the instructions in the program - Dell A960 | Owner's Manual - Page 51
the status, and then click Preferences or Properties. 5 Click the General tab and view the Status line. 6 Click Close when you are finished. Using the Printer 51 - Dell A960 | Owner's Manual - Page 52
.dell.com/supplies | support.dell.com Using Special Fax Features There are several fax features on your Dell A960 that the Printer Software 1 Click Start → All Programs (or Programs) → Dell Printers → Dell AIO Printer A960 → Fax Setup Utility. 2 Click the Speed Dial tab. 3 Follow the instructions - Dell A960 | Owner's Manual - Page 53
a delayed fax. On Hook Dial 1 On the operator panel, press Fax. 2 Press Options repeatedly until On Hook Dial appears. 3 Press Select to make the printer go off hook. 4 Enter the number to which you want to send a fax. 5 Press the keypad numbers to navigate an automated answering system. 6 Press - Dell A960 | Owner's Manual - Page 54
www.dell.com/supplies | support.dell.com Broadcast Send If your printer is attached to a computer, you can send a fax of up to 20 pages to as many as five people at once. To Send a Broadcast Fax Immediately 1 Press Fax. 2 Press Options four times to display Delay Until. 3 Press + or - - Dell A960 | Owner's Manual - Page 55
SECTION 3 Understanding the Software Using the Dell All-In-One Center Using Print Properties Using the Dell Printer Solution Center Using Dell Picture Studio 3 - Dell A960 | Owner's Manual - Page 56
editing software in your Windows operating system. • Fax Setup Utility (page 44) Using the Dell All-In-One Center You can use the Dell All-In-One Center to: • Select a scan destination. • Select a photocopy quantity and color. • Scan, copy, print, fax, and do creative tasks. • Access troubleshooting - Dell A960 | Owner's Manual - Page 57
The All-In-One Main Page The All-In-One Main Page consists of four main sections. The following table be used. NOTE: Click See More Scan Settings to view all settings. • Select the quantity and color of your photocopies. • Select a quality setting for your photocopies. • Adjust the size of the - Dell A960 | Owner's Manual - Page 58
of what will be printed or copied. For more information on using the Dell All-In-One Center, see your User's Guide. NOTE: For more information about the All-In-One Main Page, View Saved Images Page, or the Maintain/Troubleshoot Page, click the Help button located in the upper right corner of the - Dell A960 | Owner's Manual - Page 59
to select the print settings. I Want To menu Select one of the projects from the menu to help print photos, printer prints several photocopies of a single print job: collated or normal. Print Color Images in Black and White-To print your color images in black and white. Understanding the Software - Dell A960 | Owner's Manual - Page 60
www.dell.com/supplies | support.dell.com From this tab: Paper Setup Print Layout You can change these settings: Type-Select the type of media you are using. Paper Size-Select the size of the paper you are using. Orientation-Select how you want the document oriented on the printed page. You can - Dell A960 | Owner's Manual - Page 61
and to check the current printer status. Access the Dell Printer Solution Center Click Start → All Programs (or Programs) → Dell Printers → Dell AIO Printer A960 → Dell Printer Solution Center. To learn more about the Dell Printer Solution Center, see your User's Guide. Understanding the Software 61 - Dell A960 | Owner's Manual - Page 62
Make a series of images into a movie Access Dell Picture Studio • Click Start → All Programs (or Programs) → Dell Picture Studio Home. NOTE: Your language may not be supported. If your language is not supported, use the photo editing software in your Windows operating system. 62 Understanding the - Dell A960 | Owner's Manual - Page 63
SECTION 4 Ink Cartridge Maintenance Replacing Ink Cartridges Aligning Ink Cartridges Cleaning the Ink Cartridge Nozzles 4 - Dell A960 | Owner's Manual - Page 64
and follow the Safety Instructions on page 4. Dell™ ink cartridges are available only through Dell. You can order more ink at www.dell.com/supplies. 1 Make sure the printer is on. 2 Lift the printer (scanner unit) until the scanner support keeps it open. The ink cartridge carrier moves and stops - Dell A960 | Owner's Manual - Page 65
Printer Software to Automatically Align Ink Cartridges When automatically aligning your ink cartridges, a page prints with vertical, horizontal, and slanted lines. 1 Load paper. For help, see page 25. 2 Click Start → All Programs (or Programs) → Dell Printers → Dell AIO Printer A960 → Dell Printer - Dell A960 | Owner's Manual - Page 66
| support.dell.com Using the Printer Software to Manually Align Ink Cartridges When manually aligning your ink cartridges, a page prints with arrows followed by numbers. 1 Load paper. For help, see page 25. 2 Click Start → All Programs (or Programs) → Dell Printers → Dell AIO Printer A960 → Dell - Dell A960 | Owner's Manual - Page 67
continue with wiping the ink cartridge nozzles and contacts. For help, see your User's Guide. Using the Printer Software 1 Load paper. For help, see page 25. 2 Click Start → All Programs (or Programs) → Dell Printers → Dell AIO Printer A960 → Dell Printer Solution Center. 3 From the Maintenance tab - Dell A960 | Owner's Manual - Page 68
www.dell.com/supplies | support.dell.com 68 Ink Cartridge Maintenance - Dell A960 | Owner's Manual - Page 69
SECTION 5 Tr o u b l e s h o o t i n g Setup Problems General Problems More Troubleshooting Options 5 - Dell A960 | Owner's Manual - Page 70
Incorrect" on page 74. • You only have one Dell AIO Printer A960 attached to your computer. • Your operating system is compatible with your printer. The Dell AIO Printer A960 supports Windows XP and Windows 2000. General Problems Try to troubleshoot your problem before contacting Dell by checking - Dell A960 | Owner's Manual - Page 71
(Windows 2000). b Double-click the Dell AIO Printer A960 icon, and then click Printer. c Click Printer, and make sure no check mark appears next to Pause Printing. • Print a test page: a Click Start → All Programs (or Programs) → Dell Printers → Dell AIO Printer A960 → Dell Printer Solution Center - Dell A960 | Owner's Manual - Page 72
Printers → Dell AIO Printer A960 → Dell All-In-One Center. The All-In-One Main Page appears on your computer screen. 2 In the Copy section, click See More Copy Settings. 3 Click Advanced to display the Advanced Copy Settings dialog box. 4 Click the Scan tab. 5 From the Color depth drop down menu - Dell A960 | Owner's Manual - Page 73
"Faxing" on page 40. Printer Is Not Sending or Receiving Faxes If you are having trouble sending or receiving a fax through the printer software, ensure that: • Fax software is installed and configured on your computer. • Your printer is connected to the computer with a USB cable. Troubleshooting 73 - Dell A960 | Owner's Manual - Page 74
www.dell.com/supplies | support.dell.com Display Language Is Not Preferable If the language on the printer display is not Dell Printers → Dell AIO Printer A960 → Dell All-In-One Center. The All-In-One Main Page appears on your computer screen. 2 In the upper left corner, click Maintain/Troubleshoot - Dell A960 | Owner's Manual - Page 75
not load too much paper into the printer. For help, see page 26. • Make sure the paper guide rests against the left edge of the paper and does not cause the paper to bow in the paper support. • Place the printer on a flat, level surface. • Select the correct paper type and size. Troubleshooting 75 - Dell A960 | Owner's Manual - Page 76
www.dell.com/supplies | support.dell.com Paper Jams If a paper jam occurs in the paper support, remove the paper from the printer. If the paper is lodged too far into the printer and cannot be removed: 1 Press Power to turn the printer off. 2 Pull slowly and firmly on the paper to remove it. If you - Dell A960 | Owner's Manual - Page 77
Document Misfeeds or Jams 1 Turn the printer off. 2 Open the ADF. 3 Pull gently to remove the paper jam. 4 Close the ADF. 5 Turn the printer on. 6 Print any missing pages. Troubleshooting 77 - Dell A960 | Owner's Manual - Page 78
a new cartridge from Dell at www.dell.com/supplies. For help installing a new cartridge, see page 64. Paper Jam Message If your printer has a paper jam: 1 Click Start → All Programs (or Programs) → Dell Printers → Dell AIO Printer A960 → Dell Printer Solution Center. 2 Click the Troubleshooting tab - Dell A960 | Owner's Manual - Page 79
on. Cartridge Error: 50C Your ink cartridge has a short. 1 Press Power to turn your printer off. 2 Unplug your printer. 3 Plug in your printer. 4 Turn your printer on. 5 Uninstall and reinstall the cartridges. NOTE: If this does not resolve the problem, see "More Troubleshooting Options" on page 82 - Dell A960 | Owner's Manual - Page 80
www.dell.com/supplies | support.dell.com Power Light Blinks Twice The ink cartridge carrier might be stalled. Check your computer screen for error messages. 1 Turn the printer off. 2 Wait a few seconds, and then turn the printer on. Improving Print Quality If you are not satisfied with the print - Dell A960 | Owner's Manual - Page 81
Dell AIO Printer A960. 2 Follow the instructions on your screen to remove the All-In-One software. 3 Restart your computer before reinstalling the printer software. 4 Insert the Driver and Utilities CD, and then follow the instructions on your screen to install the software. Troubleshooting - Dell A960 | Owner's Manual - Page 82
do not solve the problem you are having with your printer: • See the Dell Printer Solution Center software for more troubleshooting information: a Click Start → All Programs (or Programs) → Dell Printers → Dell AIO Printer A960 → Dell Printer Solution Center. b Click the Troubleshooting tab on the - Dell A960 | Owner's Manual - Page 83
6 SECTION 6 Contacting Dell - Dell A960 | Owner's Manual - Page 84
Assistance If you need help with a technical problem, Dell is ready to assist you. 1 Call technical support from a telephone near or at the printer so that technical support can assist you with any necessary procedures. When calling Dell, use your Express Service Code to help expedite the routing of - Dell A960 | Owner's Manual - Page 85
electronically, you can access the following websites: • www.dell.com • support.dell.com (technical support) • premiersupport.dell.com (technical support for educational, government, healthcare, and medium/large business customers, including Premier, Platinum, and Gold customers) For specific web - Dell A960 | Owner's Manual - Page 86
) Customer Service and Technical Support toll-free: 1-800-456-3355 Employee Purchase Program (EPP) Customers toll-free: 1-800-234-1490 Dell Sales toll-free: 1-800-289-3355 or toll-free: 1-800-879-3355 Dell Outlet Store (Dell refurbished computers) toll-free: 1-888-798-7561 Software and - Dell A960 | Owner's Manual - Page 87
(City) International Access Code Country Code City Code Department Name or Service Area, Website and E-Mail Address Belgium (Brussels) Website: support.euro.dell.com International Access Code: 00 E-mail: [email protected] Country Code: 32 City Code: 2 E-mail for French Speaking Customers - Dell A960 | Owner's Manual - Page 88
Name or Service Area, Website and E-Mail Address Denmark (Copenhagen) Website: support.euro.dell.com International Access Code: 00 Country Code: 45 E-mail Support (portable computers): [email protected] E-mail Support (desktop computers): [email protected] E-mail Support (servers - Dell A960 | Owner's Manual - Page 89
: 00 Country Code: 49 City Code: 6103 Department Name or Service Area, Website and E-Mail Address Website: support.euro.dell.com E-mail: support.euro.dell.com/fr/fr/emaildell/ Home and Small Business Technical Support Customer Care Switchboard Switchboard (calls from outside of France) Sales Fax - Dell A960 | Owner's Manual - Page 90
Service Area, Website and E-Mail Address Website: support.euro.dell.com E-mail: support.euro.dell.com/gr/en/emaildell/ Technical Support Gold Technical Support Switchboard Sales Fax Technical Support Sales Website: support.euro.dell.com E-mail: [email protected] Ireland Technical Support - Dell A960 | Owner's Manual - Page 91
Code: 02 Latin America Department Name or Service Area, Website and E-Mail Address Website: support.euro.dell.com E-mail: support.euro.dell.com/it/it/emaildell/ Home and Small Business Technical Support Customer Care Fax Switchboard Corporate Technical Support Customer Care Fax Switchboard Customer - Dell A960 | Owner's Manual - Page 92
Customer Technical Support Sales Customer Service Main Netherlands (Amsterdam) International Access Code: 00 Country Code: 31 City Code: 20 Website: support.euro.dell.com E-mail (Technical Support): (Enterprise): [email protected] (Latitude): [email protected] (Inspiron - Dell A960 | Owner's Manual - Page 93
Service Fax Reception Desk Fax Switchboard Portugal Website: support.euro.dell.com International Access Code: 00 E-mail: support.euro.dell.com/pt/en/emaildell/ Country Code: 351 Technical Support Customer or 800 300 411 or 800 300 412 or 21 422 07 10 21 424 01 12 1-800-805-7545 Contacting - Dell A960 | Owner's Manual - Page 94
Address Singapore (Singapore) Technical Support International Access Code: 005 Customer Service (Penang, Malaysia) Country Code: 65 Transaction Sales Corporate Sales Spain (Madrid) Website: support.euro.dell.com International Access Code: 00 E-mail: support.euro.dell.com/es/es/emaildell - Dell A960 | Owner's Manual - Page 95
Department Name or Service Area, Website and E-Mail Address Area Codes, Local Numbers, and Toll-Free Numbers Website: support.euro.dell.com E-mail: [email protected] E-mail for French-speaking HSB and Corporate Customers: support.euro.dell.com/ch/fr/emaildell/ Technical Support (Home and Small - Dell A960 | Owner's Manual - Page 96
www.dell.com/supplies | support.dell.com 96 Contacting Dell - Dell A960 | Owner's Manual - Page 97
7 SECTION 7 Appendix Limited Warranties and Return Policy Dell Inc. Ink and Toner Cartridges Limited Warranties Dell Software License Agreement Regulatory Notices - Dell A960 | Owner's Manual - Page 98
of software • Non-Dell-branded and Solution Provider Direct products and accessories • Problems that result from: - External causes such as accident, abuse, misuse, or problems with electrical power - Servicing not authorized by Dell - Usage that is not in accordance with product instructions - Dell A960 | Owner's Manual - Page 99
AVAILABLE FOR USE, OR FOR LOST DATA OR LOST SOFTWARE. OUR LIABILITY WILL BE NO MORE THAN THE AMOUNT Dell-branded batteries lasts only one year and the limited warranty on the lamps for Dell- Support and Customer Service Government and Education Customers: Technical Support and Customer Service Dell - Dell A960 | Owner's Manual - Page 100
dell.com/supplies | support.dell personal service contract is with Dell, service will be provided to you under the terms of the service agreement. Please refer to that contract for details on how to obtain service. If you purchased through us a service contract with one of our third-party service - Dell A960 | Owner's Manual - Page 101
satisfied? We pride ourselves on our great customer service. If you are not satisfied with the service you receive under this limited warranty, please let us slip or invoice. To return applications software or an operating system that has been installed by Dell, you must return the entire computer. - Dell A960 | Owner's Manual - Page 102
of the software • Non-Dell branded and Solution Provider Direct products and accessories • Problems that result from: - External causes such as accident, abuse, misuse, or problems with electrical power - Servicing not authorized by Dell - Usage that is not in accordance with product instructions - Dell A960 | Owner's Manual - Page 103
FOR PRODUCTS NOT BEING AVAILABLE FOR USE, OR FOR LOST DATA OR LOST SOFTWARE. OUR LIABILITY WILL BE NO MORE THAN THE AMOUNT YOU PAID FOR THE that the limited warranty on Dell-branded batteries lasts only one year and the limited warranty on the lamps for Dell-branded projectors lasts only ninety - Dell A960 | Owner's Manual - Page 104
Employee Purchase Program: Technical Support Customer Service Dell-Branded Memory Canada Only that the problem is not covered under this warranty, we will notify you and inform you of service alternatives that any of your confidential, proprietary or personal information; lost or corrupted data; or - Dell A960 | Owner's Manual - Page 105
to that contract for details on how to obtain service. Dell's service contracts can be found online at www.dell.ca or by calling Customer Care at 1-800-847-4096. If you purchased through us a service contract with one of our third-party service providers, please refer to that contract (mailed to you - Dell A960 | Owner's Manual - Page 106
, and all of the manuals, floppy disk(s), CD(s), power cables, and other items included with a product must be returned with it. For customers who want to return, for refund or credit only, either application or operating system software that has been installed by Dell, the whole system must - Dell A960 | Owner's Manual - Page 107
invoice; you are responsible for those. To return products, you must call Dell Customer Service at 1-800-387-5759 to receive a Credit Return Authorization Number. You must ship the Dell Software and Peripherals products back to Dell in their original manufacturer's packaging (which must be in as-new - Dell A960 | Owner's Manual - Page 108
www.dell.com/supplies | support.dell.com Limitation and Statutory Rights Dell makes no other warranty, end user with Dell and/or any other seller. Dell World Trade LP One Dell Way, Round Rock, TX 78682, USA Dell Computadores do Brasil Ltda (CNPJ No. 72.381.189/0001-10)/ Dell Commercial do Brasil - Dell A960 | Owner's Manual - Page 109
cartridge purchase cost, at Dell's sole option. This limited warranty does not apply to ink or toner cartridges that have been refilled or improperly stored or due to problems NOT BEING AVAILABLE FOR USE, OR FOR LOST DATA OR LOST SOFTWARE. DELL'S LIABILITY WILL BE NO MORE THAN THE AMOUNT YOU PAID FOR - Dell A960 | Owner's Manual - Page 110
www.dell.com/supplies | support.dell.com Ink and Toner Cartridges Limited Warranty (Latin America Only) Dell Inc. warrants to the original purchaser of genuine Dell-branded toner cartridges that the cartridges will be free from defects resulting from material or manufacturing process for the life - Dell A960 | Owner's Manual - Page 111
with the Dell product, for which there is no separate license agreement between you and the manufacturer or owner of the software (collectively the "Software"). By opening or breaking the seal on the Software packet(s), installing or downloading the Software, or using the Software that has - Dell A960 | Owner's Manual - Page 112
, abuse, misapplication, or service or modification by someone other than Dell. Any replacement disk is Software will be uninterrupted or error free. You assume responsibility for selecting the Software to achieve your intended results and for the use and results obtained from the Software. DELL - Dell A960 | Owner's Manual - Page 113
end users acquire the software and documentation with only those rights set forth herein. Contractor/manufacturer is Dell Products, L.P., One Dell Way, Round Rock, , cellular services, radar, air-traffic control, pager, and Personal Communication Services (PCS). These licensed services, along with - Dell A960 | Owner's Manual - Page 114
Dell Technical Support representative or an experienced radio/television technician for additional suggestions. FCC Notices (U.S. Only) Most Dell mounting brackets, and on the cards themselves. If any one of the labels carries a Class A rating, your the manufacturer's instruction manual, may cause - Dell A960 | Owner's Manual - Page 115
necessary modifications to maintain uninterrupted service. If you experience trouble with this telephone equipment, see "Getting Help" in your computer's troubleshooting documentation or, for some computers, the section titled "Contacting Dell" in your computer's online guide to find the appropriate - Dell A960 | Owner's Manual - Page 116
www.dell.com/supplies | support.dell.com NOM Information (Mexico Only) The following Model number: Supply voltage: Frequency: Current Consumption: Output voltage: Output current: Dell Inc. One Dell Way Round Rock, TX 78682 Dell Computer de México, S.A. de C.V. Paseo de la Reforma 2620 - - Dell A960 | Owner's Manual - Page 117
, 64 cartridges, print replacing, 63 Color (Start) button, 16 copies, 59 Copy (Select mode) button, 15 copy settings, 57 copying operator panel, 33 software, 33 custom size paper loading, 27, 31 D Dell All-In-One Center, 56 accessing, 56 Dell Picture Studio accessing, 62 using, 62 Dell Printer - Dell A960 | Owner's Manual - Page 118
ink cartridges aligning, 65 installing, 63 removing, 64 replacing, 63 Ink Low message, 78 installing ink cartridges, 63 installing software specialty, 31 messages, error Ink Low, 78 Paper Jam 10 Paper Jam message, 78 paper jam, clearing, 78 Paper Out message, 78 Paper Setup tab, 60 paper support, 10 - Dell A960 | Owner's Manual - Page 119
scan settings, 57 scanner lock, 11 scanner support, 11 scanner unit, 11 scanning, 34 software, 35 scanning multiple images, 37 Select button, 16 settings, saving for future use, 61 setup, 13 software, 56 Dell All-In-One Center, 56 Dell Printer Solution Center, 61 Fax Setup Utility, 44 reinstalling - Dell A960 | Owner's Manual - Page 120
120 Index - Dell A960 | Owner's Manual - Page 121
www.dell.com/supplies | support.dell.com
-
 1
1 -
 2
2 -
 3
3 -
 4
4 -
 5
5 -
 6
6 -
 7
7 -
8
-
9
-
10
-
11
-
12
-
13
-
14
-
15
-
16
-
17
-
18
-
19
-
20
-
21
-
22
-
23
-
24
-
25
-
26
-
27
-
28
-
29
-
30
-
31
-
32
-
33
-
34
-
35
-
36
-
37
-
38
-
39
-
40
-
41
-
42
-
43
-
44
-
45
-
46
-
47
-
48
-
49
-
50
-
51
-
52
-
53
-
54
-
55
-
56
-
57
-
58
-
59
-
60
-
61
-
62
-
63
-
64
-
65
-
66
-
67
-
68
-
69
-
70
-
71
-
72
-
73
-
74
-
75
-
76
-
77
-
78
-
79
-
80
-
81
-
82
-
83
-
84
-
85
-
86
-
87
-
88
-
89
-
90
-
91
-
92
-
93
-
94
-
95
-
96
-
97
-
98
-
99
-
100
-
101
-
102
-
103
-
104
-
105
-
106
-
107
-
108
-
109
-
110
-
111
-
112
-
113
-
114
-
115
-
116
-
117
-
118
-
119
-
120
-
121
 |
 |

www.dell.com/supplies | support.dell.com
Dell™ Personal All-In-One Printer A960
Owner’s Manual
Look Inside For:
• Ordering Supplies
• Getting Started
• Understanding the Software
• Ink Cartridge Maintenance
• Troubleshooting