Dell OptiPlex GX200 Service Manual - Page 41
Front Bezel, Eject, Power, and Reset Buttons - tower
 |
View all Dell OptiPlex GX200 manuals
Add to My Manuals
Save this manual to your list of manuals |
Page 41 highlights
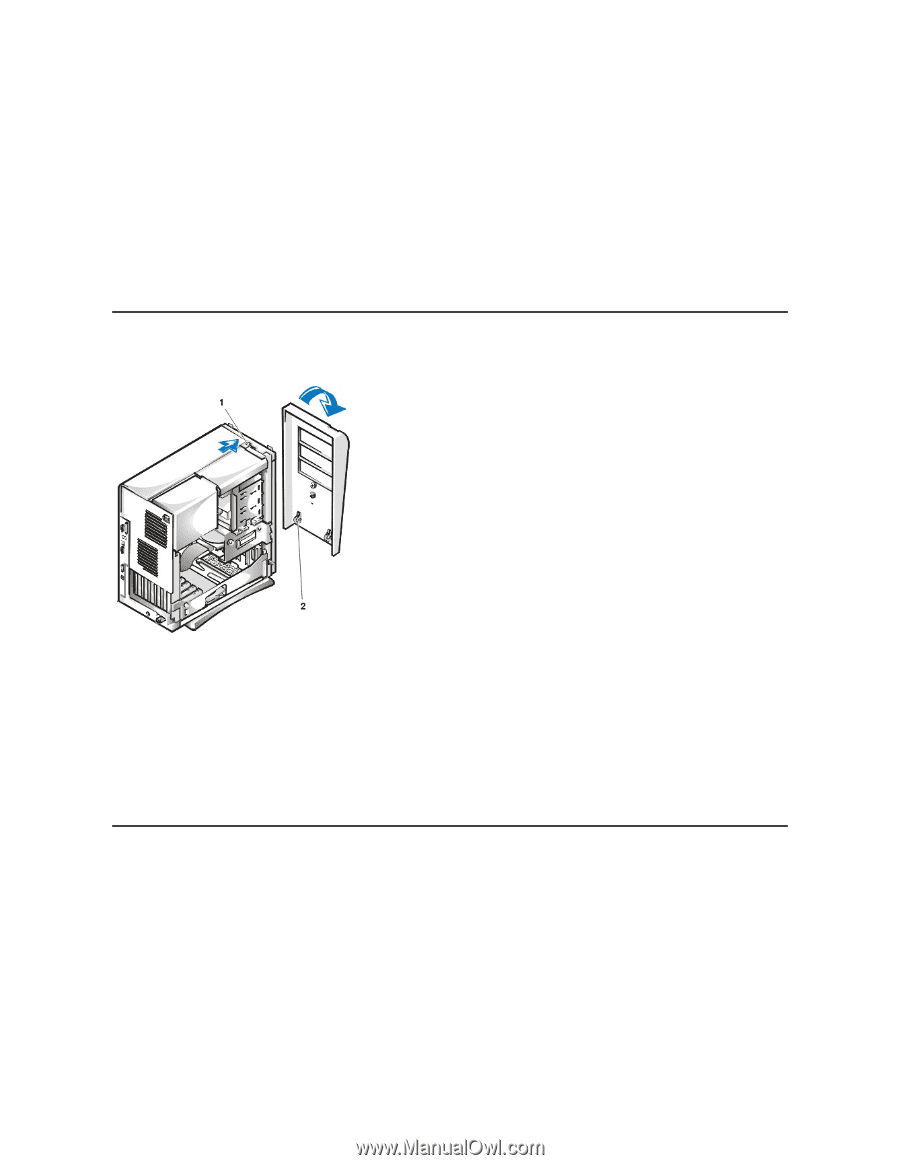
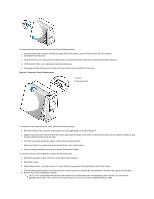
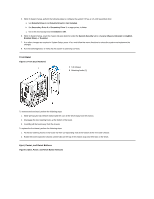
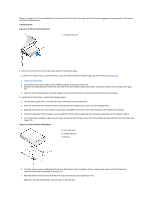
5. While in System Setup, perform the following steps to configure the system if it has an LS-120 SuperDisk drive: a. Set Diskette Drive A and Diskette Drive B to Not Installed. b. Set Secondary Drive 0 or Secondary Drive 1, as appropriate, to Auto. c. Go to the second page and set Diskette to Off. 6. While in System Setup, reset the chassis intrusion detector under the System Security tab by changing Chassis Intrusion to Enabled, Enabled-Silent, or Disabled. 7. If no other changes are required in System Setup, press and follow the menu directions to reboot the system and implement the changes. 8. Run the Dell Diagnostics to verify that the system is operating correctly. Front Bezel Figure 5. Front Bezel Removal 1 Tab release 2 Retaining hooks (2) To remove the front bezel, perform the following steps: 1. While pressing the tab release marked with the icon, tilt the bezel away from the chassis. 2. Disengage the two retaining hooks at the bottom of the bezel. 3. Carefully pull the bezel away from the chassis. To replace the front bezel, perform the following steps: 1. Fit the two retaining hooks on the bezel into their corresponding slots at the bottom of the mini tower chassis. 2. Rotate the bezel toward the chassis until the tabs on the top of the chassis snap into their slots on the bezel. Eject, Power, and Reset Buttons Figure 6. Eject, Power, and Reset Button Removal
-
 1
1 -
2
-
3
-
4
-
5
-
6
-
7
-
8
-
9
-
10
-
11
-
12
-
13
-
14
-
15
-
16
-
17
-
18
-
19
-
20
-
21
-
22
-
23
-
24
-
25
-
26
-
27
-
28
-
29
-
30
-
31
-
32
-
33
-
34
-
35
-
 36
36 -
 37
37 -
 38
38 -
 39
39 -
 40
40 -
 41
41 -
 42
42 -
 43
43 -
 44
44 -
 45
45 -
 46
46 -
47
-
48
-
49
-
50
-
51
-
52
-
53
-
54
-
55
-
56
-
57
-
58
-
59
-
60
-
61
-
62
-
63
-
64
-
65
-
66
-
67
-
68
-
69
-
70
-
71
-
72
-
73
-
74
-
75
-
76
-
77
-
78
-
79
 |
 |