Dell XPS 630i Owner's Manual - Page 126
c:\dell\utilities\DSR, DSRIRRemv2.exe, Local Disk C, Properties, Free Space, Finish - pc
 |
View all Dell XPS 630i manuals
Add to My Manuals
Save this manual to your list of manuals |
Page 126 highlights
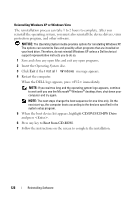
1 Log on to the computer as a local administrator. 2 In Microsoft Windows Explorer, go to c:\dell\utilities\DSR. 3 Double-click the filename DSRIRRemv2.exe. NOTE: If you do not log on as a local administrator, a message appears stating that you that you must log on as administrator. Click Quit, and then log on as a local administrator. NOTE: If the partition for PC Restore does not exist on your computer hard drive, a message appears stating that the partition was not found. Click Quit; there is no partition to delete. 4 Click OK to remove the PC Restore partition on the hard drive. 5 Click Yes when a confirmation message appears. The PC Restore partition is deleted and the newly available disk space is added to the free space allocation on the hard drive. 6 Right-click Local Disk (C) in Windows Explorer, click Properties, and verify that the additional disk space is available as indicated by the increased value for Free Space. 7 Click Finish to close the PC Restore Removal window and restart the computer. Windows Vista: Dell Factory Image Restore 1 Turn on the computer. When the Dell logo appears, press several times to access the Vista Advanced Boot Options Window. 2 Select Repair Your Computer. The System Recovery Options window appears. 3 Select a keyboard layout and click Next. 4 To access the recovery options, log on as a local user. To access the command prompt, type administrator in the User name field, then click OK. 5 Click Dell Factory Image Restore. NOTE: Depending upon your configuration, you may need to select Dell Factory Tools, then Dell Factory Image Restore. The Dell Factory Image Restore welcome screen appears. 126 Reinstalling Software
-
 1
1 -
2
-
3
-
4
-
5
-
6
-
7
-
8
-
9
-
10
-
11
-
12
-
13
-
14
-
15
-
16
-
17
-
18
-
19
-
20
-
21
-
22
-
23
-
24
-
25
-
26
-
27
-
28
-
29
-
30
-
31
-
32
-
33
-
34
-
35
-
36
-
37
-
38
-
39
-
40
-
41
-
42
-
43
-
44
-
45
-
46
-
47
-
48
-
49
-
50
-
51
-
52
-
53
-
54
-
55
-
56
-
57
-
58
-
59
-
60
-
61
-
62
-
63
-
64
-
65
-
66
-
67
-
68
-
69
-
70
-
71
-
72
-
73
-
74
-
75
-
76
-
77
-
78
-
79
-
80
-
81
-
82
-
83
-
84
-
85
-
86
-
87
-
88
-
89
-
90
-
91
-
92
-
93
-
94
-
95
-
96
-
97
-
98
-
99
-
100
-
101
-
102
-
103
-
104
-
105
-
106
-
107
-
108
-
109
-
110
-
111
-
112
-
113
-
114
-
115
-
116
-
117
-
118
-
119
-
120
-
 121
121 -
 122
122 -
 123
123 -
 124
124 -
 125
125 -
 126
126 -
 127
127 -
 128
128 -
 129
129 -
 130
130 -
 131
131 -
132
-
133
-
134
-
135
-
136
-
137
-
138
-
139
-
140
-
141
-
142
-
143
-
144
-
145
-
146
-
147
-
148
-
149
-
150
-
151
-
152
-
153
-
154
-
155
-
156
-
157
-
158
-
159
-
160
-
161
-
162
-
163
-
164
-
165
-
166
-
167
-
168
 |
 |