Denon AVR-3805 Owners Manual - Page 48
Protecting the setting
 |
UPC - 081757505987
View all Denon AVR-3805 manuals
Add to My Manuals
Save this manual to your list of manuals |
Page 48 highlights
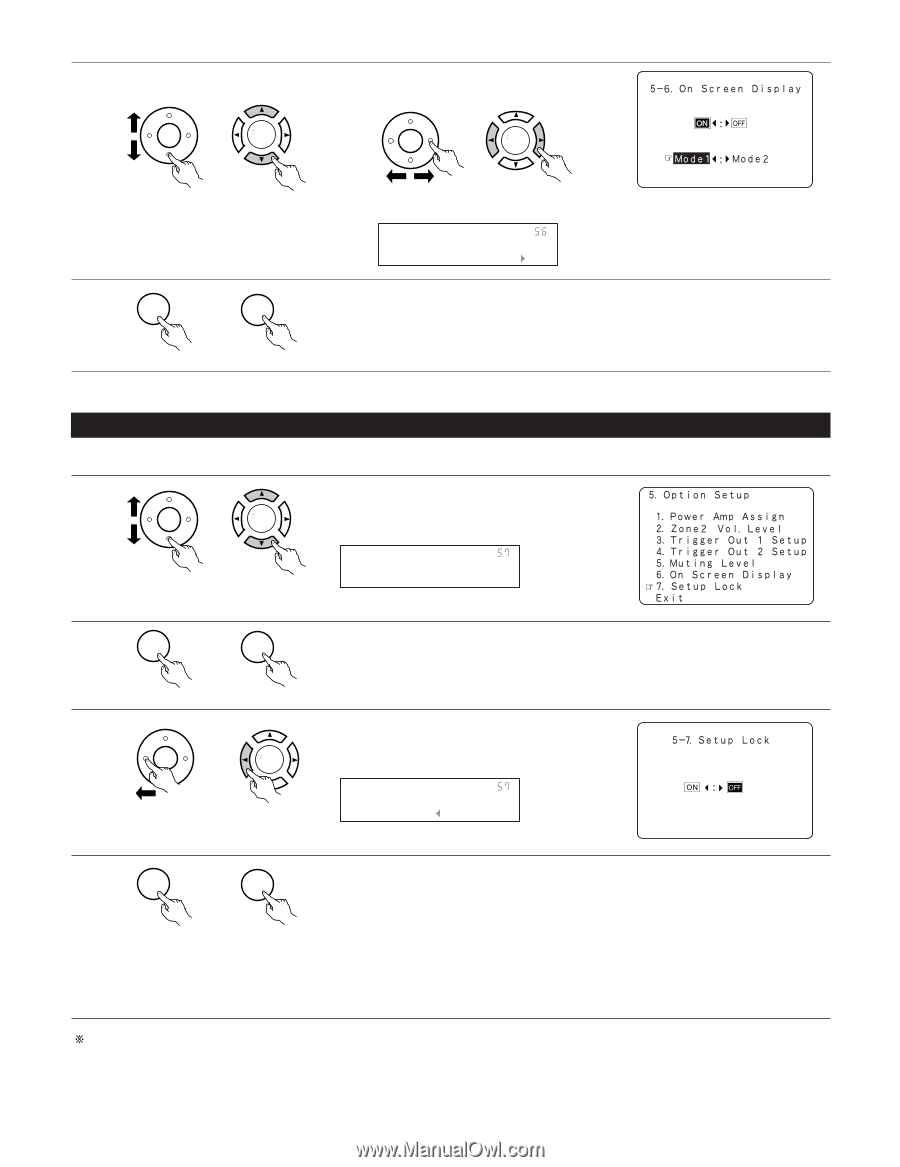
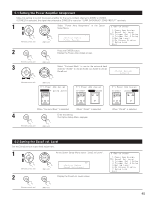
4 q Select the On Screen Display mode. CH SEL ENTER CH SEL ENTER w Select "Mode1" or "Mode2". CH SEL ENTER CH SEL ENTER (Remote control unit) (Main unit) 5 CH SEL ENTER CH SEL ENTER (Remote control unit) (Main unit) (Remote control unit) (Main unit) *On Screen Mode : Mode1 Enter the setting. The Option Setup Menu reappears. 5-7 Protecting the setting The system setup settings can be locked so that they cannot be changed easily. 1 Select "Setup Lock" at the Option Setup Menu. CH SEL ENTER CH SEL ENTER (Remote control unit) (Main unit) *Option Setup Setup Lock 2 CH SEL ENTER Display the Setup Lock screen. CH SEL ENTER (Remote control unit) 3 CH SEL ENTER (Main unit) CH SEL ENTER (Remote control unit) (Main unit) Select "ON", to lock the system setup settings. *Setup Lock ON/OFF: OFF 4 CH SEL ENTER CH SEL ENTER (Remote control unit) (Main unit) Press the "ENTER"button to finalize the setting and exit the Option setup mode. When the setup lock function is activated, the settings listed below cannot be changed, and "Setup Locked" is displayed when related buttons are operated. • System setup settings • Surround parameter settings • Tone control settings • Channel level settings (including test tones) To unlock, press the System Setup button again and display the Setup Lock screen, then select "OFF" and press "ENTER". System setup is complete. Once these settings are made, there is no need to change them unless different AV components are connected or the speakers are repositioned. 48
-
 1
1 -
2
-
3
-
4
-
5
-
6
-
7
-
8
-
9
-
10
-
11
-
12
-
13
-
14
-
15
-
16
-
17
-
18
-
19
-
20
-
21
-
22
-
23
-
24
-
25
-
26
-
27
-
28
-
29
-
30
-
31
-
32
-
33
-
34
-
35
-
36
-
37
-
38
-
39
-
40
-
41
-
42
-
 43
43 -
 44
44 -
 45
45 -
 46
46 -
 47
47 -
 48
48 -
 49
49 -
 50
50 -
 51
51 -
 52
52 -
 53
53 -
54
-
55
-
56
-
57
-
58
-
59
-
60
-
61
-
62
-
63
-
64
-
65
-
66
-
67
-
68
-
69
-
70
-
71
-
72
-
73
-
74
-
75
-
76
-
77
-
78
-
79
-
80
-
81
-
82
-
83
-
84
-
85
-
86
-
87
-
88
-
89
-
90
-
91
-
92
-
93
-
94
-
95
-
96
-
97
-
98
-
99
-
100
-
101
-
102
-
103
-
104
 |
 |