Epson BrightLink 1480Fi Installation Guide - Page 97
Appendix, Using the Easy Interactive Function, Using Auto Screen Adjustment
 |
View all Epson BrightLink 1480Fi manuals
Add to My Manuals
Save this manual to your list of manuals |
Page 97 highlights
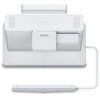
English 10 Appendix Using the Easy Interactive Function After you install your BrightLink projector (and the Touch Unit, if applicable), you need to perform calibration to align the positions of the cursor and your interactive pen(s) (and finger, if the Touch Unit is installed). See the projector's online User's Guide or Start Here folder for detailed instructions. In order to use the Easy Interactive Tools software, you must first install the software on your computer. Mac users also need to install a driver that enables pen or finger touch interactivity to work. Both software programs are available for download. For details, see the online User's Guide or visit the following site and search for your product: U.S.: www.epson.com/support/brightlinkdownloads Canada: www.epson.ca/support/brightlinkdownloads Latin America: www.latin.epson.com/support Using Auto Screen Adjustment If possible, avoid adjustments with the Auto Screen Adjustment, Quick Corner, or Keystone functions of the projector. Doing so may result in a reduction in image quality and pen or finger touch calibration. The Auto Screen Adjustment feature automatically corrects the position and shape of any image that is 110 inches or smaller diagonally. This feature is only available on the BrightLink 1480Fi/1480Fi+/1485Fi/1485Fi+/ EB-725Wi/EB-735Fi. Make sure you select the correct Screen Type setting before performing the Auto Screen Adjustment. Changing the Screen Type will reset any screen adjustments. See page 57 for more information. The Auto Screen Adjustment may not work properly if: ❏ The projection surface is not flat. ❏ There are patterns, obstructions, or dirt/debris on the projection surface. 1. Place one corner marker in each corner of the intended image location. The corner marker stickers can only be placed once. If you want to re-use the markers, attach them to the included magnets. 97
-
 1
1 -
2
-
3
-
4
-
5
-
6
-
7
-
8
-
9
-
10
-
11
-
12
-
13
-
14
-
15
-
16
-
17
-
18
-
19
-
20
-
21
-
22
-
23
-
24
-
25
-
26
-
27
-
28
-
29
-
30
-
31
-
32
-
33
-
34
-
35
-
36
-
37
-
38
-
39
-
40
-
41
-
42
-
43
-
44
-
45
-
46
-
47
-
48
-
49
-
50
-
51
-
52
-
53
-
54
-
55
-
56
-
57
-
58
-
59
-
60
-
61
-
62
-
63
-
64
-
65
-
66
-
67
-
68
-
69
-
70
-
71
-
72
-
73
-
74
-
75
-
76
-
77
-
78
-
79
-
80
-
81
-
82
-
83
-
84
-
85
-
86
-
87
-
88
-
89
-
90
-
91
-
 92
92 -
 93
93 -
 94
94 -
 95
95 -
 96
96 -
 97
97 -
 98
98 -
 99
99 -
 100
100 -
 101
101 -
 102
102 -
103
-
104
-
105
 |
 |
