Fujitsu Fi-5110EOX2 Getting Started - Page 12
Connecting the USB cable - scansnap scanner
 |
View all Fujitsu Fi-5110EOX2 manuals
Add to My Manuals
Save this manual to your list of manuals |
Page 12 highlights
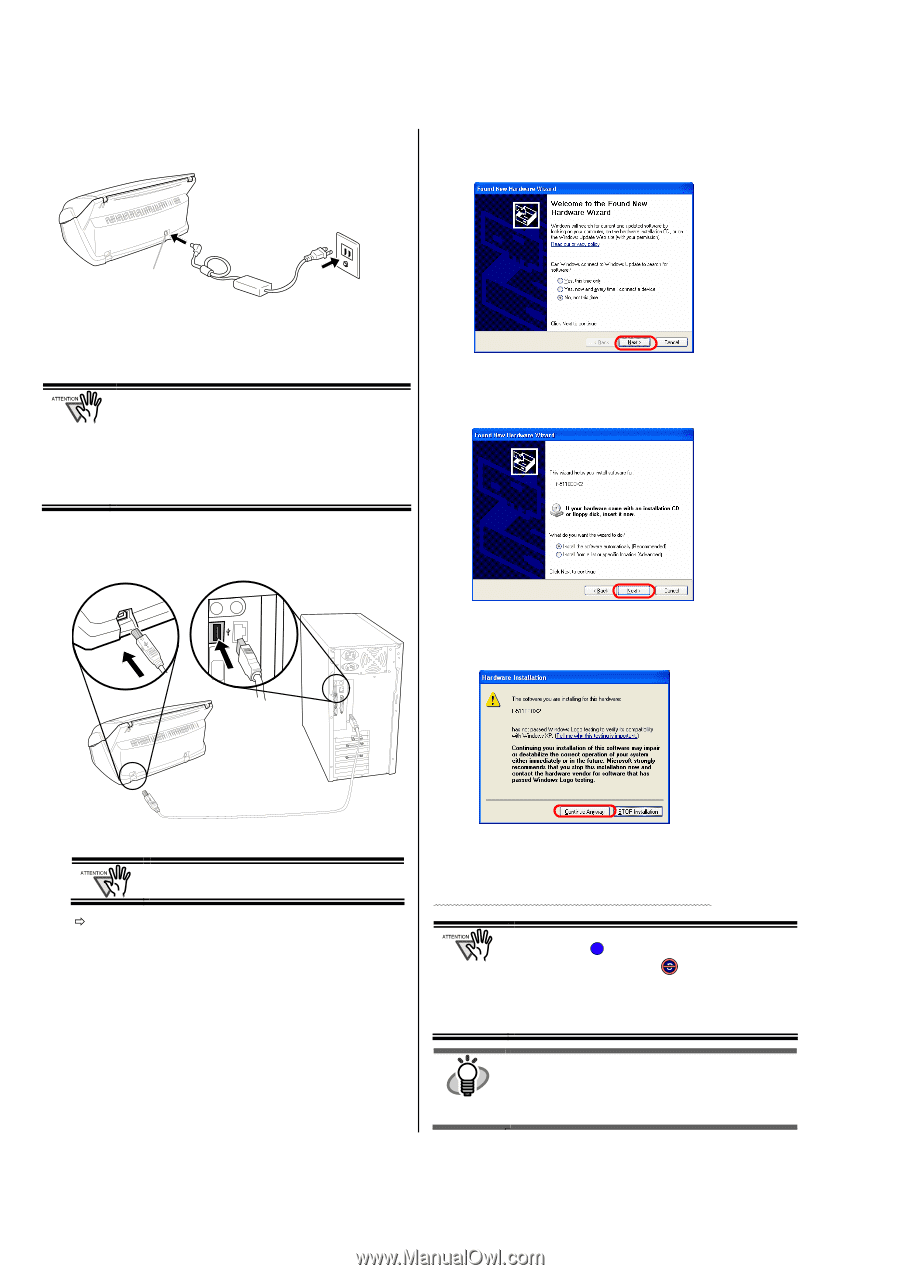
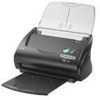
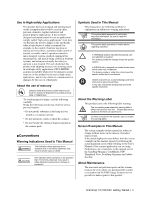
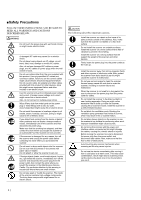
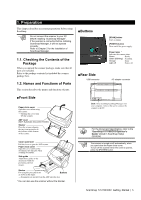
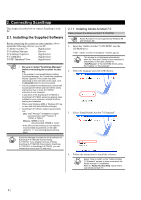
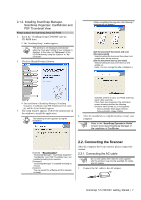
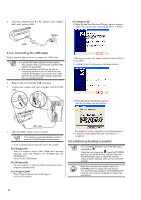
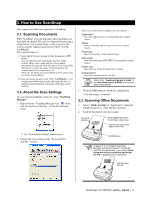
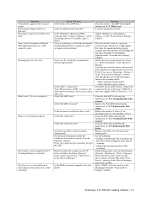
2. Insert the connectors of the AC adapter to the scanner inlet and a power outlet. Outlet Inlet 2.2.2. Connecting the USB cable Follow the procedure below to connect the USB cable. ● Use the USB cable supplied with this scanner. The operation with a commercially available USB cable is not guaranteed. ● When connecting to a USB hub, be sure to connect the scanner to the hub nearest to your computer (first stage). If you connect it to a USB hub from the second stage onwards, ScanSnap may not operate correctly. 1. Remove the seal from the USB connector. 2. Connect the scanner and your computer with the USB cable. For Windows XP 1) When [Found New Hardware Wizard] window appears, select "No, not this time" and click the [Next >] button. (The above window only appears when the Service Pack 2 is installed.) 2) Click the [Next >] button in the following window. 3) When [Hardware Installation] appears, click the [Continue Anyway] button. USB cable 3. Open the Paper chute cover of scanner. If the scanner is not automatically turned on, press the [POWER] button on the scanner. Ö Your computer will automatically detect the scanner. For Windows 98 There is a request to insert a disk. When such a message appeared, insert the Windows 98 CD-ROM into the CD-ROM drive. Then click the [OK] button. For Windows Me The new hardware is detected and the installation will be completed automatically. For Windows 2000 When [Digital Signature not Found] appears, click the [Yes] button. The window to notify completion of installation appears. 4) Click the [Finish] button when the installation is completed. The installation of ScanSnap is complete! The "ScanSnap Manager" icon in the task tray is displayed as S . When the icon remains as , press the [POWER] button to turn off the scanner and then press the [POWER] button again to restart the scanner. (Allow at least 5 seconds when you turn on/off the scanner. When you turn off/on the scanner, press the HINT [POWER] button for longer than one second. *For preventing mis-operation, the [POWER] button does not work unless it is pressed for longer than one second. 8 |
-
 1
1 -
2
-
3
-
4
-
5
-
6
-
 7
7 -
 8
8 -
 9
9 -
 10
10 -
 11
11 -
 12
12 -
 13
13 -
 14
14 -
 15
15 -
 16
16 -
 17
17 -
18
-
19
-
20
-
21
-
22
-
23
-
24
-
25
-
26
-
27
-
28
-
29
-
30
-
31
-
32
-
33
-
34
-
35
-
36
-
37
-
38
-
39
-
40
-
41
-
42
-
43
-
44
-
45
-
46
-
47
-
48
-
49
-
50
-
51
-
52
-
53
-
54
-
55
-
56
-
57
-
58
-
59
-
60
-
61
-
62
-
63
-
64
-
65
-
66
-
67
-
68
-
69
-
70
-
71
-
72
-
73
-
74
-
75
-
76
-
77
-
78
-
79
-
80
-
81
-
82
-
83
-
84
-
85
-
86
-
87
-
88
-
89
-
90
-
91
-
92
-
93
-
94
-
95
-
96
-
97
-
98
-
99
-
100
-
101
-
102
-
103
-
104
-
105
-
106
-
107
-
108
-
109
-
110
-
111
-
112
-
113
-
114
-
115
-
116
-
117
-
118
-
119
-
120
-
121
-
122
-
123
-
124
-
125
-
126
-
127
-
128
-
129
-
130
 |
 |