Gigabyte GA-Z77X-UD5H Manual - Page 107
Manually Rebuilding RAID 1 in the Operating System, Virtual Disk 0, Property, Background Activity
 |
View all Gigabyte GA-Z77X-UD5H manuals
Add to My Manuals
Save this manual to your list of manuals |
Page 107 highlights
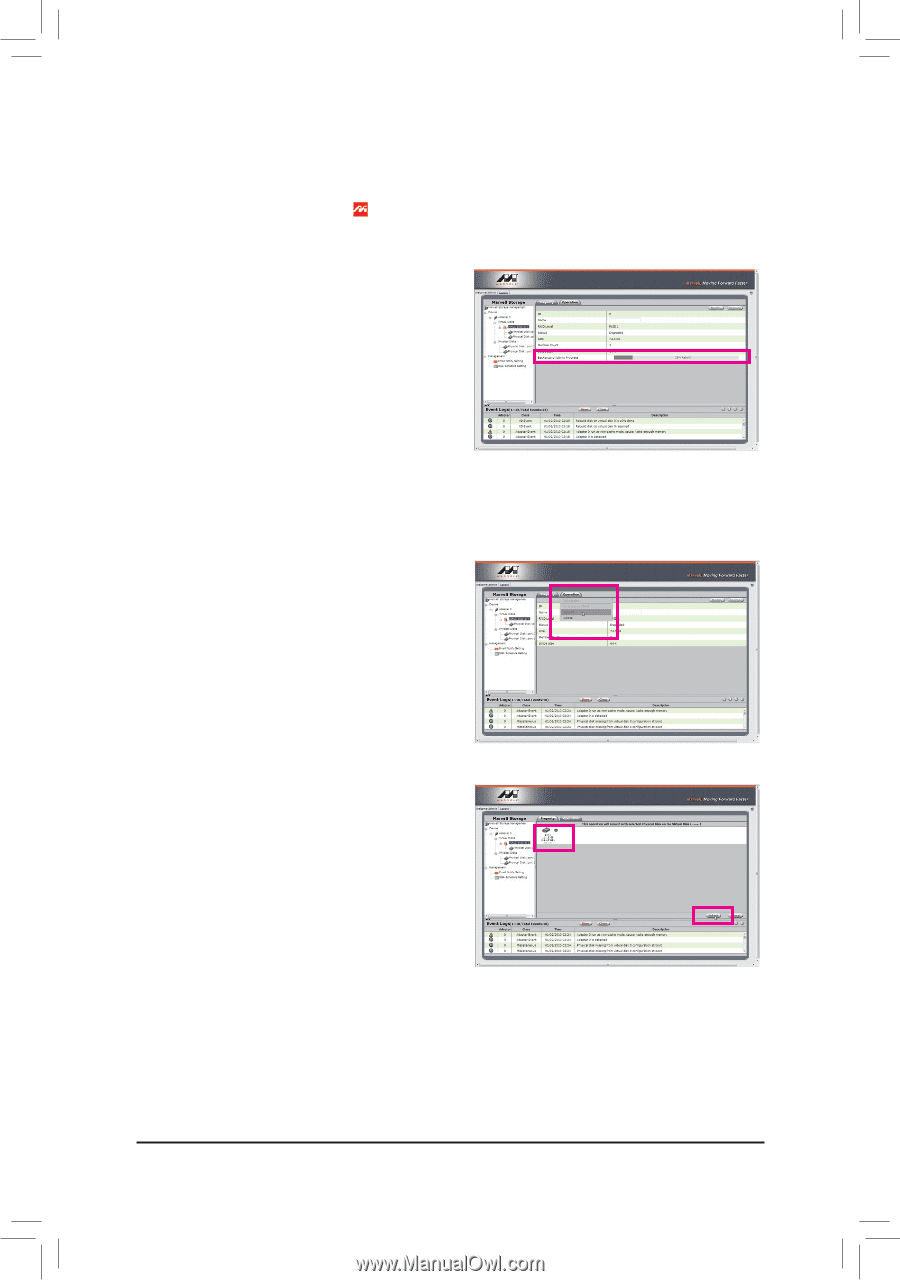
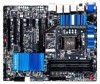
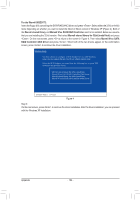
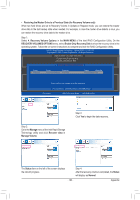
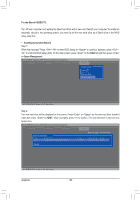
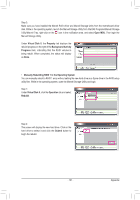
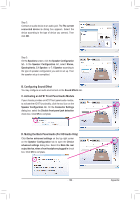
Step 3: Make sure you have installed the Marvell RAID driver and Marvell Storage Utility from the motherboard driver disk. While in the operating system, launch the Marvell Storage Utility from Start\All Programs\Marvell Storage Utility\Marvell Tray, right-click on the icon in the notification area, and select Open MSU. Then login the Marvell Storage Utility. Under Virtual Disk 0, the Property tab displays the rebuild progress on the right of the Background Activity Progress item, indicating that the RAID volume is being rebuilt. When completed, the status will display as Done. •• Manually Rebuilding RAID 1 in the Operating System You can manually rebuild a RAID 1 array without setting the new hard drive as a Spare drive in the RAID setup utility first. While in the operating system, open the Marvell Storage Utility and login. Step 1: Under Virtual Disk 0, click the Operation tab and select Rebuild. Step 2: The screen will display the new hard drive. Click on the hard drive to select it and click the Submit button to begin the rebuild. - 107 - Appendix
-
 1
1 -
2
-
3
-
4
-
5
-
6
-
7
-
8
-
9
-
10
-
11
-
12
-
13
-
14
-
15
-
16
-
17
-
18
-
19
-
20
-
21
-
22
-
23
-
24
-
25
-
26
-
27
-
28
-
29
-
30
-
31
-
32
-
33
-
34
-
35
-
36
-
37
-
38
-
39
-
40
-
41
-
42
-
43
-
44
-
45
-
46
-
47
-
48
-
49
-
50
-
51
-
52
-
53
-
54
-
55
-
56
-
57
-
58
-
59
-
60
-
61
-
62
-
63
-
64
-
65
-
66
-
67
-
68
-
69
-
70
-
71
-
72
-
73
-
74
-
75
-
76
-
77
-
78
-
79
-
80
-
81
-
82
-
83
-
84
-
85
-
86
-
87
-
88
-
89
-
90
-
91
-
92
-
93
-
94
-
95
-
96
-
97
-
98
-
99
-
100
-
101
-
 102
102 -
 103
103 -
 104
104 -
 105
105 -
 106
106 -
 107
107 -
 108
108 -
 109
109 -
 110
110 -
 111
111 -
 112
112 -
113
-
114
-
115
-
116
-
117
-
118
-
119
-
120
-
121
-
122
-
123
-
124
-
125
-
126
-
127
-
128
 |
 |