HP 166207-B21 Smart Array 5300 Controller User Guide - Page 27
Connecting the Cables, Installing a Smart Array 5300 Controller
 |
UPC - 720591292225
View all HP 166207-B21 manuals
Add to My Manuals
Save this manual to your list of manuals |
Page 27 highlights
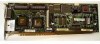
Installing the Hardware Figure 3-1: Installing a Smart Array 5300 Controller NOTE: Your server may look slightly different from the one illustrated. 5. Press the controller board firmly into the slot so that the contacts on the board edge are properly seated in the system board connector. 6. Secure the board in place with the hot-plug latch or retaining screw. 7. Continue by following the instructions given in "Connecting the Cables." Connecting the Cables Each port on the controller supports up to 14 drives. Ports 1 and 2 each have two SCSI connectors, one for external storage units and one for internal hard drives in the server. The two connectors for a given port cannot be used simultaneously. Ports 3 and 4 (present on the 5304 model, and also on the 5302 model with an attached 2- to 4-channel adapter) are only for external storage units. Peripherals attached to any of the connectors must have a unique SCSI ID value in the range of 0 to 15 (except ID 7, which is reserved for controller use). The SCSI ID value determines the priority given to the device when it attempts to use the SCSI bus. Compaq Smart Array 5300 Controller User Guide 3-3
-
 1
1 -
2
-
3
-
4
-
5
-
6
-
7
-
8
-
9
-
10
-
11
-
12
-
13
-
14
-
15
-
16
-
17
-
18
-
19
-
20
-
21
-
 22
22 -
 23
23 -
 24
24 -
 25
25 -
 26
26 -
 27
27 -
 28
28 -
 29
29 -
 30
30 -
 31
31 -
 32
32 -
33
-
34
-
35
-
36
-
37
-
38
-
39
-
40
-
41
-
42
-
43
-
44
-
45
-
46
-
47
-
48
-
49
-
50
-
51
-
52
-
53
-
54
-
55
-
56
-
57
-
58
-
59
-
60
-
61
-
62
-
63
-
64
-
65
-
66
-
67
-
68
-
69
-
70
-
71
-
72
-
73
-
74
-
75
-
76
-
77
-
78
-
79
-
80
-
81
-
82
-
83
-
84
-
85
-
86
-
87
-
88
-
89
-
90
-
91
-
92
-
93
-
94
-
95
-
96
-
97
-
98
-
99
-
100
-
101
-
102
-
103
-
104
-
105
-
106
-
107
-
108
-
109
-
110
-
111
-
112
-
113
-
114
-
115
-
116
-
117
-
118
-
119
-
120
-
121
-
122
-
123
-
124
-
125
-
126
-
127
-
128
-
129
-
130
-
131
-
132
-
133
-
134
-
135
-
136
-
137
-
138
-
139
-
140
-
141
-
142
-
143
-
144
-
145
-
146
-
147
-
148
-
149
-
150
-
151
-
152
-
153
-
154
-
155
-
156
-
157
-
158
-
159
-
160
-
161
-
162
-
163
 |
 |
