HP Color LaserJet 4730 HP LaserJet - Network Install Guide (multiple language) - Page 6
Client-server printing via direct-connected shared printer, Manually configuring an IP address
 |
View all HP Color LaserJet 4730 manuals
Add to My Manuals
Save this manual to your list of manuals |
Page 6 highlights
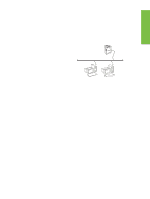
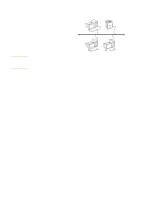
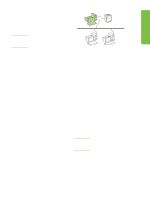
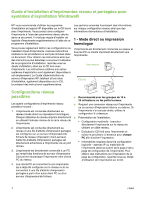
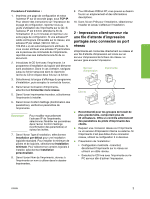
8. On the Printer Sharing screen, click the Printer Sharing button and follow the prompts. 9. If you are sharing the printer with other PCs that are running operating systems different than the PC you are using, add these drivers on the Client Driver Support screen after the printer is installed. • To add drivers for sharing with different operating systems, highlight the printer and select File, Properties. On the Sharing tab, select Additional Drivers and point to the desired drivers. 10. For Windows 2000 and XP, you can provide location and descriptive information if desired. 11. On the Ready to Install screen, select Install and allow the installation to complete. 4 - Client-server printing via Installation steps: 1. Insert the CD that came with the printer. The software installer should start without assistance. If it does not, browse to setup.exe in the root directory of the CD, and double-click on it. 2. Select the language you would like the installer to display, and accept the License Agreement. 3. On the Printer Connection screen, select Connected via the network. 4. On the Printers Found screen, select the printer to be installed. 5. On the Installation Type screen, select Typical Installation to install the typical software. To install the minimum set of drivers and software, select Minimum Installation. If you want to select the software to be installed, select Custom Installation. direct-connected shared printer 6. On the Ready to Install screen, select Install and allow the installation to complete. Client installation Manually configuring an IP address Note Server Clients Server installation must be completed (see configuration 3) before client installation can be performed. Printer The printer can automatically find an IP address from your network BootP/DHCP server, or it can be configured from software. But if you wish to assign a particular IP address to your printer, you can configure an IP address manually from the printer control panel. 1. Press the Menu button on the printer control panel and locate the JETDIRECT menu. Typically, you will select the CONFIGURE DEVICE menu, then the I/O menu, and then the JETDIRECT menu. 2. In the JETDIRECT menu, select the TCP/IP menu, the CONFIG METHOD menu, and then select MANUAL. A MANUAL SETTINGS item is added to the TCP/IP menu. ● Recommended when the printer has already been connected to the network and a print queue is shared from a network file/print server, or connected directly to a network PC and shared to other network PC clients. 3. Use the MANUAL SETTINGS menu and your control panel keys to set the values for IP ADDRESS, SUBNET MASK, DEFAULT GATEWAY, SYSLOG SERVER, and IDLE TIMEOUT. ● Run the CD that came with the printer on the client PC to enable printing. ● Information required during software setup: • UNC (Universal Naming Convention) name for the shared printer • Example: \\server_name\sharename\path\filename 4 ENWW
-
 1
1 -
 2
2 -
 3
3 -
 4
4 -
 5
5 -
 6
6 -
 7
7 -
 8
8 -
 9
9 -
 10
10 -
 11
11 -
 12
12 -
13
-
14
-
15
-
16
-
17
-
18
-
19
-
20
-
21
-
22
-
23
-
24
-
25
-
26
-
27
-
28
-
29
-
30
-
31
-
32
-
33
-
34
-
35
-
36
-
37
-
38
-
39
-
40
-
41
-
42
-
43
-
44
-
45
-
46
-
47
-
48
 |
 |
