HP Deskjet 1000c HP DeskJet 1000C Professional Series Printer - (English) User - Page 6
Setting Up The Printer
 |
View all HP Deskjet 1000c manuals
Add to My Manuals
Save this manual to your list of manuals |
Page 6 highlights
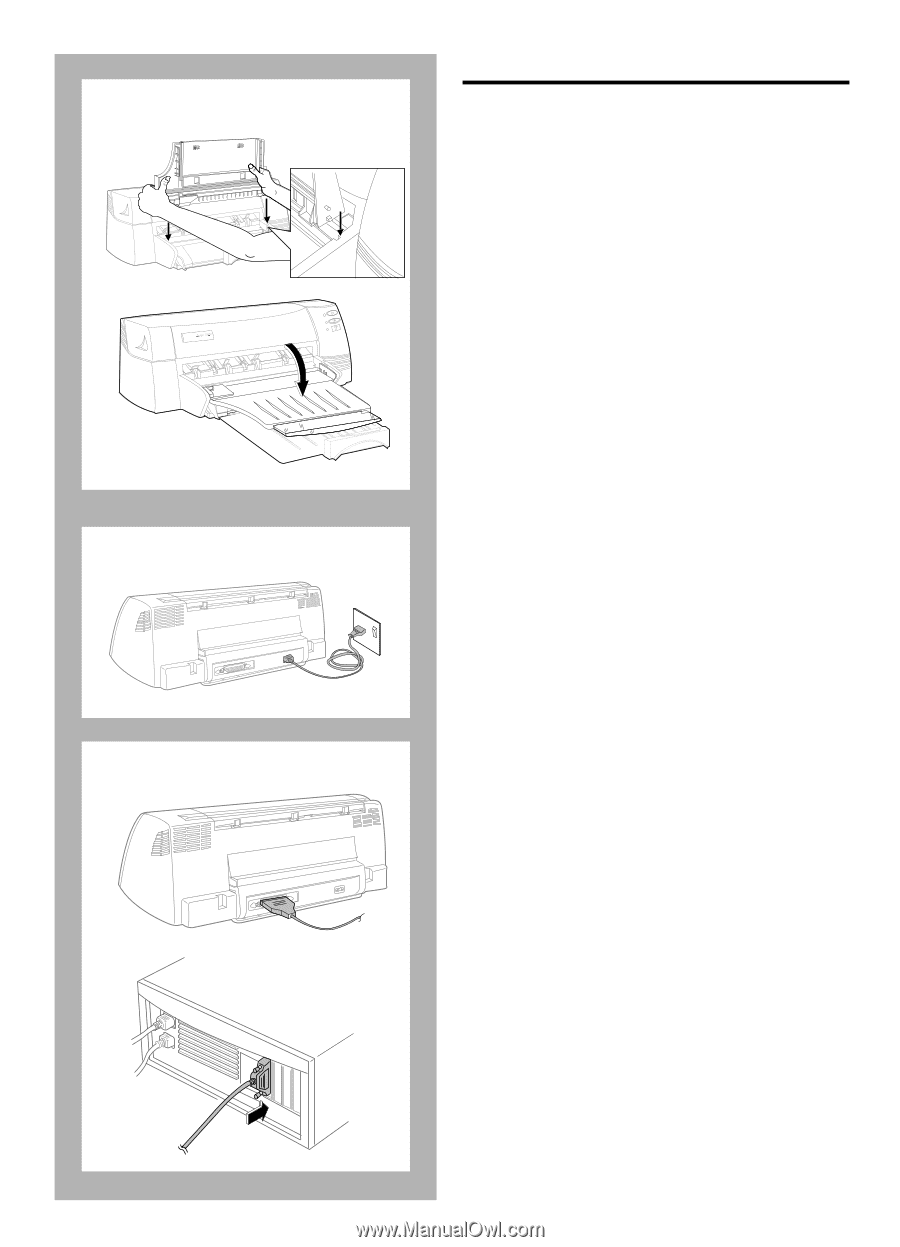
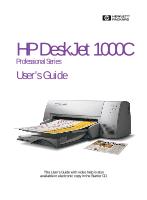
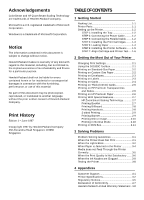
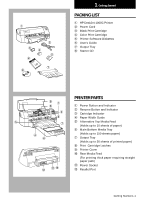
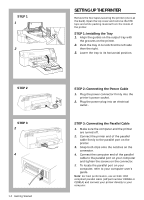
STEP 1 1 2 H PROFESSIONAL SERIES STEP 2 STEP 3 2 4 1-2 Getting Started SETTING UP THE PRINTER Remove the four tapes securing the printer (one is at the back). Open the top cover and remove the fifth tape and white packing material from the inside of the printer. STEP 1: Installing the Tray 1. Align the guides on the output tray with the grooves on the printer. 2. Push the tray in to lock first the left side then the right. 3. Lower the tray to its horizontal position. STEP 2: Connecting the Power Cable 1. Plug the power connector firmly into the printer's power socket. 2. Plug the power plug into an electrical outlet . STEP 3: Connecting the Parallel Cable 1. Make sure the computer and the printer are turned off. 2. Connect the printer end of the parallel cable firmly to the parallel port on the printer. 3. Snap both clips onto the notches on the connector. 4. Connect the computer end of the parallel cable to the parallel port on your computer and tighten the screws on the connector. 5. To locate the parallel port on your computer, refer to your computer user's guide. Note: For best performance, use an IEEE 1284 compliant parallel cable (HP part number C2950A or C2951A) and connect your printer directly to your computer.
-
 1
1 -
 2
2 -
 3
3 -
 4
4 -
 5
5 -
 6
6 -
 7
7 -
 8
8 -
 9
9 -
 10
10 -
 11
11 -
 12
12 -
13
-
14
-
15
-
16
-
17
-
18
-
19
-
20
-
21
-
22
-
23
-
24
-
25
-
26
-
27
-
28
-
29
-
30
-
31
-
32
-
33
-
34
-
35
-
36
-
37
-
38
-
39
-
40
 |
 |