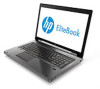
HP EliteBook 8770w Getting Started HP Notebook
HP EliteBook 8770w Manual
 |
View all HP EliteBook 8770w manuals
Add to My Manuals
Save this manual to your list of manuals |
HP EliteBook 8770w manual content summary:
- HP EliteBook 8770w | Getting Started HP Notebook - Page 1
Getting Started HP Notebook - HP EliteBook 8770w | Getting Started HP Notebook - Page 2
, go to http://www.hp.com/go/contactHP. For worldwide support, go to http://welcome.hp.com/country/us/en/ wwcontact_us.html. Software terms By installing, copying, downloading, or otherwise using any software product preinstalled on this computer, you agree to be bound by the terms of the HP End - HP EliteBook 8770w | Getting Started HP Notebook - Page 3
the computer, do not place the computer directly on your lap or obstruct the computer air vents. Use the computer only on a hard, flat surface. Do not allow another hard surface, such as an adjoining optional printer, or a soft surface, such as pillows or rugs or clothing, to block airflow. Also, do - HP EliteBook 8770w | Getting Started HP Notebook - Page 4
iv Safety warning notice - HP EliteBook 8770w | Getting Started HP Notebook - Page 5
2 Getting to know your computer ...4 Top ...4 TouchPad ...4 Lights ...6 Buttons and fingerprint reader (select models only 7 Keys ...9 Front ...10 Right ...12 Left ...13 Rear ...14 Display ...15 Bottom ...16 3 Networking ...18 Using an Internet service provider (ISP 19 Connecting to a wireless - HP EliteBook 8770w | Getting Started HP Notebook - Page 6
39 Replacing a hard drive ...39 Replacing an optical drive 41 Adding or replacing memory modules 43 Adding or replacing the memory module underneath the service door 43 Adding or replacing the memory module underneath the keyboard 45 Using the DreamColor display (select models only 50 Updating - HP EliteBook 8770w | Getting Started HP Notebook - Page 7
Backing up your information ...54 Performing a system recovery ...55 Using the Windows recovery tools 55 Using f11 recovery tools ...56 Using a Windows 7 operating system DVD (purchased separately 57 7 Support ...58 Contacting support ...58 Labels ...59 8 Specifications ...60 Input power ...60 - HP EliteBook 8770w | Getting Started HP Notebook - Page 8
viii - HP EliteBook 8770w | Getting Started HP Notebook - Page 9
. See the HP Notebook Reference Guide. For instructions on accessing this guide, see Finding information on page 2. ● Get to know your computer-Learn about your computer features. See Getting to know your computer on page 4 and Keyboard and pointing devices on page 22 for additional information - HP EliteBook 8770w | Getting Started HP Notebook - Page 10
● How to update the software ● How to install certain components ● How to create a wired and/or wireless network Help and Support ● Operating system information To access Help and Support, select Start > Help and ● Software, driver, and BIOS updates Support. ● Troubleshooting tools NOTE: For - HP EliteBook 8770w | Getting Started HP Notebook - Page 11
Select Start > Help and Support > User Guides > View Warranty Information. - or - Go to http://www.hp.com/go/orderdocuments. *You can find the expressly provided HP Limited Warranty applicable to your product located with the user guides on your computer and/or on the CD/DVD provided in the box - HP EliteBook 8770w | Getting Started HP Notebook - Page 12
your computer Top TouchPad Component (1) (2) (3) Left pointing stick button Center pointing stick button Pointing stick (4) Right pointing stick button (5) Right TouchPad button (6) Center TouchPad button (7) Left TouchPad button Description Functions like the left button on an external - HP EliteBook 8770w | Getting Started HP Notebook - Page 13
Component (8) TouchPad zone (9) TouchPad on/off button Description Moves the pointer and selects or activates items on the screen. Turns the TouchPad on and off. Top 5 - HP EliteBook 8770w | Getting Started HP Notebook - Page 14
light (8) Calculator light Description ● Amber: The TouchPad is off. ● Off: The TouchPad is on. On: Caps lock is on. ● On: The computer is on. ● Blinking: The computer is in the Sleep state. ● Off: The computer is off or in Hibernation. On: Num lock is on. ● White: An integrated wireless device - HP EliteBook 8770w | Getting Started HP Notebook - Page 15
Buttons and fingerprint reader (select models only) Component (1) (2) TouchPad on/off button Power button (3) Wireless button (4) Volume mute button (5) Web browser button Description Turns the TouchPad on and off. ● When the computer is off, press the button to turn on the computer. ● When - HP EliteBook 8770w | Getting Started HP Notebook - Page 16
Component (6) Calculator button Description Activates the calculator function. (7) Fingerprint reader (select models only) Allows a fingerprint logon to Windows, instead of a password logon. 8 Chapter 2 Getting to know your computer - HP EliteBook 8770w | Getting Started HP Notebook - Page 17
on page 22. Executes frequently used system functions when pressed in combination with a function key, the num lk key, the esc key, or other keys. For more information, see Keyboard and pointing devices on page 22. Displays the Windows Start menu. Displays a shortcut menu for items beneath the - HP EliteBook 8770w | Getting Started HP Notebook - Page 18
Front Component (1) Media Card Reader (2) Display release latch (3) Wireless light (4) Power light (5) AC adapter/Battery light Description Supports the following digital card formats: ● Secure Digital (SD) Card ● Secure Digital HC (SDHC) Card ● Secure Digital XC (SDXC) Card ● - HP EliteBook 8770w | Getting Started HP Notebook - Page 19
Component (6) Hard drive light (7) Speakers (2) Description ● Blinking white: The hard drive is being accessed. ● Amber: HP 3D DriveGuard has temporarily parked the hard drive. NOTE: For information on HP 3D DriveGuard, see the HP Notebook Reference Guide. Produce SRS Premium Sound (select - HP EliteBook 8770w | Getting Started HP Notebook - Page 20
about USB devices, see the HP Notebook Reference Guide. Connects an external VGA monitor or projector. (6) Smart card reader (select models only) Supports optional smart cards. (7) Upgrade bay (optical drive shown) The upgrade bay can hold a weight-saver option, a hard drive, or an - HP EliteBook 8770w | Getting Started HP Notebook - Page 21
(6) DisplayPort (7) eSATA/USB 2.0 combo port (8) HP ExpressCard slot Description Attaches display device, such as a high-performance monitor or projector. Connects an optional high-performance eSATA component, such as an eSATA external hard drive, or connects an optional USB device. Supports - HP EliteBook 8770w | Getting Started HP Notebook - Page 22
Rear Component (1) (2) RJ-11 (modem) jack Vents (2) (3) Power connector Description Connects a modem cable. Enable airflow to cool internal components. NOTE: The computer fan starts up automatically to cool internal components and prevent overheating. It is normal for the internal fan to cycle - HP EliteBook 8770w | Getting Started HP Notebook - Page 23
to communicate with wireless wide area networks (WWAN). (4) Internal microphones (2) Record sound. (5) Webcam light On: The webcam is in use. (6) Webcam Records video and captures still photographs. To to your country or region. These notices are located in Help and Support. Display 15 - HP EliteBook 8770w | Getting Started HP Notebook - Page 24
Vents (3) Bluetooth compartment Description Holds the battery. Supports a wireless subscriber identity module (SIM). The SIM slot is located inside the battery bay. Releases the battery. Connects an optional accessory battery. Connects an optional docking device. Releases the service door from - HP EliteBook 8770w | Getting Started HP Notebook - Page 25
the hard drive bay, the wireless LAN (WLAN) module slot, the WWAN module slot, and the memory module slots. NOTE: To prevent an unresponsive system, replace the wireless module only with a wireless module authorized for use in the computer by the governmental agency that regulates wireless devices - HP EliteBook 8770w | Getting Started HP Notebook - Page 26
on computer model and your location. Your computer may support one or both of the following types of Internet access: ● Wireless-For mobile Internet access, you can use a wireless connection. information on connecting to a wired network, see the HP Notebook Reference Guide. 18 Chapter 3 Networking - HP EliteBook 8770w | Getting Started HP Notebook - Page 27
icons may be displayed either individually on the Windows desktop or grouped in a desktop folder named Online Services. To set up a new Internet account or configure the computer to use an existing account, double-click an icon, and then follow the on-screen instructions. ● Windows Connect to the - HP EliteBook 8770w | Getting Started HP Notebook - Page 28
connect to, click Open Network and Sharing Center, and then click Set up a new connection or network. A list of options is displayed. You can choose to manually search for and connect to a network or to create a new network connection. 5. Click Connect. 6. If the network is a security-enabled WLAN - HP EliteBook 8770w | Getting Started HP Notebook - Page 29
system also provides tools to help you set up a new wireless network. To use the Windows tools to set up your network: ● Select Start > Control Panel > Network and Internet > Network and Sharing Center > Set up a new connection or network > Set up a network. Then follow the on-screen instructions - HP EliteBook 8770w | Getting Started HP Notebook - Page 30
system memory is saved to the hard drive. The function of the fn+f3 hot key can be changed. For example, you can set the fn+f3 hot key to initiate Hibernation instead of Sleep. In all Windows operating system windows, references to the sleep button apply to the fn+f3 hot key. 22 Chapter 4 Keyboard - HP EliteBook 8770w | Getting Started HP Notebook - Page 31
f4 hot key can also alternate images among other devices that are receiving video information from the computer. Decreases speaker volume. fn+f7 Increases speaker volume. fn+f8 fn+f9 Launches HP Power Assistant. Displays charge information for all installed batteries. The display indicates which - HP EliteBook 8770w | Getting Started HP Notebook - Page 32
computer is turned on. When num lock on an external keypad is turned off, the num lock light on the computer is turned off. To turn num lock on or off on an external keypad as you work: ▲ Press the num lk key on the external keypad, not on the computer. 24 Chapter 4 Keyboard and pointing devices - HP EliteBook 8770w | Getting Started HP Notebook - Page 33
Setting pointing device preferences Use Mouse Properties in Windows to customize settings for pointing devices, such as button configuration, click buttons as you would the left and right buttons on an external mouse. Using the TouchPad To move the pointer, slide one finger across the TouchPad - HP EliteBook 8770w | Getting Started HP Notebook - Page 34
go. Selecting Use the left and right TouchPad buttons like the corresponding buttons on an external mouse. Using TouchPad gestures The TouchPad supports a variety of gestures. To use TouchPad gestures, place two fingers on the TouchPad at the same time. 26 Chapter 4 Keyboard and pointing devices - HP EliteBook 8770w | Getting Started HP Notebook - Page 35
notification area, at the far right of the taskbar. 2. Click the Synaptics Pointing Device icon , and then click Pointing Device Properties. 3. Click the Device Settings tab, select the device in the window that is displayed, and then click Settings. 4. Select the check box next to the gesture that - HP EliteBook 8770w | Getting Started HP Notebook - Page 36
speed. Pinching/Zooming Pinching allows you to zoom in or out on images or text. ● Zoom in by placing two fingers together on the TouchPad, and then moving them apart. ● Zoom out by placing two fingers apart on the TouchPad, and then moving them together. 28 Chapter 4 Keyboard and pointing devices - HP EliteBook 8770w | Getting Started HP Notebook - Page 37
factory. Flicking Flicking allows you to navigate through screens or quickly scroll through documents. To flick, use three fingers to touch the TouchPad zone in a light, quick flicking motion up, down, left, or right. NOTE: Three-finger flicking is disabled at the factory. Using pointing devices 29 - HP EliteBook 8770w | Getting Started HP Notebook - Page 38
information on using the battery, see the HP Notebook Reference Guide. To insert the battery: ▲ Insert the battery (1) into the battery bay until it is seated (2). The battery release latch automatically locks the battery into place. To remove the battery: CAUTION: Removing a battery that is the - HP EliteBook 8770w | Getting Started HP Notebook - Page 39
2. Remove the battery from the computer by lifting it away (2) and up (3) from the computer. Inserting or removing the battery 31 - HP EliteBook 8770w | Getting Started HP Notebook - Page 40
the computer is off or in Hibernation, turn the computer on by pressing the power button. Then shut down the computer through the operating system. Removing the service door Remove the service door to access the memory module slot, hard drive, regulatory label, and other components. To remove - HP EliteBook 8770w | Getting Started HP Notebook - Page 41
Insert the alignment tabs (2) on the rear edge of the service door with the notches on the computer. 3. Slide the service door towards the battery bay until the service door snaps into place. 4. With the battery bay toward you, slide the service door release latch to the left (3), and if you choose - HP EliteBook 8770w | Getting Started HP Notebook - Page 42
User Guide located in Help and Support. Removing the primary hard drive To remove the primary hard drive: 1. Save your work and shut down the computer. 2. Disconnect AC power and external devices connected to the computer. 3. Turn the computer upside down on a flat surface. 4. Remove the battery - HP EliteBook 8770w | Getting Started HP Notebook - Page 43
hard drive To remove the secondary hard drive: 1. Save your work and shut down the computer. 2. Disconnect AC power and external devices connected to the computer. 3. Turn the computer upside down on a flat surface, with the secondary hard drive bay toward you. Replacing or upgrading the hard drive - HP EliteBook 8770w | Getting Started HP Notebook - Page 44
the primary hard drive To install the primary hard drive: 1. Disconnect all external devices connected to the computer. 2. Unplug the power cord from the AC outlet. 3. Turn the computer upside down on a flat surface, with the secondary hard drive bay toward you. 4. Remove the battery (see Inserting - HP EliteBook 8770w | Getting Started HP Notebook - Page 45
screw (2). 11. Replace the service door (see Removing or replacing the service door on page 32). 12. Replace the battery (see Inserting or removing the battery on page 30). 13. Connect AC power and external devices to the computer. 14. Turn on the computer. Replacing or upgrading the hard drive 37 - HP EliteBook 8770w | Getting Started HP Notebook - Page 46
hard drive with the connector. 8. Tighten the hard drive screws (3). 9. Replace the service door (see Removing or replacing the service door on page 32). 10. Replace the battery (see Inserting or removing the battery on page 30). 11. Connect AC power and external devices to the computer. 12. Turn - HP EliteBook 8770w | Getting Started HP Notebook - Page 47
the computer on by pressing the power button. Then shut down the computer through the operating system. To remove a hard drive from the upgrade bay: 1. Save your work. 2. Shut down the computer and close the display. 3. Disconnect all external devices connected to the computer. 4. Unplug the power - HP EliteBook 8770w | Getting Started HP Notebook - Page 48
11. Remove the hard drive from the upgrade bay (3). To install a hard drive in the upgrade bay: 1. Turn the computer upside down on a flat surface, with the upgrade bay toward you. 2. Insert the hard drive (1) into the upgrade bay, and then tighten the upgrade bay screw (2). 40 Chapter 5 Maintenance - HP EliteBook 8770w | Getting Started HP Notebook - Page 49
Replace the hard drive screws. 4. Replace the service door (see Removing or replacing the service door on page 32). 5. Insert the battery (see Inserting or removing the battery on page 30). 6. Turn the computer right-side up, and then reconnect AC power and external devices to the computer. 7. Turn - HP EliteBook 8770w | Getting Started HP Notebook - Page 50
toward you. 2. Insert the optical drive into the upgrade bay (1). 3. Tighten the upgrade bay screw (2). 4. Replace the service door (see Removing or replacing the service door on page 32). 5. Insert the battery (see Inserting or removing the battery on page 30). 6. Turn the computer right-side up - HP EliteBook 8770w | Getting Started HP Notebook - Page 51
core processors have 4 slots. NOTE: To use a dual-channel configuration when adding a second memory module, be sure that both memory modules are identical. Adding or replacing the memory module underneath the service door CAUTION: To prevent information loss or an unresponsive system: Shut down the - HP EliteBook 8770w | Getting Started HP Notebook - Page 52
module: CAUTION: To prevent damage to the memory module, hold the memory module by the edges only. Do not touch the components on the memory module. a. Align the notched edge (1) of the memory module with the tab in the memory module slot. b. With the memory module at a 45-degree angle from the - HP EliteBook 8770w | Getting Started HP Notebook - Page 53
the battery on page 30). 10. Connect AC power and external devices to the computer. 11. Turn on the computer. Adding or replacing the memory module underneath the keyboard CAUTION: To prevent information loss or an unresponsive system: Shut down the computer before adding or replacing memory modules - HP EliteBook 8770w | Getting Started HP Notebook - Page 54
. c. Turn the computer right-side up, lift the top edge of the keyboard, and then rest the keyboard on the TouchPad. NOTE: Do not disconnect the keyboard cable. To avoid disconnecting the keyboard cable, do not pull the keyboard away from the computer. 7. If you are replacing a memory module - HP EliteBook 8770w | Getting Started HP Notebook - Page 55
memory module. a. Align the notched edge (1) of the memory module with the tab in the memory module slot. b. With the memory module at a 45-degree angle from the surface of the memory module compartment, press the module (2) into the memory module slot until it is seated. Adding or replacing memory - HP EliteBook 8770w | Getting Started HP Notebook - Page 56
into place. CAUTION: To prevent damage to the memory module, be sure that you do not bend the memory module. 9. Replace the keyboard: a. Lift up the keyboard and flip it over (1), resting it on the base enclosure. b. Slide the keyboard tabs (2) into the base enclosure slots. 48 Chapter 5 Maintenance - HP EliteBook 8770w | Getting Started HP Notebook - Page 57
the keyboard into place. 10. Replace the service door (see Removing or replacing the service door on page 32). 11. Insert the battery (see Inserting or removing the battery on page 30). 12. Connect AC power and external devices to the computer. 13. Turn on the computer. Adding or replacing memory - HP EliteBook 8770w | Getting Started HP Notebook - Page 58
of the taskbar, or select Start > All Programs > Productivity and Tools > Mobile Display Assistant. Updating programs and drivers HP recommends that you update your programs and drivers on a regular basis with the latest versions. For U.S. support, go to http://www.hp.com/go/contactHP. For worldwide - HP EliteBook 8770w | Getting Started HP Notebook - Page 59
electric shock or damage to components, do not attempt to clean your computer while it is turned on: 1. Turn off the computer. 2. Disconnect external power. 3. Disconnect all powered external devices. CAUTION: Do not spray cleaning agents or liquids directly on any computer surface. Liquids dripped - HP EliteBook 8770w | Getting Started HP Notebook - Page 60
components, do not use a vacuum cleaner attachment to clean the keyboard. A vacuum cleaner can deposit household debris on the keyboard surface. CAUTION: When cleaning the TouchPad and keyboard, do not let liquids drip between the keys. This can permanently damage internal components. ● To clean and - HP EliteBook 8770w | Getting Started HP Notebook - Page 61
and recovery To protect your information, use Windows Backup and Restore to back up individual files and folders, back up your entire hard drive (select models only), create system repair discs (select models only)with the installed optical drive (select models only) or an optional external optical - HP EliteBook 8770w | Getting Started HP Notebook - Page 62
if the hard drive becomes corrupted. A system recovery reinstalls the original operating system and the software programs installed at the factory, and then configures the settings for the programs. HP Recovery Disc Creator can create two kinds of recovery DVDs as follows: ● Windows DVD-Installs the - HP EliteBook 8770w | Getting Started HP Notebook - Page 63
fix problems that might prevent Windows from starting correctly. ● f11 recovery tools: You can use the f11 recovery tools to recover your original hard drive image. The image includes the Windows operating system and software programs installed at the factory. NOTE: If you are unable to boot (start - HP EliteBook 8770w | Getting Started HP Notebook - Page 64
on-screen instructions. NOTE: For additional information on recovering information using the Windows tools, perform a search for these topics in Help and Support. Using f11 recovery tools CAUTION: Using f11 recovery tools completely erases hard drive contents and reformats the hard drive. All files - HP EliteBook 8770w | Getting Started HP Notebook - Page 65
, press any keyboard key. 4. Follow the on-screen instructions. 5. Click Next. 6. Select Repair your computer. 7. Follow the on-screen instructions. After the repair is completed: 1. Eject the Windows 7 operating system DVD, and then insert the Driver Recovery disc. 2. Install the Hardware Enabling - HP EliteBook 8770w | Getting Started HP Notebook - Page 66
If the information provided in this user guide, in the HP Notebook Reference Guide, or in Help and Support does not address your questions, you can contact support. For U.S. support, go to http://www.hp.com/go/contactHP. For worldwide support, go to http://welcome.hp.com/country/us/en/ wwcontact_us - HP EliteBook 8770w | Getting Started HP Notebook - Page 67
you troubleshoot system problems or travel internationally with the computer: ● Service support. The service label is affixed inside the battery bay. ● Microsoft® Certificate of Authenticity-Contains the Windows Product Key. You may need the Product Key to update or troubleshoot the operating system - HP EliteBook 8770w | Getting Started HP Notebook - Page 68
Power Operating voltage and current Rating 19.5 V dc @ 10.3 A - Slim 200W - or - 19.5 V dc @ 11.8 A - Slim 230W NOTE: This product is designed for IT power systems in Norway with phase-to-phase voltage not exceeding 240 V rms. NOTE: The computer operating voltage and current can be found on the - HP EliteBook 8770w | Getting Started HP Notebook - Page 69
Operating environment Factor Temperature Operating Nonoperating Relative humidity (noncondensing) Operating Nonoperating Maximum altitude (unpressurized) Operating Nonoperating Metric 5°C to 35°C -20°C to 60°C 10% to 90% 5% to 95% -15 m to 3,048 m -15 m to 12,192 m U.S. 41°F to 95°F -4°F to 140°F - HP EliteBook 8770w | Getting Started HP Notebook - Page 70
recovery 56 fingerprint reader, identifying 8 fn key, identifying 9, 22 function keys, identifying 9 H hard drive installing primary 36 removing 34 removing secondary 35 hard drive light 11 hard drive recovery 56 headphone (audio-out) jack 12 hot keys adjusting volume 23 battery charge 23 decrease - HP EliteBook 8770w | Getting Started HP Notebook - Page 71
9 Windows logo 9 L labels Bluetooth 59 HP Mobile Broadband Module 59 Microsoft Certificate of Authenticity 59 regulatory 59 service 59 SIM 59 wireless certification 59 WLAN 59 latches, battery release 16 latches, service door release 16 lights battery 10 calculator 6 caps lock 6 hard drive 11 - HP EliteBook 8770w | Getting Started HP Notebook - Page 72
Z zooming TouchPad gesture 28 64 Index
-
 1
1 -
 2
2 -
 3
3 -
 4
4 -
 5
5 -
 6
6 -
 7
7 -
8
-
9
-
10
-
11
-
12
-
13
-
14
-
15
-
16
-
17
-
18
-
19
-
20
-
21
-
22
-
23
-
24
-
25
-
26
-
27
-
28
-
29
-
30
-
31
-
32
-
33
-
34
-
35
-
36
-
37
-
38
-
39
-
40
-
41
-
42
-
43
-
44
-
45
-
46
-
47
-
48
-
49
-
50
-
51
-
52
-
53
-
54
-
55
-
56
-
57
-
58
-
59
-
60
-
61
-
62
-
63
-
64
-
65
-
66
-
67
-
68
-
69
-
70
-
71
-
72
 |
 |

Getting Started
HP Notebook