HP EliteBook 8770w Getting Started HP Notebook - Page 50
Tighten the upgrade bay screw, Replace the service door see
 |
View all HP EliteBook 8770w manuals
Add to My Manuals
Save this manual to your list of manuals |
Page 50 highlights
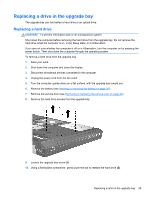
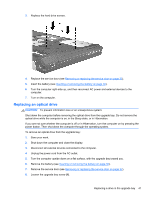
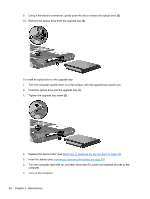
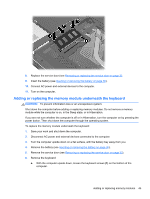
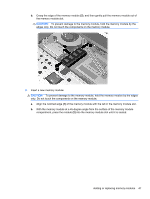
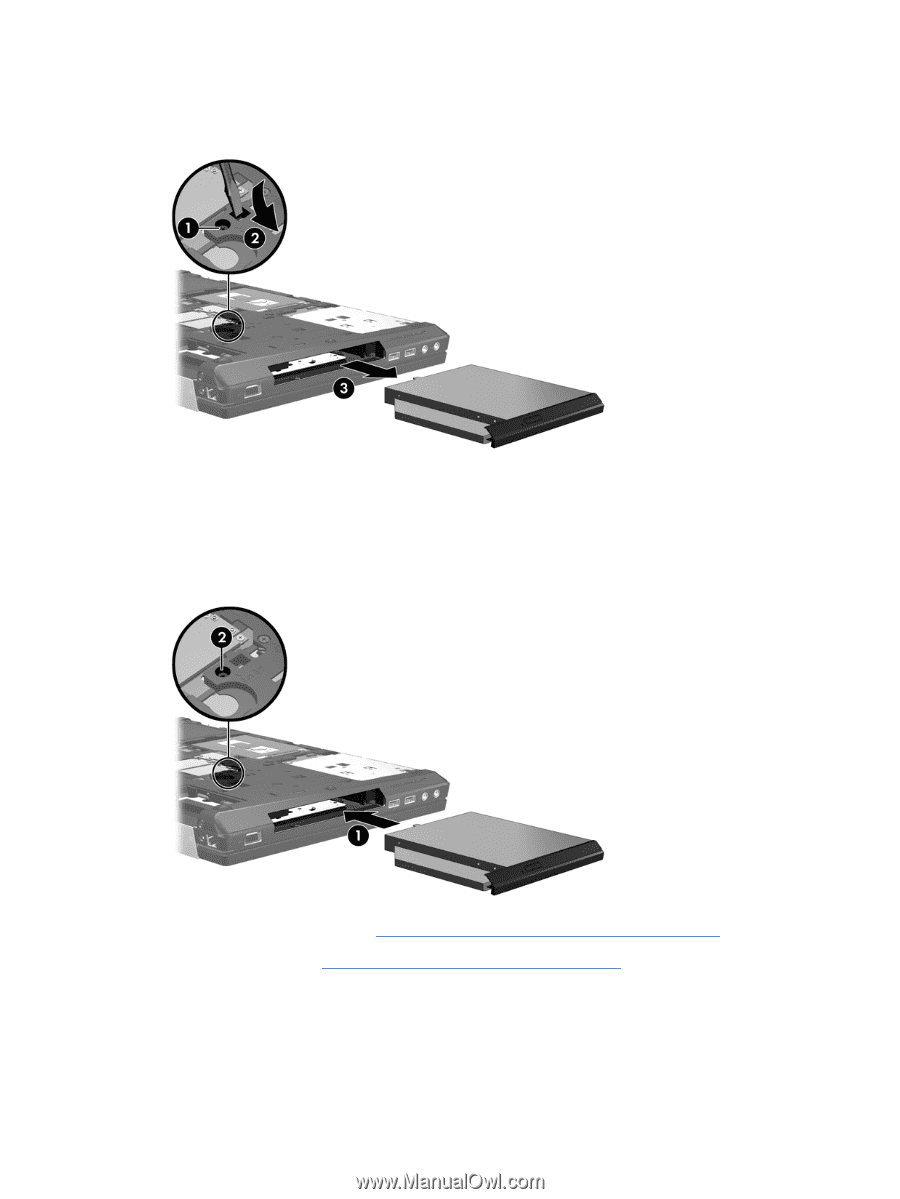
9. Using a flat-bladed screwdriver, gently push the tab to release the optical drive (2). 10. Remove the optical drive from the upgrade bay (3). To install an optical drive in the upgrade bay: 1. Turn the computer upside down on a flat surface, with the upgrade bay toward you. 2. Insert the optical drive into the upgrade bay (1). 3. Tighten the upgrade bay screw (2). 4. Replace the service door (see Removing or replacing the service door on page 32). 5. Insert the battery (see Inserting or removing the battery on page 30). 6. Turn the computer right-side up, and then reconnect AC power and external devices to the computer. 7. Turn on the computer. 42 Chapter 5 Maintenance
-
 1
1 -
2
-
3
-
4
-
5
-
6
-
7
-
8
-
9
-
10
-
11
-
12
-
13
-
14
-
15
-
16
-
17
-
18
-
19
-
20
-
21
-
22
-
23
-
24
-
25
-
26
-
27
-
28
-
29
-
30
-
31
-
32
-
33
-
34
-
35
-
36
-
37
-
38
-
39
-
40
-
41
-
42
-
43
-
44
-
 45
45 -
 46
46 -
 47
47 -
 48
48 -
 49
49 -
 50
50 -
 51
51 -
 52
52 -
 53
53 -
 54
54 -
 55
55 -
56
-
57
-
58
-
59
-
60
-
61
-
62
-
63
-
64
-
65
-
66
-
67
-
68
-
69
-
70
-
71
-
72
 |
 |
9.
Using a flat-bladed screwdriver, gently push the tab to release the optical drive
(2)
.
10.
Remove the optical drive from the upgrade bay
(3)
.
To install an optical drive in the upgrade bay:
1.
Turn the computer upside down on a flat surface, with the upgrade bay toward you.
2.
Insert the optical drive into the upgrade bay
(1)
.
3.
Tighten the upgrade bay screw
(2)
.
4.
Replace the service door (see
Removing or replacing the service door
on page
32
).
5.
Insert the battery (see
Inserting or removing the battery
on page
30
).
6.
Turn the computer right-side up, and then reconnect AC power and external devices to the
computer.
7.
Turn on the computer.
42
Chapter 5
Maintenance