HP Officejet Pro 3620 User Guide - Page 51
Set the redial options, Set the fax speed, No Answer Redial
 |
View all HP Officejet Pro 3620 manuals
Add to My Manuals
Save this manual to your list of manuals |
Page 51 highlights
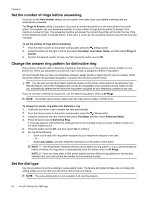
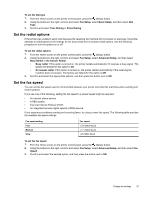
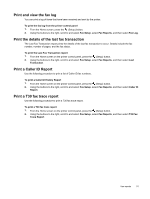
To set the dial type 1. From the Home screen on the printer control panel, press the (Setup) button. 2. Using the buttons to the right, scroll to and select Fax Setup, select Basic Setup, and then select Dial Type. 3. Scroll to and select Tone Dialing or Pulse Dialing. Set the redial options If the printer was unable to send a fax because the receiving fax machine did not answer or was busy, the printer attempts to redial based on the settings for the busy-redial and no-answer-redial options. Use the following procedure to turn the options on or off. To set the redial options 1. From the Home screen on the printer control panel, press the (Setup) button. 2. Using the buttons to the right, scroll to and select Fax Setup, select Advanced Setup, and then select Busy Redial or No Answer Redial. • Busy redial: If this option is turned on, the printer redials automatically if it receives a busy signal. The factory-set default for this option is On. • No answer redial: If this option is turned on, the printer redials automatically if the receiving fax machine does not answer. The factory-set default for this option is Off. 3. Scroll to and select the appropriate options, and then press the button next to OK. Set the fax speed You can set the fax speed used to communicate between your printer and other fax machines when sending and receiving faxes. If you use one of the following, setting the fax speed to a slower speed might be required: • An Internet phone service • A PBX system • Fax over Internet Protocol (FoIP) • An integrated services digital network (ISDN) service If you experience problems sending and receiving faxes, try using a lower fax speed. The following table provides the available fax speed settings. Fax speed setting Fast Medium Slow Fax speed v.34 (33600 baud) v.17 (14400 baud) v.29 (9600 baud) To set the fax speed 1. From the Home screen on the printer control panel, press the (Setup) button. 2. Using the buttons to the right, scroll to and select Fax Setup, select Advanced Setup, and then select Fax Speed. 3. Scroll to and select the desired option, and then press the button next to OK. Change fax settings 47
-
 1
1 -
2
-
3
-
4
-
5
-
6
-
7
-
8
-
9
-
10
-
11
-
12
-
13
-
14
-
15
-
16
-
17
-
18
-
19
-
20
-
21
-
22
-
23
-
24
-
25
-
26
-
27
-
28
-
29
-
30
-
31
-
32
-
33
-
34
-
35
-
36
-
37
-
38
-
39
-
40
-
41
-
42
-
43
-
44
-
45
-
 46
46 -
 47
47 -
 48
48 -
 49
49 -
 50
50 -
 51
51 -
 52
52 -
 53
53 -
 54
54 -
 55
55 -
 56
56 -
57
-
58
-
59
-
60
-
61
-
62
-
63
-
64
-
65
-
66
-
67
-
68
-
69
-
70
-
71
-
72
-
73
-
74
-
75
-
76
-
77
-
78
-
79
-
80
-
81
-
82
-
83
-
84
-
85
-
86
-
87
-
88
-
89
-
90
-
91
-
92
-
93
-
94
-
95
-
96
-
97
-
98
-
99
-
100
-
101
-
102
-
103
-
104
-
105
-
106
-
107
-
108
-
109
-
110
-
111
-
112
-
113
-
114
-
115
-
116
-
117
-
118
-
119
-
120
-
121
-
122
-
123
-
124
-
125
-
126
-
127
-
128
-
129
-
130
-
131
-
132
-
133
-
134
-
135
-
136
-
137
-
138
-
139
-
140
-
141
-
142
-
143
-
144
-
145
-
146
-
147
-
148
-
149
-
150
-
151
-
152
-
153
-
154
-
155
-
156
-
157
-
158
-
159
-
160
-
161
-
162
-
163
-
164
-
165
-
166
-
167
-
168
-
169
-
170
 |
 |
