HP Officejet Pro 8600 User Guide - Page 39
Turn the printer off, To clean the rollers or separator pad, CAUTION - ink replacement
 |
View all HP Officejet Pro 8600 manuals
Add to My Manuals
Save this manual to your list of manuals |
Page 39 highlights
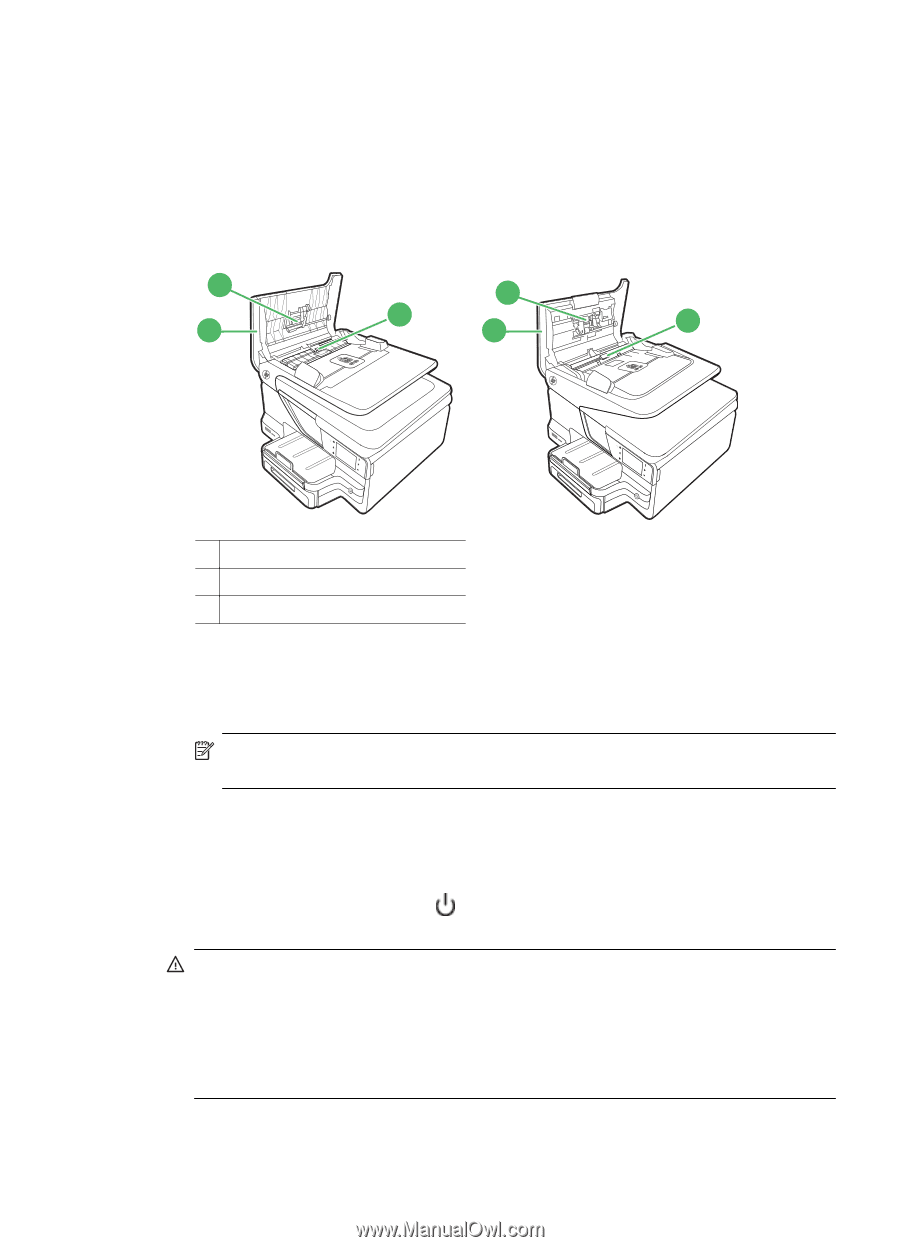
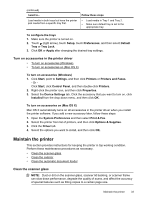
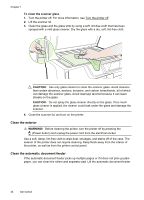
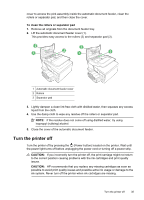
cover to access the pick assembly inside the automatic document feeder, clean the rollers or separator pad, and then close the cover. To clean the rollers or separator pad 1. Remove all originals from the document feeder tray. 2. Lift the automatic document feeder cover (1). This provides easy access to the rollers (2) and separator pad (3). 2 2 1 3 1 3 1 Automatic document feeder cover 2 Rollers 3 Separator pad 3. Lightly dampen a clean lint-free cloth with distilled water, then squeeze any excess liquid from the cloth. 4. Use the damp cloth to wipe any residue off the rollers or separator pad. NOTE: If the residue does not come off using distilled water, try using isopropyl (rubbing) alcohol. 5. Close the cover of the automatic document feeder. Turn the printer off Turn the printer off by pressing the (Power button) located on the printer. Wait until the power light turns off before unplugging the power cord or turning off a power strip. CAUTION: If you incorrectly turn the printer off, the print carriage might not return to the correct position causing problems with the ink cartridges and print quality issues. CAUTION: HP recommends that you replace any missing cartridges as soon as possible to avoid print quality issues and possible extra ink usage or damage to the ink system. Never turn off the printer when ink cartridges are missing. Turn the printer off 35
-
 1
1 -
2
-
3
-
4
-
5
-
6
-
7
-
8
-
9
-
10
-
11
-
12
-
13
-
14
-
15
-
16
-
17
-
18
-
19
-
20
-
21
-
22
-
23
-
24
-
25
-
26
-
27
-
28
-
29
-
30
-
31
-
32
-
33
-
 34
34 -
 35
35 -
 36
36 -
 37
37 -
 38
38 -
 39
39 -
 40
40 -
 41
41 -
 42
42 -
 43
43 -
 44
44 -
45
-
46
-
47
-
48
-
49
-
50
-
51
-
52
-
53
-
54
-
55
-
56
-
57
-
58
-
59
-
60
-
61
-
62
-
63
-
64
-
65
-
66
-
67
-
68
-
69
-
70
-
71
-
72
-
73
-
74
-
75
-
76
-
77
-
78
-
79
-
80
-
81
-
82
-
83
-
84
-
85
-
86
-
87
-
88
-
89
-
90
-
91
-
92
-
93
-
94
-
95
-
96
-
97
-
98
-
99
-
100
-
101
-
102
-
103
-
104
-
105
-
106
-
107
-
108
-
109
-
110
-
111
-
112
-
113
-
114
-
115
-
116
-
117
-
118
-
119
-
120
-
121
-
122
-
123
-
124
-
125
-
126
-
127
-
128
-
129
-
130
-
131
-
132
-
133
-
134
-
135
-
136
-
137
-
138
-
139
-
140
-
141
-
142
-
143
-
144
-
145
-
146
-
147
-
148
-
149
-
150
-
151
-
152
-
153
-
154
-
155
-
156
-
157
-
158
-
159
-
160
-
161
-
162
-
163
-
164
-
165
-
166
-
167
-
168
-
169
-
170
-
171
-
172
-
173
-
174
-
175
-
176
-
177
-
178
-
179
-
180
-
181
-
182
-
183
-
184
-
185
-
186
-
187
-
188
-
189
-
190
-
191
-
192
-
193
-
194
-
195
-
196
-
197
-
198
-
199
-
200
-
201
-
202
-
203
-
204
-
205
-
206
-
207
-
208
-
209
-
210
-
211
-
212
-
213
-
214
-
215
-
216
-
217
-
218
-
219
-
220
-
221
-
222
-
223
-
224
-
225
-
226
-
227
-
228
-
229
-
230
-
231
-
232
-
233
-
234
-
235
-
236
-
237
-
238
-
239
-
240
-
241
-
242
-
243
-
244
-
245
-
246
-
247
-
248
-
249
-
250
-
251
-
252
 |
 |