HP Pavilion All-in-One MS210 Maintenance and Service Guide: HP Pro All-in-One - Page 13
seconds. The blue activity LED on the wireless receiver illuminates when the synchronization
 |
View all HP Pavilion All-in-One MS210 manuals
Add to My Manuals
Save this manual to your list of manuals |
Page 13 highlights
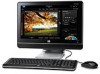
4. If you are replacing the mouse and it has a power switch on the bottom, turn on the mouse power switch (A). The keyboard does not have a power switch, so you can skip this step if you are installing the keyboard only. 5. Press the blue connect button on the bottom of the keyboard (B) and/or mouse (C) for 5 to 10 seconds. The blue activity LED on the wireless receiver illuminates when the synchronization command has been received and goes off when synchronization is complete. NOTE: If the synchronization does not work, remove and then re-insert the wireless receiver from the back of the computer and synchronize the keyboard and/or mouse again. Replacing the Keyboard or Mouse 7
-
 1
1 -
2
-
3
-
4
-
5
-
6
-
7
-
 8
8 -
 9
9 -
 10
10 -
 11
11 -
 12
12 -
 13
13 -
 14
14 -
 15
15 -
 16
16 -
 17
17 -
 18
18 -
19
-
20
-
21
-
22
-
23
-
24
-
25
-
26
-
27
-
28
-
29
-
30
-
31
-
32
-
33
-
34
-
35
-
36
-
37
-
38
-
39
-
40
-
41
-
42
-
43
-
44
-
45
-
46
-
47
-
48
-
49
-
50
-
51
-
52
-
53
-
54
-
55
-
56
-
57
-
58
-
59
 |
 |

4.
If you are replacing the mouse and it has a power switch on the bottom, turn on the mouse
power switch
(A)
. The keyboard does not have a power switch, so you can skip this step if you
are installing the keyboard only.
5.
Press the blue connect button on the bottom of the keyboard
(B)
and/or mouse
(C)
for 5 to 10
seconds. The blue activity LED on the wireless receiver illuminates when the synchronization
command has been received and goes off when synchronization is complete.
NOTE:
If the synchronization does not work, remove and then re-insert the wireless receiver from
the back of the computer and synchronize the keyboard and/or mouse again.
Replacing the Keyboard or Mouse
7