HP Pavilion All-in-One MS210 Maintenance and Service Guide: HP Pro All-in-One - Page 24
Back cover
 |
View all HP Pavilion All-in-One MS210 manuals
Add to My Manuals
Save this manual to your list of manuals |
Page 24 highlights
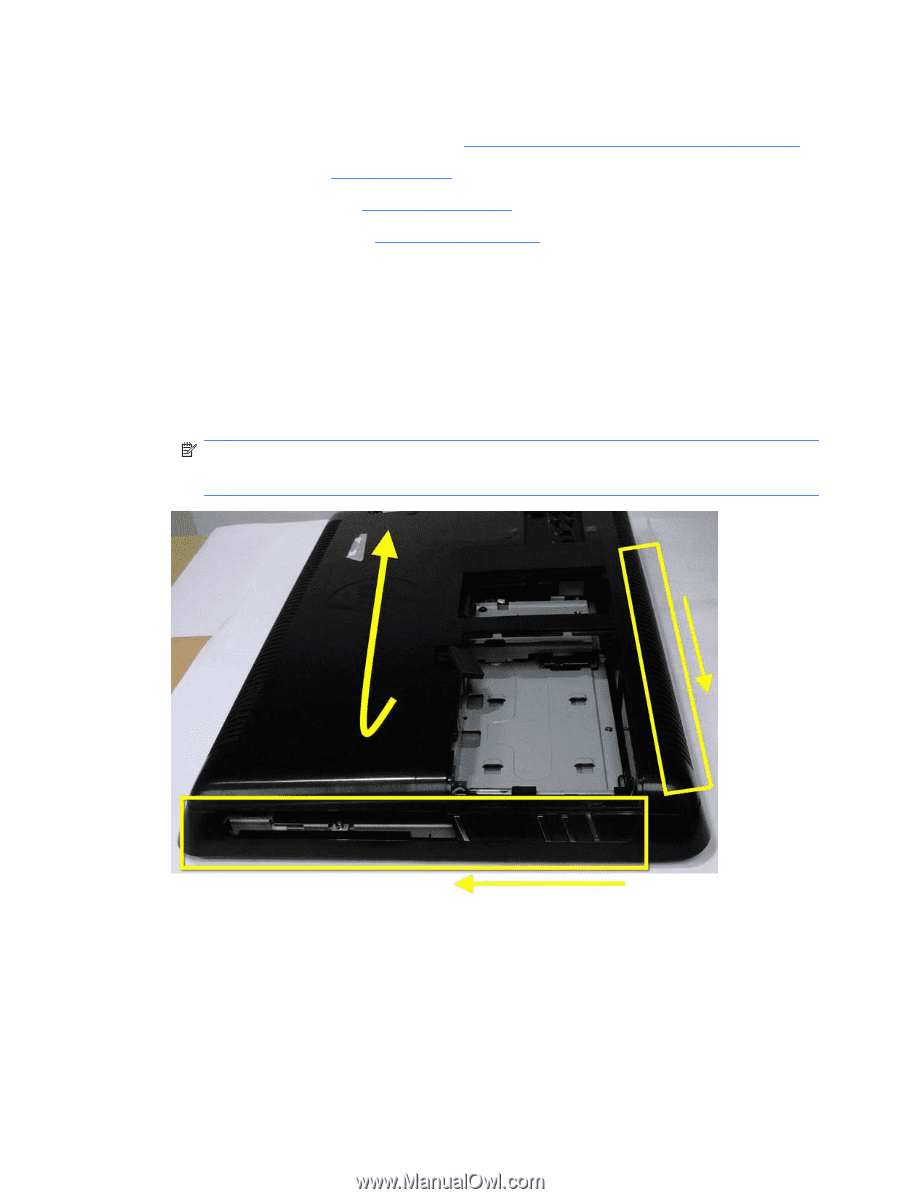
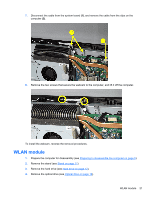
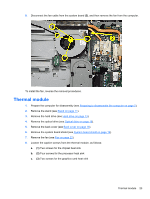
Back cover 1. Prepare the computer for disassembly (see Preparing to disassemble the computer on page 5). 2. Remove the stand (see Stand on page 11). 3. Remove the hard drive (see Hard drive on page 13). 4. Remove the optical drive (see Optical drive on page 16). 5. Remove the back cover by prying the back cover away from the front bezel, as follows: a. Using your fingers at the outside seam between the back cover and front bezel, pry the back cover away from the computer at the area near the stand mounting bracket. b. Move around the bottom to the left side of the computer while prying the cover off the computer. c. After you pry the cover off near the optical drive, the cover should release from the computer. NOTE: To avoid breaking parts of the back cover or computer, make sure the tabs on the back cover and slots on the computer are clearly separated before lifting the cover off the computer. To replace the back cover, reverse the removal procedures. 18 Chapter 3 Removal and Replacement Procedures
-
 1
1 -
2
-
3
-
4
-
5
-
6
-
7
-
8
-
9
-
10
-
11
-
12
-
13
-
14
-
15
-
16
-
17
-
18
-
 19
19 -
 20
20 -
 21
21 -
 22
22 -
 23
23 -
 24
24 -
 25
25 -
 26
26 -
 27
27 -
 28
28 -
 29
29 -
30
-
31
-
32
-
33
-
34
-
35
-
36
-
37
-
38
-
39
-
40
-
41
-
42
-
43
-
44
-
45
-
46
-
47
-
48
-
49
-
50
-
51
-
52
-
53
-
54
-
55
-
56
-
57
-
58
-
59
 |
 |