HP Pavilion zt1100 HP Pavilion Notebook zt1000, xz100 and Omnibook xt1000 Seri - Page 47
Disconnecting the Keyboard, Reassembly Notes
 |
View all HP Pavilion zt1100 manuals
Add to My Manuals
Save this manual to your list of manuals |
Page 47 highlights
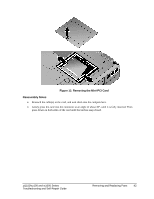
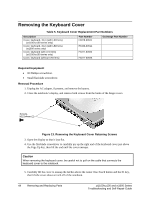
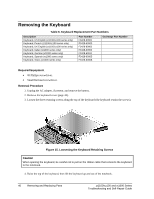
5. Lay the keyboard face down on the top case, forward of its normal position, and disconnect the ribbon cable from the motherboard. Warning Do not touch the metal surfaces inside the notebook until they have cooled off. They could be very hot if the notebook was running recently. Figure 16. Disconnecting the Keyboard Reassembly Notes • Lay the keyboard face down on the top case, forward of its normal position, and reconnect the ribbon cable. • Slip the metal tabs on the bottom of the keyboard into their slots in the top case, then lower the keyboard into place. zt1100/xz100 and xt1000 Series Troubleshooting and Self-Repair Guide Removing and Replacing Parts 47
-
 1
1 -
2
-
3
-
4
-
5
-
6
-
7
-
8
-
9
-
10
-
11
-
12
-
13
-
14
-
15
-
16
-
17
-
18
-
19
-
20
-
21
-
22
-
23
-
24
-
25
-
26
-
27
-
28
-
29
-
30
-
31
-
32
-
33
-
34
-
35
-
36
-
37
-
38
-
39
-
40
-
41
-
 42
42 -
 43
43 -
 44
44 -
 45
45 -
 46
46 -
 47
47 -
 48
48 -
 49
49 -
 50
50 -
 51
51 -
 52
52 -
53
-
54
-
55
-
56
 |
 |
zt1100/xz100 and xt1000 Series
Removing and Replacing Parts
47
Troubleshooting and Self-Repair Guide
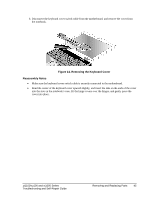
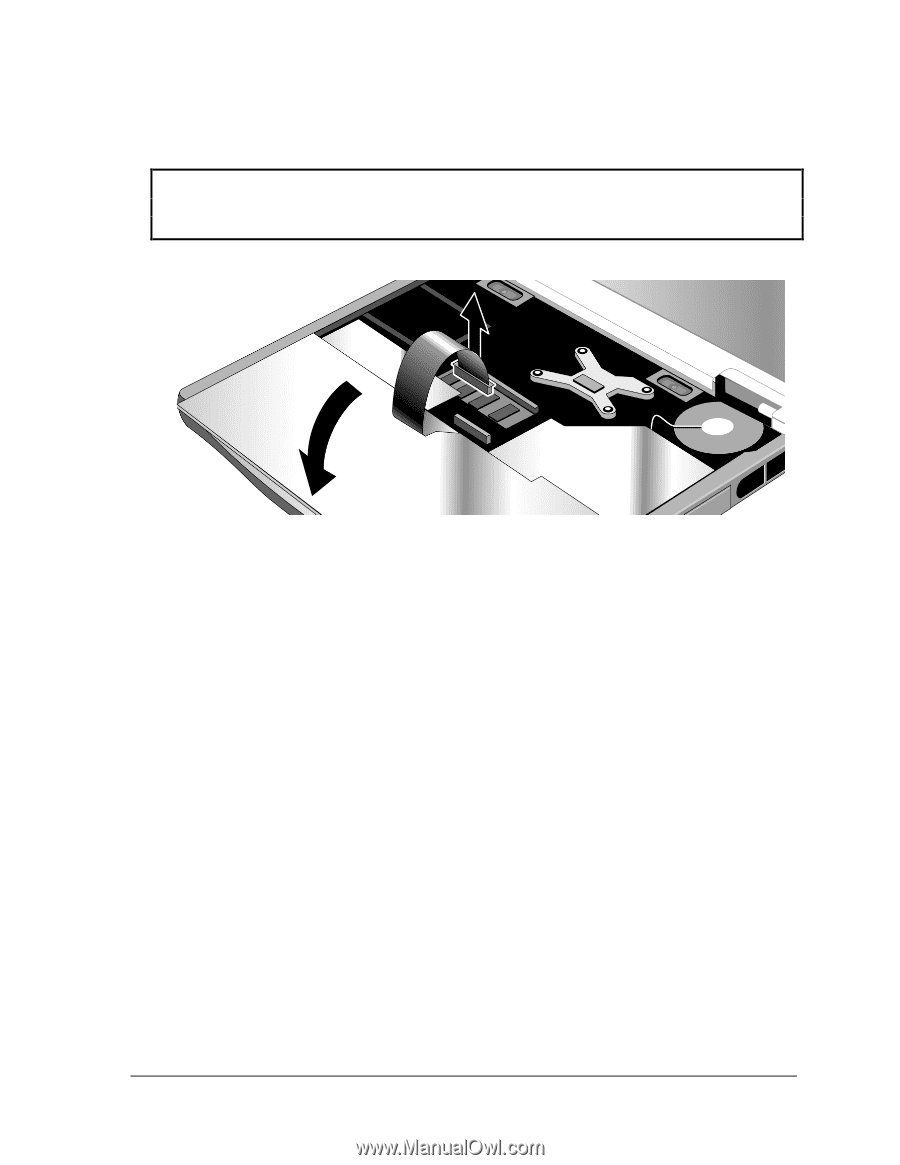
5. Lay the keyboard face down on the top case, forward of its normal position, and disconnect the
ribbon cable from the motherboard.
Warning
Do not touch the metal surfaces inside the notebook until they have cooled off. They could
be very hot if the notebook was running recently.
Figure 16. Disconnecting the Keyboard
Reassembly Notes
•
Lay the keyboard face down on the top case, forward of its normal position, and reconnect the
ribbon cable.
•
Slip the metal tabs on the bottom of the keyboard into their slots in the top case, then lower the
keyboard into place.