HP Pavilion zt1100 HP Pavilion Notebook zt1000, xz100 and Omnibook xt1000 Seri - Page 50
Removing the Speakers
 |
View all HP Pavilion zt1100 manuals
Add to My Manuals
Save this manual to your list of manuals |
Page 50 highlights
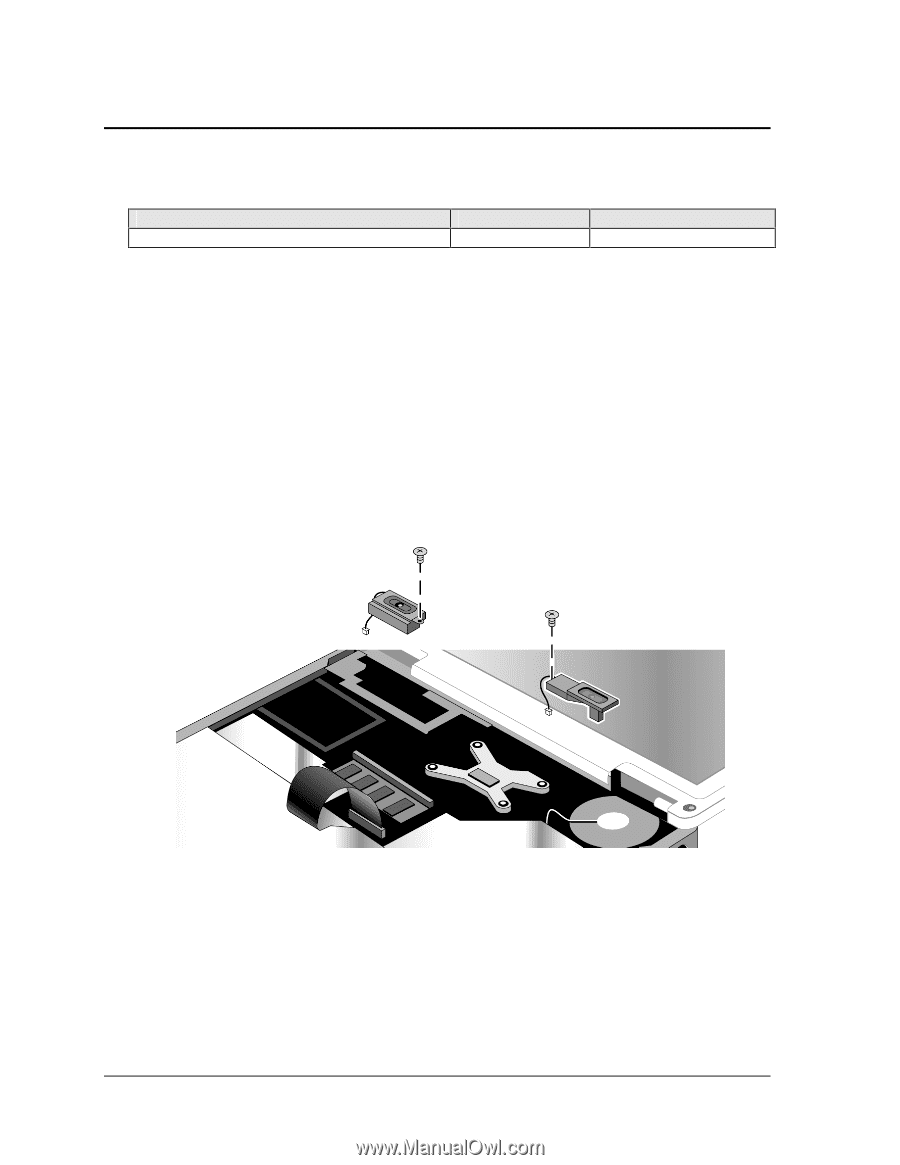
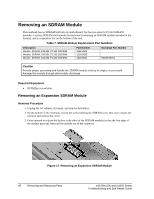
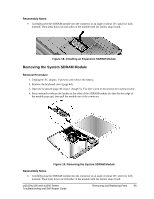
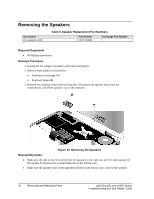
Removing the Speakers Description Kit, speakers (L/R) Table 8. Speaker Replacement Part Numbers Part Number F3377-60942 Exchange Part Number Required Equipment • #0 Phillips screwdriver. Removal Procedure 1. Unplug the AC adapter, if present, and remove the battery. 2. Remove these additional assemblies: • Keyboard cover (page 44). • Keyboard (page 48). 3. Remove the retaining screw from each speaker. Disconnect the speaker wires from the motherboard, and lift the speakers out of the notebook. Figure 20. Removing the Speakers Reassembly Notes • Make sure the tabs on the left side (for the left speaker) or the right rear (for the right speaker) of the speaker fit between the corresponding tabs in the bottom case. • Make sure the speaker wires fit through their notches in the bottom case, close to the speaker. 50 Removing and Replacing Parts zt1100/xz100 and xt1000 Series Troubleshooting and Self-Repair Guide
-
 1
1 -
2
-
3
-
4
-
5
-
6
-
7
-
8
-
9
-
10
-
11
-
12
-
13
-
14
-
15
-
16
-
17
-
18
-
19
-
20
-
21
-
22
-
23
-
24
-
25
-
26
-
27
-
28
-
29
-
30
-
31
-
32
-
33
-
34
-
35
-
36
-
37
-
38
-
39
-
40
-
41
-
42
-
43
-
44
-
 45
45 -
 46
46 -
 47
47 -
 48
48 -
 49
49 -
 50
50 -
 51
51 -
 52
52 -
 53
53 -
 54
54 -
 55
55 -
56
 |
 |