HP Pavilion zt1100 HP Pavilion Notebook zt1000, xz100 and Omnibook xt1000 Seri - Page 48
Removing an SDRAM Module
 |
View all HP Pavilion zt1100 manuals
Add to My Manuals
Save this manual to your list of manuals |
Page 48 highlights
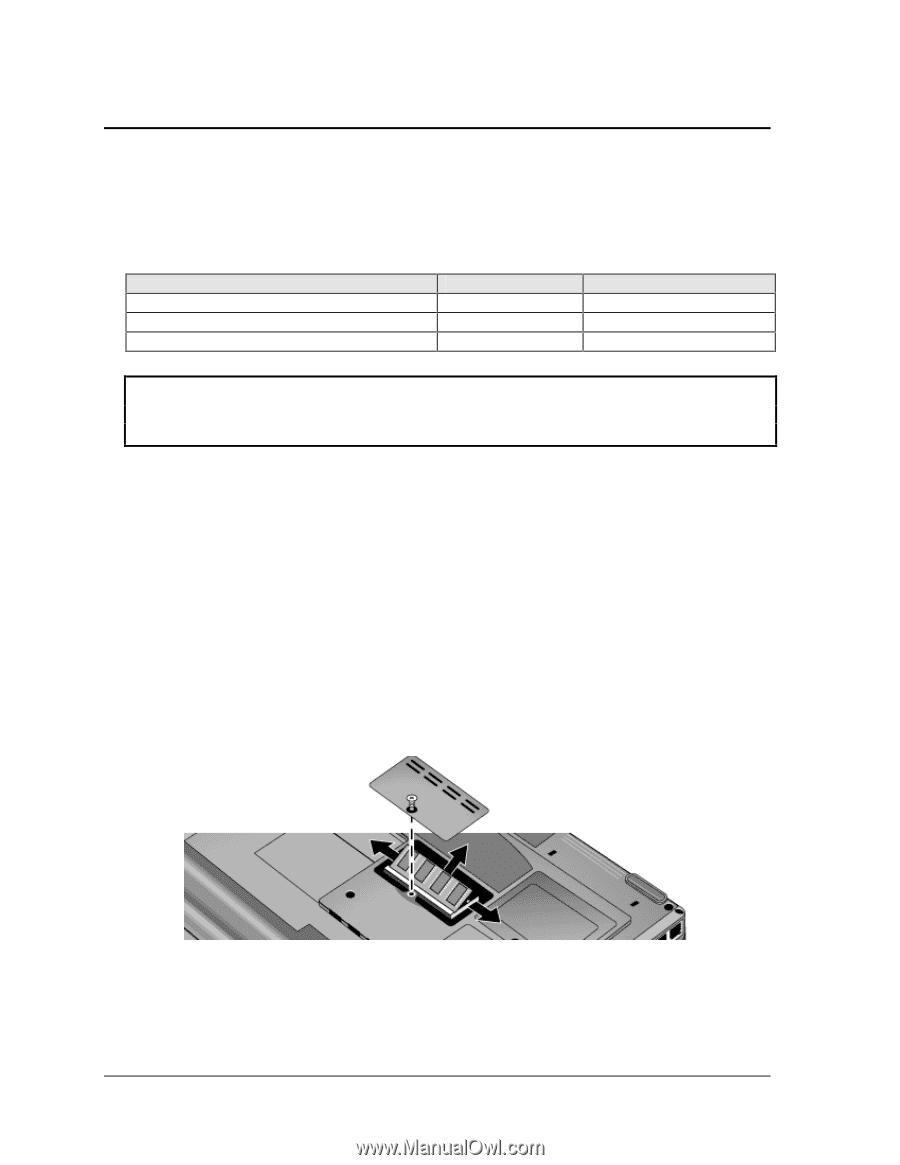
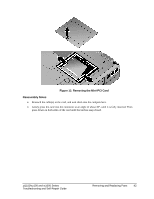
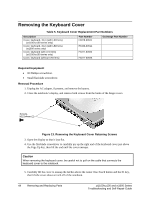
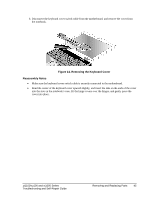
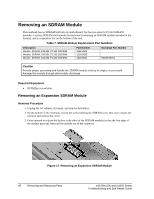
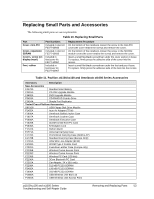
Removing an SDRAM Module The notebook has no SDRAM built into its motherboard, but has two slots for PC133 SDRAM modules: a system SDRAM slot beneath the keyboard (containing an SDRAM module installed at the factory), and an expansion slot on the bottom of the unit. Table 7. SDRAM Module Replacement Part Numbers Description Module, SDRAM, 128 MB, PC133 SODIMM Module, SDRAM, 256 MB, PC133 SODIMM Module, SDRAM, 512 MB, PC133 SODIMM Part Number 1818-8504 1818-8635 1818-8604 Exchange Part Number F2298-69001 Caution Provide proper grounding and handle the SDRAM module only by its edges, or you could damage the module through electrostatic discharge. Required Equipment • #0 Phillips screwdriver. Removing an Expansion SDRAM Module Removal Procedure 1. Unplug the AC adapter, if present, and remove the battery. 2. On the bottom of the notebook, loosen the screw holding the SDRAM cover (the cover retains the screws), and remove the cover. 3. Press outward to release the latches at the sides of the SDRAM module (so that the free edge of the module pops up), then pull the module out of the connector. Figure 17. Removing an Expansion SDRAM Module 48 Removing and Replacing Parts zt1100/xz100 and xt1000 Series Troubleshooting and Self-Repair Guide
-
 1
1 -
2
-
3
-
4
-
5
-
6
-
7
-
8
-
9
-
10
-
11
-
12
-
13
-
14
-
15
-
16
-
17
-
18
-
19
-
20
-
21
-
22
-
23
-
24
-
25
-
26
-
27
-
28
-
29
-
30
-
31
-
32
-
33
-
34
-
35
-
36
-
37
-
38
-
39
-
40
-
41
-
42
-
 43
43 -
 44
44 -
 45
45 -
 46
46 -
 47
47 -
 48
48 -
 49
49 -
 50
50 -
 51
51 -
 52
52 -
 53
53 -
54
-
55
-
56
 |
 |