HP Photosmart A630 User Guide - Page 49
Use Photo Fix, Crop a photo, Remove red-eye from your photos - bluetooth
 |
View all HP Photosmart A630 manuals
Add to My Manuals
Save this manual to your list of manuals |
Page 49 highlights
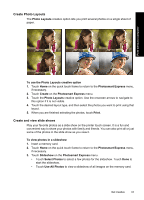
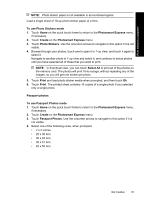
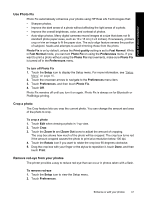
Print without a computer Use Photo Fix Photo Fix automatically enhances your photos using HP Real Life Technologies that: • Sharpen photos. • Improve the dark areas of a photo without affecting the light areas of a photo. • Improve the overall brightness, color, and contrast of photos. • Auto-align photos. Many digital cameras record images at a size that does not fit standard photo paper sizes, such as 10 x 15 cm (4 x 6 inches). If necessary, printers crop or trim an image to fit the paper size. The auto-align feature senses the position of subjects' heads and attempts to avoid trimming those from the photo. Photo Fix is on by default, unless the Print quality setting is set to Fast Normal. While in Fast Normal mode, you can turn Photo Fix on using the Preferences menu. If you want to print a photo without using the Photo Fix improvements, make sure Photo Fix is turned off in the Preferences menu. To turn off Photo Fix 1. Touch the Setup icon to display the Setup menu. For more information, see "Setup Menu" on page 16. 2. Touch the onscreen arrows to navigate to the Preferences menu item. 3. Touch Preferences, and then touch Photo Fix. 4. Touch Off. Photo Fix remains off until you turn it on again. Photo Fix is always on for Bluetooth or PictBridge printing. Crop a photo The Crop feature lets you crop the current photo. You can change the amount and area of the photo to crop. To crop a photo 1. Touch Edit when viewing a photo in 1-up view. 2. Touch Crop. 3. Touch the Zoom In and Zoom Out icons to adjust the amount of cropping. The crop box shows how much of the photo will be cropped. The crop box turns red if the amount cropped causes the photo to print at a resolution below 100 dpi. 4. Touch the Rotate icon if you want to rotate the crop box 90 degrees clockwise. 5. Drag the crop box with your finger or the stylus to reposition it, touch Done, and then touch Print. Remove red-eye from your photos The printer provides a way to reduce red-eye that can occur in photos taken with a flash. To remove red-eye 1. Touch the Setup icon to view the Setup menu. 2. Touch Preferences. Enhance or edit your photos 47
-
 1
1 -
2
-
3
-
4
-
5
-
6
-
7
-
8
-
9
-
10
-
11
-
12
-
13
-
14
-
15
-
16
-
17
-
18
-
19
-
20
-
21
-
22
-
23
-
24
-
25
-
26
-
27
-
28
-
29
-
30
-
31
-
32
-
33
-
34
-
35
-
36
-
37
-
38
-
39
-
40
-
41
-
42
-
43
-
 44
44 -
 45
45 -
 46
46 -
 47
47 -
 48
48 -
 49
49 -
 50
50 -
 51
51 -
 52
52 -
 53
53 -
 54
54 -
55
-
56
-
57
-
58
-
59
-
60
-
61
-
62
-
63
-
64
-
65
-
66
-
67
-
68
-
69
-
70
-
71
-
72
-
73
-
74
-
75
-
76
-
77
-
78
-
79
-
80
-
81
-
82
-
83
-
84
-
85
-
86
-
87
-
88
-
89
-
90
-
91
-
92
-
93
-
94
-
95
-
96
-
97
-
98
 |
 |