HP ProLiant DL380p HP ProLiant Servers Troubleshooting Guide - Page 184
Miscellaneous port 85 codes
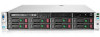 |
View all HP ProLiant DL380p manuals
Add to My Manuals
Save this manual to your list of manuals |
Page 184 highlights
CAUTION: Before removing or replacing any processors, be sure to follow the guidelines provided in "Performing processor procedures in the troubleshooting process (on page 18)." Failure to follow the recommended guidelines can cause damage to the system board, requiring replacement of the system board. 3. Remove all processors and PPMs, except the processor installed in socket 1 and the corresponding PPM. 4. Install the expansion boards one at a time, rebooting between each installation to isolate the failed expansion board. 5. Replace the failed expansion board, if applicable. 6. Replace the PCI riser board, if applicable. 7. Replace the system board. IMPORTANT: If replacing the system board or clearing NVRAM, you must re-enter the server serial number through RBSU ("Re-entering the serial number and product ID" on page 73). Miscellaneous port 85 codes To troubleshoot all other port 85 codes: IMPORTANT: Reboot the server after completing each numbered step. If the error condition continues, proceed with the next step. 1. Bring the server to base configuration by removing all components that are not required by the server to complete POST. For more information, see "Breaking the server down to the minimum hardware configuration (on page 18)." This process can include removing all: o Expansion boards o DIMMs, except the first bank o Hard drives o Peripheral devices IMPORTANT: Processor socket 1 and PPM slot 1 must be populated at all times or the server does not function properly. CAUTION: Before removing or replacing any processors, be sure to follow the guidelines provided in "Performing processor procedures in the troubleshooting process (on page 18)." Failure to follow the recommended guidelines can cause damage to the system board, requiring replacement of the system board. 2. Remove all processors and PPMs, except the processor installed in socket 1 and the corresponding PPM. 3. Install each remaining system component, rebooting between each installation to isolate any failed components. 4. Clear the system NVRAM. 5. Replace the system board. IMPORTANT: If replacing the system board or clearing NVRAM, you must re-enter the server serial number through RBSU ("Re-entering the serial number and product ID" on page 73). Error messages 184
-
 1
1 -
2
-
3
-
4
-
5
-
6
-
7
-
8
-
9
-
10
-
11
-
12
-
13
-
14
-
15
-
16
-
17
-
18
-
19
-
20
-
21
-
22
-
23
-
24
-
25
-
26
-
27
-
28
-
29
-
30
-
31
-
32
-
33
-
34
-
35
-
36
-
37
-
38
-
39
-
40
-
41
-
42
-
43
-
44
-
45
-
46
-
47
-
48
-
49
-
50
-
51
-
52
-
53
-
54
-
55
-
56
-
57
-
58
-
59
-
60
-
61
-
62
-
63
-
64
-
65
-
66
-
67
-
68
-
69
-
70
-
71
-
72
-
73
-
74
-
75
-
76
-
77
-
78
-
79
-
80
-
81
-
82
-
83
-
84
-
85
-
86
-
87
-
88
-
89
-
90
-
91
-
92
-
93
-
94
-
95
-
96
-
97
-
98
-
99
-
100
-
101
-
102
-
103
-
104
-
105
-
106
-
107
-
108
-
109
-
110
-
111
-
112
-
113
-
114
-
115
-
116
-
117
-
118
-
119
-
120
-
121
-
122
-
123
-
124
-
125
-
126
-
127
-
128
-
129
-
130
-
131
-
132
-
133
-
134
-
135
-
136
-
137
-
138
-
139
-
140
-
141
-
142
-
143
-
144
-
145
-
146
-
147
-
148
-
149
-
150
-
151
-
152
-
153
-
154
-
155
-
156
-
157
-
158
-
159
-
160
-
161
-
162
-
163
-
164
-
165
-
166
-
167
-
168
-
169
-
170
-
171
-
172
-
173
-
174
-
175
-
176
-
177
-
178
-
 179
179 -
 180
180 -
 181
181 -
 182
182 -
 183
183 -
 184
184 -
 185
185 -
 186
186 -
 187
187 -
 188
188 -
 189
189 -
190
-
191
-
192
-
193
-
194
-
195
-
196
-
197
-
198
-
199
-
200
-
201
-
202
-
203
-
204
 |
 |
