HP RP7 Maintenance & Service Guide HP RP7 Retail System Model 7800 - Page 82
Optional HP Retail RP7 VFD Customer Display, Installing the VFD Customer Display Without Poles
 |
View all HP RP7 manuals
Add to My Manuals
Save this manual to your list of manuals |
Page 82 highlights
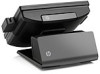
Optional HP Retail RP7 VFD Customer Display Description VFD customer display, pole VFD customer display, bracket VFD customer display, cable kit (includes USB power cable and VFD cable) Spare part number 702783-001 702784-001 702785-001 The integrated VFD customer display can be installed with no poles attached, or with one or two poles attached, depending on the desired height of the VFD. There are two recommended procedures for installing the VFD customer display: one procedure without poles attached and another procedure with poles attached. Installing the VFD Customer Display Without Poles 1. Prepare the computer for disassembly (Preparation for Disassembly on page 46). 2. Remove the rear I/O panel (Rear I/O Panel on page 49). 3. Remove the power supply cover (Power Supply Cover on page 47). 4. Remove the decorative panel (Decorative Panel (IMD) on page 48). 5. Route the VFD extension cable that was included with the VFD through the rear of the base and out the front of the base (1), then though the cable retainer (2). Connect the extension cable to the I/O cable included with the VFD (3) and connect the I/O cable to the 12V USB port on the RP7. 72 Chapter 8 Removal and Replacement Procedures
-
 1
1 -
2
-
3
-
4
-
5
-
6
-
7
-
8
-
9
-
10
-
11
-
12
-
13
-
14
-
15
-
16
-
17
-
18
-
19
-
20
-
21
-
22
-
23
-
24
-
25
-
26
-
27
-
28
-
29
-
30
-
31
-
32
-
33
-
34
-
35
-
36
-
37
-
38
-
39
-
40
-
41
-
42
-
43
-
44
-
45
-
46
-
47
-
48
-
49
-
50
-
51
-
52
-
53
-
54
-
55
-
56
-
57
-
58
-
59
-
60
-
61
-
62
-
63
-
64
-
65
-
66
-
67
-
68
-
69
-
70
-
71
-
72
-
73
-
74
-
75
-
76
-
 77
77 -
 78
78 -
 79
79 -
 80
80 -
 81
81 -
 82
82 -
 83
83 -
 84
84 -
 85
85 -
 86
86 -
 87
87 -
88
-
89
-
90
-
91
-
92
-
93
-
94
-
95
-
96
-
97
-
98
-
99
-
100
-
101
-
102
-
103
-
104
-
105
-
106
-
107
-
108
-
109
-
110
-
111
-
112
-
113
-
114
-
115
-
116
-
117
-
118
-
119
-
120
-
121
-
122
-
123
-
124
-
125
-
126
-
127
-
128
-
129
-
130
-
131
-
132
-
133
-
134
-
135
-
136
-
137
-
138
-
139
-
140
-
141
-
142
-
143
-
144
-
145
-
146
-
147
-
148
-
149
-
150
-
151
-
152
-
153
-
154
-
155
-
156
-
157
-
158
-
159
-
160
-
161
-
162
-
163
-
164
-
165
-
166
-
167
-
168
-
169
-
170
-
171
-
172
-
173
-
174
 |
 |
