IBM 8840 Installation Guide - Page 31
Installing, drive
 |
UPC - 000435863799
View all IBM 8840 manuals
Add to My Manuals
Save this manual to your list of manuals |
Page 31 highlights
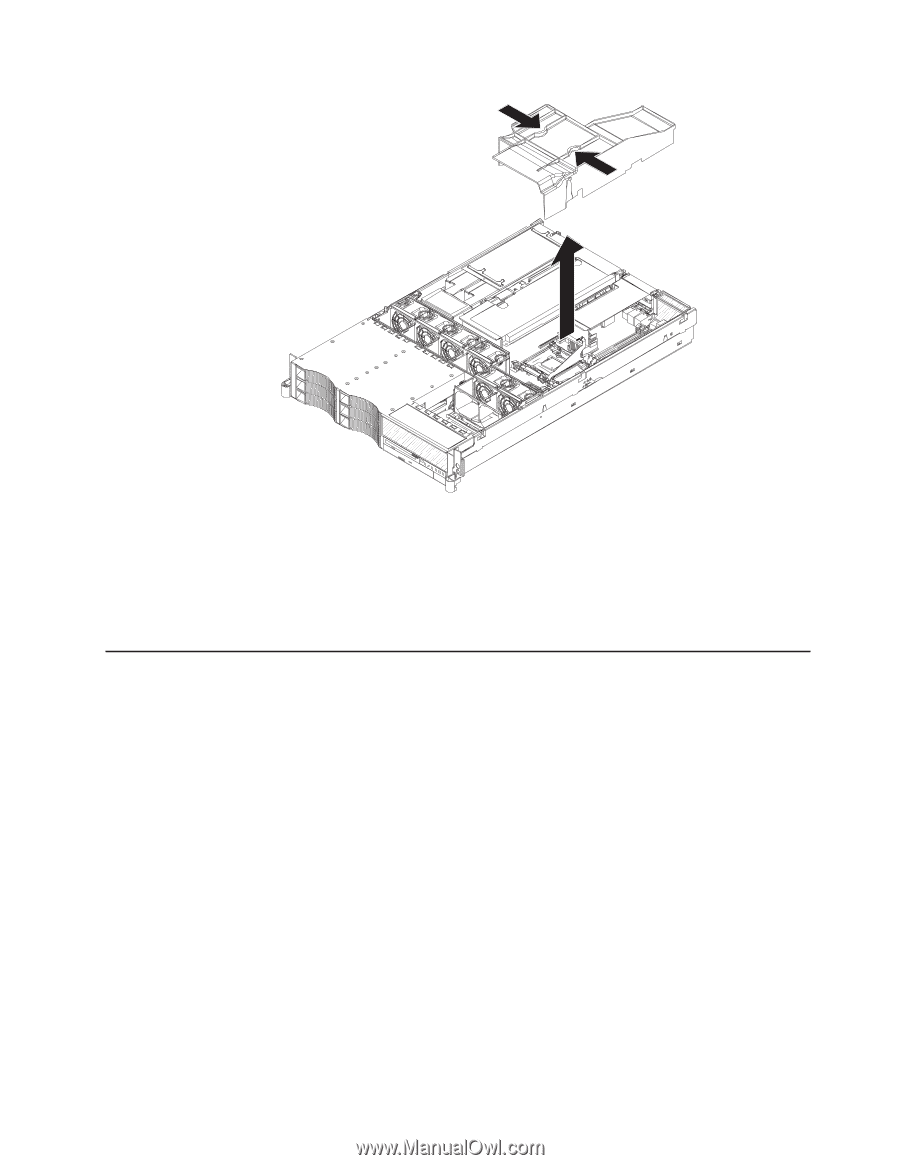
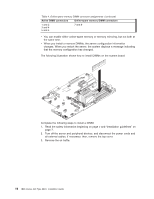
4. Determine the connectors into which you will install the DIMMs. 5. Install the DIMMs in the connectors. 6. If you have other options to install or remove, do so now. 7. Install the air baffle. 8. Replace the top cover. Go to "Completing the installation" on page 22. Installing a hard disk drive The following notes describe the types of hard disk drives that the server supports and other information that you must consider when installing hard disk drives: v The server supports six 1-inch (26 mm) slim, 3.5-inch low-voltage differential (LVD) hard disk drives installed on Ultra-Slim hard disk drive trays. For a list of supported hard disk drives, go to the ServerProven Web site at http://www.ibm.com/servers/eserver/serverproven/compat/us/. v All hot-swap drives in the server should have the same throughput speed rating. Mixing hard drives with different speed ratings will cause all drives to operate at the lower throughput speed. v The SCSI ID that is assigned to each bay is printed on the server front. The following illustration shows how to install a hot-swap hard disk drive. Chapter 2. Installing options 17
-
 1
1 -
2
-
3
-
4
-
5
-
6
-
7
-
8
-
9
-
10
-
11
-
12
-
13
-
14
-
15
-
16
-
17
-
18
-
19
-
20
-
21
-
22
-
23
-
24
-
25
-
 26
26 -
 27
27 -
 28
28 -
 29
29 -
 30
30 -
 31
31 -
 32
32 -
 33
33 -
 34
34 -
 35
35 -
 36
36 -
37
-
38
-
39
-
40
-
41
-
42
-
43
-
44
-
45
-
46
-
47
-
48
-
49
-
50
-
51
-
52
-
53
-
54
-
55
-
56
-
57
-
58
-
59
-
60
-
61
-
62
-
63
-
64
-
65
-
66
-
67
-
68
-
69
-
70
-
71
-
72
-
73
-
74
-
75
-
76
-
77
-
78
-
79
-
80
-
81
-
82
-
83
-
84
-
85
-
86
-
87
-
88
-
89
-
90
-
91
-
92
-
93
-
94
-
95
-
96
-
97
-
98
-
99
-
100
-
101
-
102
-
103
-
104
-
105
-
106
-
107
-
108
 |
 |