Intel S5500WB12V Product Specification - Page 62
Password Clear J1C2
 |
View all Intel S5500WB12V manuals
Add to My Manuals
Save this manual to your list of manuals |
Page 62 highlights
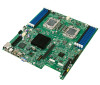
Configuration Jumpers Intel® Server Board S5500WB TPS 6. Perform the BMC firmware update procedure as documented in the README.TXT file included in the given BMC firmware update package. After successful completion of the firmware update process, the firmware update utility may generate an error stating the BMC is still in update mode. 7. Power down and remove the AC power cord. 8. Open the server chassis. 9. Move the jumper from the enabled position, covering pins 2 and 3 to the disabled position, covering pins 1 and 2. 10. Close the server chassis. 11. Reconnect the AC cord and power up the server. Note: Normal BMC functionality is disabled with the Force BMC Update jumper is set to the enabled position. You should never run the server with the BMC Force Update jumper set in this position. You should only use this jumper setting when the standard firmware update process fails. This jumper should remain in the default / disabled position when the server is running normally. The server board has several 3-pin jumper blocks that can be used to configure, protect, or recover specific features of the server board. 6.1.2 Password Clear (J1C2) The user sets this 3-pin jumper to clear the password. Jumper Position 1-2 2-3 Table 19. Password Clear Jumper Mode of Operation Note Normal Clear Password ICH10R INTRUDER# pin is pulled HIGH. Default position. ICH10R INTRUDER# pin is pulled LOW. 6.1.2.1 Clearing the Password 1. Power down server. Do not unplug the power cord. 2. Open the chassis. For instructions, see your server chassis documentation. 3. Move jumper (J1B6) from the default operating position, covering pins 1 and 2, to the password clear position, covering pins 2 and 3. 4. Close the server chassis. 5. Power up the server, wait 10 seconds or POST completes. 6. Power down the server. 7. Open the chassis and move the jumper back to default position, covering pins 1 and 2. 8. Close the server chassis. 9. Power up the server. The password is now cleared and you can reset it by going into the BIOS setup. 48 Revision 1.9 Intel order number E53971-008
-
 1
1 -
2
-
3
-
4
-
5
-
6
-
7
-
8
-
9
-
10
-
11
-
12
-
13
-
14
-
15
-
16
-
17
-
18
-
19
-
20
-
21
-
22
-
23
-
24
-
25
-
26
-
27
-
28
-
29
-
30
-
31
-
32
-
33
-
34
-
35
-
36
-
37
-
38
-
39
-
40
-
41
-
42
-
43
-
44
-
45
-
46
-
47
-
48
-
49
-
50
-
51
-
52
-
53
-
54
-
55
-
56
-
 57
57 -
 58
58 -
 59
59 -
 60
60 -
 61
61 -
 62
62 -
 63
63 -
 64
64 -
 65
65 -
 66
66 -
 67
67 -
68
-
69
-
70
-
71
-
72
-
73
-
74
-
75
-
76
-
77
-
78
-
79
-
80
-
81
-
82
-
83
-
84
-
85
-
86
-
87
-
88
-
89
-
90
-
91
-
92
-
93
-
94
-
95
-
96
-
97
-
98
-
99
-
100
-
101
-
102
-
103
-
104
-
105
-
106
-
107
-
108
-
109
-
110
-
111
-
112
-
113
-
114
-
115
-
116
-
117
 |
 |
