Intermec PX6i Intermec Printer Language (IPL) Developer's Guide (old) - Page 24
Editing Existing Fields, Sample Format, Field Editing Commands in the Sample Format
 |
View all Intermec PX6i manuals
Add to My Manuals
Save this manual to your list of manuals |
Page 24 highlights
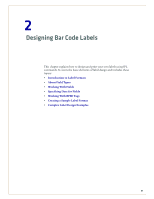
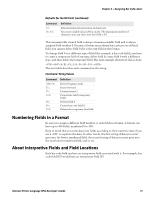
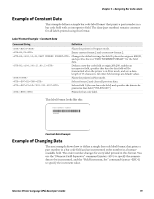
Chapter 2 - Designing Bar Code Labels Each interpretive field uses a field location from the available 400 fields. To avoid interference with other user-defined fields, interpretive fields are automatically assigned numbers beginning with the highest available field number. For example, if B33 is the first bar code field with interpretive text, then its interpretive field, I33, is assigned location 399. You can see how the printer uses the fields internally by uploading the format and examining where the interpretives appear. If you need to use more fields than IPL can accommodate in a single format (because of interpretive fields), you can use pages to combine several formats on one label. Editing Existing Fields You can change a specific field in a format by sending a command in Program mode. You can modify just the incorrect format fields instead of having to download the entire format again. When the printer is in Program mode, it uses a field pointer to point to the field to be modified. The pointer continues to point to the most recently selected field until you select a different format or field. For the next example, assume that you used the following format: Sample Format Command C P E3;F3; H0;o80,100;f0;c0;d0,16;h1;w1; H1;o80,120;f0;c0;d0,16;h1;w1; H2;o80,150;f0;c2;d0,14;h1;w1; H3;o80,190;f0;c2;d0,16;h1;w1; B4;o80,0;f0;c0,1;h50;w1;d0,11;i0;p@; R; Description Selects Advanced mode. Enters Program mode. Erases format 3, Creates format 3. Creates field H0. Creates field H1. Creates field H2. Creates field H3. Creates field B3. Saves and exits to Print mode. To change the height and width of field 3 to 2 dots, download this command string: P;F3;H3;h2;w2;R; The following table describes each command in this string: Field Editing Commands in the Sample Format Command P; F3; H3; h2; w2; R; Description Enters Program mode. Accesses format number 3 from memory. Accesses field 3. Sets the height to 2 dots. Sets the width to 2 dots. Returns to Print mode. 14 Intermec Printer Language (IPL) Developer's Guide
-
 1
1 -
2
-
3
-
4
-
5
-
6
-
7
-
8
-
9
-
10
-
11
-
12
-
13
-
14
-
15
-
16
-
17
-
18
-
 19
19 -
 20
20 -
 21
21 -
 22
22 -
 23
23 -
 24
24 -
 25
25 -
 26
26 -
 27
27 -
 28
28 -
 29
29 -
30
-
31
-
32
-
33
-
34
-
35
-
36
-
37
-
38
-
39
-
40
-
41
-
42
-
43
-
44
-
45
-
46
-
47
-
48
-
49
-
50
-
51
-
52
-
53
-
54
-
55
-
56
-
57
-
58
-
59
-
60
-
61
-
62
-
63
-
64
-
65
-
66
-
67
-
68
-
69
-
70
-
71
-
72
-
73
-
74
-
75
-
76
-
77
-
78
-
79
-
80
-
81
-
82
-
83
-
84
-
85
-
86
-
87
-
88
-
89
-
90
-
91
-
92
-
93
-
94
-
95
-
96
-
97
-
98
-
99
-
100
-
101
-
102
-
103
-
104
-
105
-
106
-
107
-
108
-
109
-
110
-
111
-
112
 |
 |
