Intermec PX6i Intermec Printer Language (IPL) Developer's Guide (old) - Page 29
Example of Constant Data, Label Format Example - Constant Data
 |
View all Intermec PX6i manuals
Add to My Manuals
Save this manual to your list of manuals |
Page 29 highlights
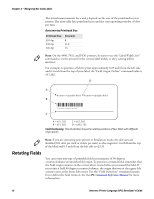
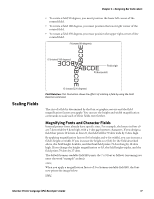
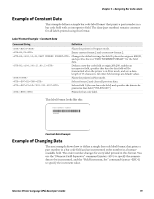
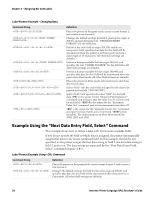
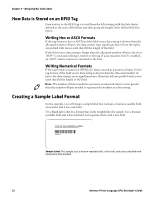
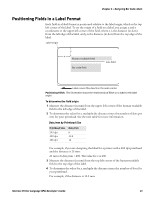
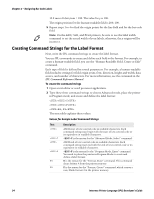
Chapter 2 - Designing Bar Code Labels Example of Constant Data This example defines a simple bar code label format that prints a part number in a bar code field with an interpretive field. The data (part number) remains constant for all labels printed using this format. Label Format Example - Constant Data Command String Definition P Places the printer in Program mode. E2;F2 Erases current format 2 and creates new format 2. H0;o200,50;d3,PART NUMBER FORMAT Changes the default settings for field 0: places the origin at 200,50, and specifies the text "PART NUMBER FORMAT" for the field data. B1;o200,200;i1;d0,13 Defines a new bar code field at origin 200,200, enables an interpretive field, specifies that data for this field will be transmitted when the printer is in Print mode, and sets a data length of 13 characters. All other field settings are default values. R Places the printer in Print mode. E2 Selects format 2 and clears all previous data. F1*999-999-999* Selects field 1 (the new bar code field) and specifies the data to be printed in that field (*999-999-999*). Prints the bar code label. This label format looks like this: PART NUMBER FORMAT *999-999-999* Constant Data Example Example of Changing Data The next example shows how to define a simple bar code label format that prints a part number in a bar code field and an incremented order number in a humanreadable field. The order number changes for every label printed in this format. You use the "Numeric Field Separator" command (syntax ) to specify the numeric data to be incremented, and the "Field Increment, Set" command (syntax I) to specify the increment value. Intermec Printer Language (IPL) Developer's Guide 19
-
 1
1 -
2
-
3
-
4
-
5
-
6
-
7
-
8
-
9
-
10
-
11
-
12
-
13
-
14
-
15
-
16
-
17
-
18
-
19
-
20
-
21
-
22
-
23
-
 24
24 -
 25
25 -
 26
26 -
 27
27 -
 28
28 -
 29
29 -
 30
30 -
 31
31 -
 32
32 -
 33
33 -
 34
34 -
35
-
36
-
37
-
38
-
39
-
40
-
41
-
42
-
43
-
44
-
45
-
46
-
47
-
48
-
49
-
50
-
51
-
52
-
53
-
54
-
55
-
56
-
57
-
58
-
59
-
60
-
61
-
62
-
63
-
64
-
65
-
66
-
67
-
68
-
69
-
70
-
71
-
72
-
73
-
74
-
75
-
76
-
77
-
78
-
79
-
80
-
81
-
82
-
83
-
84
-
85
-
86
-
87
-
88
-
89
-
90
-
91
-
92
-
93
-
94
-
95
-
96
-
97
-
98
-
99
-
100
-
101
-
102
-
103
-
104
-
105
-
106
-
107
-
108
-
109
-
110
-
111
-
112
 |
 |
