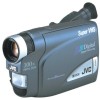
JVC GR-SX851U Instruction Manual
JVC GR-SX851U - Palm Size Compact Super VHS Camcorder Manual
 |
UPC - 046838158049
View all JVC GR-SX851U manuals
Add to My Manuals
Save this manual to your list of manuals |
JVC GR-SX851U manual content summary:
- JVC GR-SX851U | Instruction Manual - Page 1
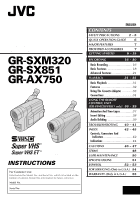
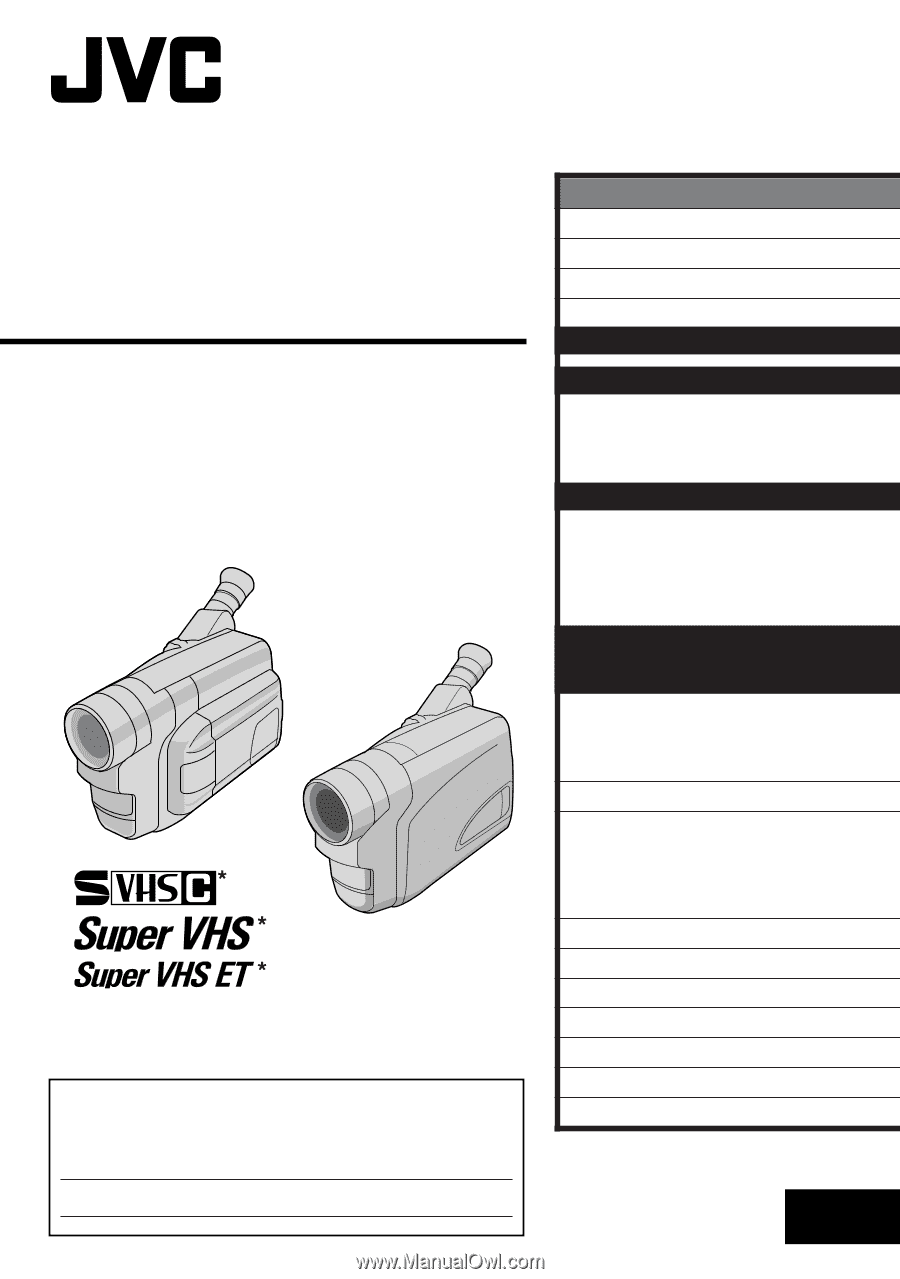
COMPACT VHS CAMCORDER GR-SXM320 GR-SX851 GR-AX750 * GR-SXM320/SX851 only INSTRUCTIONS For Customer Use: Enter below the Model No. and Serial No. which is located on the bottom of cabinet. Retain this information for future reference. Model No. Serial No. ENGLISH CONTENTS SAFETY PRECAUTIONS 2 - 5 - JVC GR-SX851U | Instruction Manual - Page 2
JVC Compact VHS camcorder. Before use, please read the safety information and precautions contained in the following pages to ensure safe use of this product. Using This Instruction Manual (OR BACK). NO USER-SERVICEABLE PARTS INSIDE. REFER SERVICING TO QUALIFIED SERVICE PERSONNEL. The lightning flash - JVC GR-SX851U | Instruction Manual - Page 3
waste stream, which may be illegal in your area. Please call 1-800-8-BATTERY™ for information on Ni-Cd battery recycling and disposal bans/restrictions in your area. JVC's involvement in this program is part of our commitment to preserving our environment and conserving our natural resources. When - JVC GR-SX851U | Instruction Manual - Page 4
servicing. ATTENTION: Follow and obey all warnings and instructions marked on your product and its operating instructions. For your safety, please read all the safety and operating instructions before you operate this product and keep this manual of the mast and supporting structure, grounding of the - JVC GR-SX851U | Instruction Manual - Page 5
product through openings as they may touch dangerous voltage points or short-out parts that could result in a fire or electric shock. Never spill liquid by following the detailed procedure in its operating instructions, do not attempt to service it yourself as opening or removing covers may expose - JVC GR-SX851U | Instruction Manual - Page 6
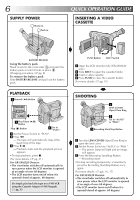
GUIDE INSERTING A VIDEO CASSETTE BATTERY RELEASE Using the battery pack Hook its end to the camcorder and push the battery pack in until it locks in place . (Charging procedure, ੬ pg. 8) To remove the battery pack Slide BATTERY pgs. 16, 17) For GR-SXM320 Owners: •The viewfinder switches off - JVC GR-SX851U | Instruction Manual - Page 7
VHS-ET (GR-SXM320/ SX851 only) (੬ pg. 13) Digital Hyper Zoom (੬ pg. 18) PROVIDED ACCESSORIES • AC Power Adapter/ Charger AA-V16U •Cassette Adapter (VHS Playpak) C-P7U •Battery I T * "DEMO MODE" remains "ON" even if the camcorder power is turned off. Setting Menu NOTE: When a tape whose Erase - JVC GR-SX851U | Instruction Manual - Page 8
the most appropriate source of power. Do not use provided power supply units with other equipment. CHARGING THE BATTERY PACK 1 Make sure you unplug the camcorder's DC cord from the AC Power Adapter/Charger. Plug the AC Adapter/ Charger's power cord into an AC outlet. 2 Align the marks and slide the - JVC GR-SX851U | Instruction Manual - Page 9
the VU-V856KIT's instruction manuals before using. It is impossible to charge the BN-V856U battery pack using the provided AC Power Adapter/Charger. Use the optional AA-V80U AC Power Adapter/ Charger. 9 EN USING THE BATTERY PACK Hook its end to the camcorder and push the battery pack in until it - JVC GR-SX851U | Instruction Manual - Page 10
power supply unit (battery pack, AC Power Adapter/Battery Charger, etc.). 2 Pull out the battery holder to remove it from the camcorder. 3 Insert the battery in the holder, it locks into place. 5 Close the LCD monitor (GR-SXM320 only). NOTES: ● Closing the LCD monitor while the cassette holder is still - JVC GR-SX851U | Instruction Manual - Page 11
reappears with the highlight bar on "RETURN". 7 Press the Select Wheel to close the Menu Screen. NOTE: To display the date and time in the camcorder's display and on a connected TV, see "Date/Time Insert" (੬ pg. 26). - JVC GR-SX851U | Instruction Manual - Page 12
12 EN Select Wheel SP/EP Recording Mode Button Power Switch MENU Button GETTING STARTED (cont.) Recording Mode Setting Set depending on your preference. 1 Set the Power Switch to "AUTO" or "PRO.". Press SP/ EP for more than 1 second. "SP" (Standard Play) provides higher picture and sound quality - JVC GR-SX851U | Instruction Manual - Page 13
ET OF F TAPE LENGTH T 3 0 Menu Screen 4RE T URN S-VHS ET ON OF F When an S-VHS cassette is loaded: S-VHS Setting Menu EX I T TELE MACRO OF F TAPE LENGTH T 3 0 4RE T URN Normal Screen Menu Screen EN13 Recording Format Setting (GR-SXM320/ SX851 only) Set the recording format according to the - JVC GR-SX851U | Instruction Manual - Page 14
jitter or noise, use a cleaning cassette. Compatibility Between S-VHS And VHS (GR-SXM320/SX851 only) Recording Playback Blank tape S-VHS-C cassette VHS-C cassette Camcorder Recorded tape Cassette adapter S-VHS recordings VHS recordings S-VHS VCR VHS VCR with SQPB function •The recorded format - JVC GR-SX851U | Instruction Manual - Page 15
the Power Switch to "CAMERA" ("AUTO" or "PRO."). 2 Adjust the viewfinder manually for best viewability. 3 Turn the Diopter Adjustment Control until the indications in the viewfinder extend its legs fully to stabilize the camcorder. To prevent damage to the unit caused by falling over, do not use a small - JVC GR-SX851U | Instruction Manual - Page 16
the Recording Start/Stop Button. The camcorder re-enters the Record-Standby mode. Shooting While Watching The LCD Monitor (GR-SXM320 only) 1 Make sure the camcorder re-enters the Record-Standby mode. Power Switch Position AUTO : Suitable for standard recording using NO special effects or manual - JVC GR-SX851U | Instruction Manual - Page 17
monitor switches on and the viewfinder switches off automatically to save power (GR-SXM320 only). ● The cassette holder cannot be opened unless a power supply indications appear/disappear from the camcorder's display: cassette warning, tape remaining time, battery pack remaining power indicator - JVC GR-SX851U | Instruction Manual - Page 18
Zooming. In this case, set the zoom while in Record-Standby, lock the focus by using the manual focus (੬ pg. 29), then zoom in or out in Record mode. ● The zoom level . ● Switch off the Picture Stabilizer when recording with the camcorder on a tripod. ● The " " indicator appears blinking if the - JVC GR-SX851U | Instruction Manual - Page 19
Button Display PAUSE 5S 5 Sec. Rec mode indicator EN19 FEATURE: Quick Review PURPOSE: To check the end of the last recording. OPERATION: 1) : Retake PURPOSE: To re-record certain segments. OPERATION: 1) Make sure the camcorder is in the Record-Standby mode. 2) Press and hold either RETAKE to reach - JVC GR-SX851U | Instruction Manual - Page 20
consult your nearest JVC dealer for replacing the video light. RECORDING Basic Features (cont.) FEATURE: Video Light (GR-SXM320/SX851 only) off to save battery power. NOTES: ● Even if the battery indicator ( ) does not blink if the battery pack's charge is low, the camcorder may turn off - JVC GR-SX851U | Instruction Manual - Page 21
RECORDING Advanced Features EN21 Fade/Wipe Effects EFFECT Button These effects let you make pro-style scene transitions. Fade- or wipe-in works at recording start, and fade- or wipe-out works at recording end or when you enter Record-Standby mode. 1 Set the Power Switch to "PRO.". Power Switch - JVC GR-SX851U | Instruction Manual - Page 22
following happens when Twilight mode is selected: •Auto gain control is turned off. •White Balance is set to " :FINE" (day mode), but can also be manually changed to another mode (੬ pg. 30). •Auto Focus becomes available only in the range of 10 m (32 ft.) to infinity. To focus when the subjectto - JVC GR-SX851U | Instruction Manual - Page 23
FRENCH 06 OF F 4RE T URN Normal Screen EN23 Using Menus For Detailed Adjustment This camcorder is equipped with an easy-to-use, on-screen menu system that simplifies many of the more detailed camcorder settings. 1 Set the Power Switch to "PRO - JVC GR-SX851U | Instruction Manual - Page 24
28). M.W.B. WIDE Refer to "White Balance Adjustment" and "Manual White Balance Operation" (੬ pg. 30). OFF Does not . Makes the date/time settings appear in the camcorder or on a connected monitor (੬ pg. 26). ), to a maximum of 400X (GR-SXM320)/300X (GR-SX851/AX750) digital magnification. Digital - JVC GR-SX851U | Instruction Manual - Page 25
in the position that allows recording is loaded in the camcorder, demonstration is not available. OFF Automatic demonstration will not take place. *S-VHS ET is displayed when a VHS cassette is loaded, and S-VHS is displayed when an S-VHS cassette is loaded (੬ pg. 13). If a cassette is not loaded - JVC GR-SX851U | Instruction Manual - Page 26
26 EN RECORDING Advanced Features (cont.) Date/Time Insert Allows you to display the date and time in the camcorder or on a connected color monitor, as well as to record them manually or automatically. You should have already performed the Date/ Time Setting procedure (੬ pg. 11). 1 Set the Power - JVC GR-SX851U | Instruction Manual - Page 27
then set "REC TIME" and "INT. TIME" in the Menu Screen to "OFF". NOTES (for Animation and Time-Lapse): ● For best results, make sure the camcorder is secured when shooting in Animation or Time-Lapse mode. ● Fade- or wipe-in/out cannot be performed during Animation or Time-Lapse shooting. ● Before - JVC GR-SX851U | Instruction Manual - Page 28
at the beach or when skiing. •When the background is overly dark or the subject light. Power Switch 1 Set the Power Switch to "PRO.". Manual Exposure Screen 00 Exposure control level counter 2 Press the Select Wheel to display the Menu Screen. 3 Rotate the Select Wheel to move the highlight bar - JVC GR-SX851U | Instruction Manual - Page 29
zoomed in in the auto focus mode, the camcorder could automatically zoom out depending on the distance between the camcorder and the subject. This does not occur with be obtainable in the situations listed below (in these cases use manual focusing): •When two subjects overlap in the same scene. • - JVC GR-SX851U | Instruction Manual - Page 30
camcorder operators control this function manually Menu appears. Perform Manual White Balance when shooting is used. "MWB" White balance is set manually. 5 Press the Select Wheel. The Menu such a case, adjust focus manually (੬ pg. 29). ● A manually, the setting is retained even if the power is - JVC GR-SX851U | Instruction Manual - Page 31
rewind, or 3 to fast-forward the tape during Stop mode. NOTES: ● The camcorder shuts off automatically after about 5 minutes in Stop mode. To turn on again, switches on and the viewfinder switches off automatically to save power (GR-SXM320 only). ● The playback picture can be viewed in the - JVC GR-SX851U | Instruction Manual - Page 32
, the indication disappears. ● When noise bars appear during playback, the camcorder enters the Auto Tracking mode and "AT" is displayed. ● Manual Tracking may not work with tapes recorded on other VCRs or camcorders. TBC (Time Base Corrector): Removes jitter from fluctuating video signals to - JVC GR-SX851U | Instruction Manual - Page 33
The Cassette Adapter EN33 Cassette Adapter (VHS Playpak) Use this to play back an S-VHS-C/VHS-C video cassette recorded with this camcorder on a VHS VCR. It is fully compatible with any S-VHS/VHS video cassette recorder. The C-P7U adapter is battery powered and automatically performs tape loading - JVC GR-SX851U | Instruction Manual - Page 34
These are some basic types of connections. When making connections, refer also to your VCR and TV instruction manuals. A. Connection to a TV or VCR equipped with an S-VIDEO IN and A/V input connectors (GR-SXM320/SX851 only) TV To Audio Output Audio cable (optional) To AUDIO IN S-Video cable - JVC GR-SX851U | Instruction Manual - Page 35
instruction manual. 4 Turn on the camcorder, Charger as the power supply instead of the battery pack (੬ pg. 9). ● If your VCR has an S-Video input connector, connect the camcorder GR-SXM320/SX851 only). ● To monitor the picture and sound from the camcorder without inserting a tape, set the camcorder - JVC GR-SX851U | Instruction Manual - Page 36
until you hear a click. •Read the caution concerning lithium batteries (੬ pg. 2). Buttons 1 PAUSE IN Connector* 2 Infrared Review (੬ pg. 19) - - Rewind, Reverse Shuttle Search (੬ pg. 31) Pause (੬ pg. 31) Playback start (੬ pg. 31) Functions same as the Recording Start/Stop button on the camcorder - JVC GR-SX851U | Instruction Manual - Page 37
Transmitted beam effective area Remote sensor When using the remote control, be sure to point it at the remote sensor. The illustration shows the approximate transmitted beam effective area for indoor use. The transmitted beam may not be effective or may cause incorrect operation outdoors or when - JVC GR-SX851U | Instruction Manual - Page 38
38 EN USING THE REMOTE CONTROL UNIT (GR-SXM320/SX851 ony) (cont.) Insert Editing You can record a new PAUSE. The Insert Editing indicator appears and the Insert Editing mode is engaged. When the scene the camcorder is aimed at appears on the screen, go to the next step. 6 To begin Insert Editing, - JVC GR-SX851U | Instruction Manual - Page 39
. The Audio DubStandby mode is engaged. 3 To begin Audio Dubbing, press PLAY. When the counter reaches "0:00:00", Audio Dubbing stops automatically and the camcorder enters the Audio Dub-Standby mode. 4 To end Audio Dubbing, press STOP. NOTES: ● Do not press FF or REW during Audio Dub-Standby, or - JVC GR-SX851U | Instruction Manual - Page 40
40 EN TROUBLESHOOTING If, after following the steps in the chart below, the problem still exists, please consult your JVC dealer. The camcorder is a microcomputer-controlled device. External noise and interference (from a TV, a radio, etc.) might prevent it from functioning properly. In such - JVC GR-SX851U | Instruction Manual - Page 41
picture is blurred in the Quick Review or Retake mode. An error number appear (੬ pg. 17). ● The battery pack is running low. ● If the (੬ pg. 12). ● Turn the camcorder's power off, then disconnect the power source appears in the viewfinder, consult your nearest JVC dealer. ● The diopter needs to be - JVC GR-SX851U | Instruction Manual - Page 42
42 EN 1 i INDEX Controls, Connectors And Indicators 2 3 456 up E R q Y o we r W Q t & * y( T Model with LCD monitor ) 7 8 9 0 ! @ # $ ^ % UI Model without LCD monitor ) - JVC GR-SX851U | Instruction Manual - Page 43
R] ..... ੬ pg. 19 •Quick Review Button [ R pg. 19 •Rewind pg. 23 •Bright Dial [BRIGHT] (GR-SXM320 only pg. 16, 31 $ MENU JVC dealer. •JLIP-controlled editing from camcorder to VCR is not possible if the VCR is not equipped with a J terminal. Indicators y Power Lamp pg. 16 Other Parts u Battery - JVC GR-SX851U | Instruction Manual - Page 44
4 5 7 8 9 0 ! @ # $ 1 2 0M I N S-ET T40 REC EP 444 TW I L I GHT +0 2 S - VHS REC. MWB PAUSE 5M I N 1 / 2S BR I GHT - - - - - -6- - - - - + CONGRATULAT I ONS DEC 2 • 5 Sec. Rec Mode Indicator pg. 19 @ Bright Level Indicator (GR-SXM320 only pg. 16 # Instant Title Display pg. 26 $ Date - JVC GR-SX851U | Instruction Manual - Page 45
3 Recording Format Indicator (S/S-ET) (GR-SXM320/SX851 only pg. 13 4 battery with a new one. (੬ pg. 10) Appears when the tape ends during recording, playback or fast-forward. (੬ pg. 17) Blinks for approx. 5 seconds when the camcorder , consult your nearest JVC dealer. The error indications - JVC GR-SX851U | Instruction Manual - Page 46
Charger not place the camcorder into the carrying JVC dealer for replacing the video light. INFORMATION This device complies with Part the user is battery use. When misused, battery can leak or explode. 1. Refer to the C-P6U/C-P7U instructions when replacing the battery. 2. Do not expose the battery - JVC GR-SX851U | Instruction Manual - Page 47
battery pack or an optional battery pack, be sure to read the following cautions: 1. To avoid hazard . . . ... do not burn. ... do not short-circuit the terminals. ... do not modify or disassemble. ... use only specified chargers. Terminals 2. To prevent damage and prolong service the VHS-C mark - JVC GR-SX851U | Instruction Manual - Page 48
battery pack or disconnect the power supply while the power is on. ... leave the battery pack attached when the camcorder the camcorder with the LCD monitor on the bottom. 2. To prolong service the head drum of a camcorder when it is moved camcorder itself. Serious malfunctioning If malfunctioning occurs, stop - JVC GR-SX851U | Instruction Manual - Page 49
Battery pg. 9 Cassette Adapter pg. 33 Charge Marker pg. 8 Charging The Battery Pack pg. 8 Clean The Camcorder pg. 50 Clock (Lithium) Battery A Tape pg. 10 EN49 M Manual Focus pg. 29 Menu Screen pg. pg. 7 Q Quick Review pg. 19 R Recording LX pg. 24 Super VHS Expansion Technology pg. 13 - JVC GR-SX851U | Instruction Manual - Page 50
EN LENS COVER Open/Close Ring BATTERY RELEASE Set to "OFF". USER MAINTENANCE After Use 1 Turn off the camcorder. 2 Open the LCD monitor* clockwise. *GR-SXM320 only. NOTES: ● Avoid using strong cleaning agents such as benzine or alcohol. ● Cleaning should be done only after the battery pack has - JVC GR-SX851U | Instruction Manual - Page 51
Charger BH-VC10U • Audio/Video Cable • S-Video Cable QAM0004-004 • Car Battery Cord AP-V7U • Compact S-VHS ( ) Cassettes ST-C-40/30/20 • Compact VHS ( ) Cassettes TC-40/30/20 • Active Carrying Bag CB-V7U Some accessories are not available in some areas. Please consult your nearest JVC - JVC GR-SX851U | Instruction Manual - Page 52
un mal funcionamiento. Para la extracción de la batería deslice BATTERY RELEASE y extraiga la batería. Tiempo de grabación aproximado ( GR-SX851 3 Cuando utilice GR-AX750 INFORMACION: El VU-V856KIT es un juego compuesto de la batería BN-V856U y del cargador/adaptador de CA AA-V80U. Lea los manuales - JVC GR-SX851U | Instruction Manual - Page 53
consulte a su concesionario local de JVC. ALIMENTACION A Enganche. B Empuje. INSERCION DEL CASSETTE DE VIDEO BATTERY RELEASE Utilización de la batería de VHS utilizando el adaptador de cassette (VHS Playpak). ੬ p. 33 Botón PUSH Conmutador EJECT 1 Abra el monitor LCD completamente (GR-SXM320 - JVC GR-SX851U | Instruction Manual - Page 54
your JVC product, you may contact your local JVC Dealer. Or from the 48 Continental United States call toll free: 1-800-882-2345. Don't service it yourself. CAUTION To prevent electrical shock, do not open the cabinet. No user serviceable parts inside. Refer servicing to qualified service personnel - JVC GR-SX851U | Instruction Manual - Page 55
JVC to render such service, or if affixed to any attachment not provided with the products, or if the model or serial number has been altered, tampered with, defaced or removed; 2. Initial installation and installation and removal for repair; 3. Operational adjustments covered in the Owner's Manual - JVC GR-SX851U | Instruction Manual - Page 56
EN GR-SXM320 GR-SX851 GR-AX750 VICTOR COMPANY OF JAPAN, LIMITED COPYRIGHT© 2000 VICTOR COMPANY OF JAPAN, LTD. U Printed in Japan * * 1299MKV UN YP
-
 1
1 -
 2
2 -
 3
3 -
 4
4 -
 5
5 -
 6
6 -
 7
7 -
8
-
9
-
10
-
11
-
12
-
13
-
14
-
15
-
16
-
17
-
18
-
19
-
20
-
21
-
22
-
23
-
24
-
25
-
26
-
27
-
28
-
29
-
30
-
31
-
32
-
33
-
34
-
35
-
36
-
37
-
38
-
39
-
40
-
41
-
42
-
43
-
44
-
45
-
46
-
47
-
48
-
49
-
50
-
51
-
52
-
53
-
54
-
55
-
56
 |
 |
LYT0465-001A
EN
COMPACT
VHS CAMCORDER
INSTRUCTIONS
GR-SXM320
GR-SX851
GR-AX750
For Customer Use:
Enter below the Model No. and Serial No. which is located on the
bottom of cabinet. Retain this information for future reference.
Model No.
Serial No.
ENGLISH
CONTENTS
SAFETY PRECAUTIONS
2 – 5
QUICK OPERATION GUIDE
6
MAJOR FEATURES
7
PROVIDED ACCESSORIES
7
GETTING STARTED
8 – 15
RECORDING
16 – 30
Basic Recording
..........................
16
Basic Features
...........................
18
Advanced Features
......................
21
PLAYBACK
31 – 35
Basic Playback
...........................
31
Features
..................................
32
Using The Cassette Adapter
...........
33
Connections
...............................
34
USING THE REMOTE
CONTROL UNIT
(GR-SXM320/SX851 only)
36 – 39
Animation And Time-Lapse
.............
37
Insert Editing
.............................
38
Audio Dubbing
...........................
39
TROUBLESHOOTING
40 – 41
INDEX
42 – 45
Controls, Connectors And
Indicators
...............................
42
Indications
................................
44
CAUTIONS
46 – 47
TERMS
48
USER MAINTENANCE
50
SPECIFICATIONS
51
ESPAÑOL
52 – 53
FOR SERVICING (Only in U.S.A.)
54
WARRANTY (Only in U.S.A.)
55
* GR-SXM320/SX851 only