JVC GR-SX851U Instruction Manual - Page 6
Quick Operation Guide
 |
UPC - 046838158049
View all JVC GR-SX851U manuals
Add to My Manuals
Save this manual to your list of manuals |
Page 6 highlights
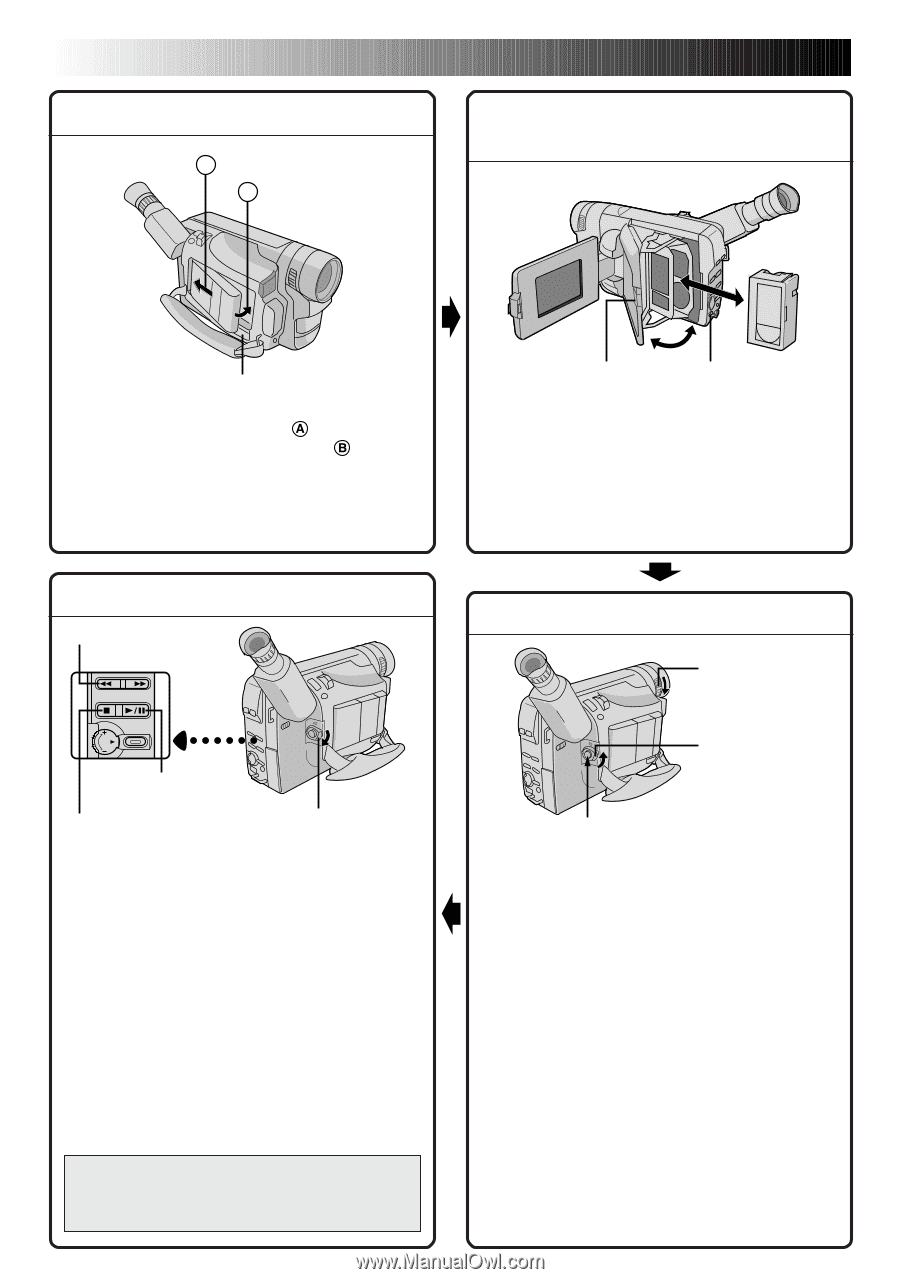
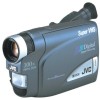
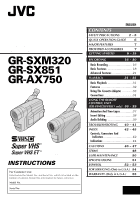
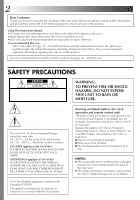
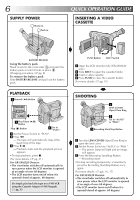
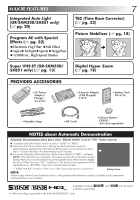
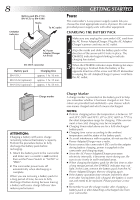
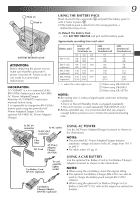
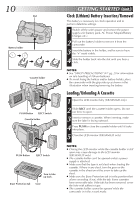
6 EN SUPPLY POWER A Hook on. B Push in. QUICK OPERATION GUIDE INSERTING A VIDEO CASSETTE BATTERY RELEASE Using the battery pack Hook its end to the camcorder and push the battery pack in until it locks in place . (Charging procedure, ੬ pg. 8) To remove the battery pack Slide BATTERY RELEASE and pull out the battery pack. PLAYBACK 2 Rewind (2) Button 3 Play/Pause (4/6) Button Stop (5) Button 1 Set to "PLAY". 1 Set the Power Switch to "PLAY". 2 Press 2. - The tape will automatically stop at the beginning of the tape. 3 Press 4/6. - Playback starts and the playback picture appears. •To stop playback, press 5. (For more details, ੬ pg. 31.) For GR-SXM320 Owners: •The viewfinder switches off automatically to save power when the LCD monitor is opened at an angle of over 60 degrees. •The LCD monitor turns on/off when it is opened/closed at approx. 60 degrees. Or simply play back the tape on a VHS VCR using the Cassette Adapter (VHS Playpak). ੬ pg. 33 PUSH Button EJECT Switch 1 Open the LCD monitor fully (GR-SXM320 only). 2 Slide EJECT to open the cassette holder. 3 Insert a video cassette. 4 Press PUSH to close the cassette holder. (For more details, ੬ pg. 10) SHOOTING 1 LENS COVER Open/Close Ring 2 Set to "AUTO" or "PRO.". 3 Recording Start/Stop Button 1 Turn the LENS COVER Open/Close Ring to open the lens cover. 2 Set the Power Switch to "AUTO" or "PRO.". - The power lamp will light and an image will appear. 3 Press the Recording Start/Stop Button. - Recording starts. •To stop recording temporarily, momentarily press the Recording Start/Stop Button once again. (For more details, ੬ pgs. 16, 17) For GR-SXM320 Owners: •The viewfinder switches off automatically to save power when the LCD monitor is opened at an angle of over 60 degrees. •The LCD monitor turns on/off when it is opened/closed at approx. 60 degrees.
-
 1
1 -
 2
2 -
 3
3 -
 4
4 -
 5
5 -
 6
6 -
 7
7 -
 8
8 -
 9
9 -
 10
10 -
 11
11 -
 12
12 -
13
-
14
-
15
-
16
-
17
-
18
-
19
-
20
-
21
-
22
-
23
-
24
-
25
-
26
-
27
-
28
-
29
-
30
-
31
-
32
-
33
-
34
-
35
-
36
-
37
-
38
-
39
-
40
-
41
-
42
-
43
-
44
-
45
-
46
-
47
-
48
-
49
-
50
-
51
-
52
-
53
-
54
-
55
-
56
 |
 |