Kenmore 9787 Use and Care Guide
Kenmore 9787 - Elite HE3 7.0 cu. Ft. Gas Dryer Manual
 |
View all Kenmore 9787 manuals
Add to My Manuals
Save this manual to your list of manuals |
Kenmore 9787 manual content summary:
- Kenmore 9787 | Use and Care Guide - Page 1
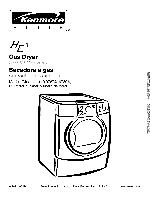
E L ! T E ® Gas Dryer Secadora a gas Models/Modelos 110.97875, 97895, 5 = color number/nOmero de color W10114658B Sears Roebuck and Co., Hoffman Estates, I L 6017g U.S.A. www.sears.com - Kenmore 9787 | Use and Care Guide - Page 2
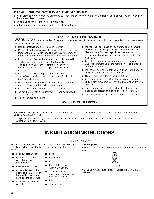
Dryer Interior ...Removing Accumulated Lint ...Vacation and Moving Care ...Changing the Drum Light ...TROUBLESHOOTING ...PROTECTION AGREEMENTS ...SERVICE NUMBERS ...2 3 4 4 5 5 7 8 9 10 12 12 12 12 13 13 15 16 16 17 17 17 17 18 18 20 20 20 21 21 22 22 22 22 22 23 23 23 25 KENMORE ELITE instructions - Kenmore 9787 | Use and Care Guide - Page 3
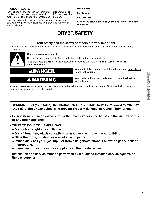
service more quickly whenever you contact Sears concerning your appliance, Model number Serial number Purchase date Save these instructions reference. and your sales receipt for future DRYER if the instructions are not followed. I WARNING: For your safety, the information in this manual must be - Kenmore 9787 | Use and Care Guide - Page 4
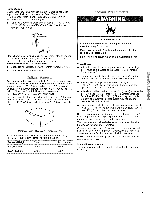
precautions, including the following: • • Read all instructions before using the dryer. [] Do not repair or replace any part of the dryer or attempt any servicing unless specifically recommended in this Use and Care Guide or in published user-repair instructions that you understand and have the - Kenmore 9787 | Use and Care Guide - Page 5
either side of the dryer. See "Electrical Requirements." A sturdy floor to support the total dryer weight of 200 Ibs dryer must not be installed or stored in an area where it will be exposed to water and/or weather. Optional pedestal (15.5" [39.4 cm] model shown) Check code requirements. Some codes - Kenmore 9787 | Use and Care Guide - Page 6
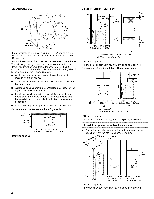
spacing for recessed area or closet installation The following spacing dimensions are recommended for this dryer. This dryer has been tested for servicing. Additional clearances might be required for wall, door and floor moldings. Additional spacing should be considered on all sides of the dryer - Kenmore 9787 | Use and Care Guide - Page 7
this dryer be provided. \'__j'j '_,},_i _ii,i_ jj _ -76" / {193 crn) GROUNDING INSTRUCTIONS (14cm with all local codes and ordinances. WARNING service representative or personnel if you are in doubt as to whether the dryer is properly grounded. Do not modify the plug provided with the dryer - Kenmore 9787 | Use and Care Guide - Page 8
be installed within 6 feet (1.8 m) of the dryer in accordance with the National Fuel Gas Code, ANSI Z223.1. The location should be easy to include: licensed heating personnel, authorized gas company personnel, and authorized service personnel. Failure to de so can result in death, explosion, or - Kenmore 9787 | Use and Care Guide - Page 9
and supported Flexible metal vent must be fully extended when the dryer is to follow or fire. these instructions can result in death Elbows 45 ° dryer MUST BE EXHAUSTED OUTDOORS. IMPORTANT: Observe all governing codes and ordinances. The dryer Review Vent system chart. Modify existing vent - Kenmore 9787 | Use and Care Guide - Page 10
angled hood style (shown here) is acceptable. 4" Optional exhaust installations This dryer can be converted to exhaust out the right side, left side, or Failure to follow these instructions can result in death, fire, electrical shock, or serious injury. problems and health problems. A B A. - Kenmore 9787 | Use and Care Guide - Page 11
close-clearance installations are shown. Refer to the manufacturer's instructions. vent path and most Select the route that will • Over-the-Top Installation: Part Number 26-49900 • Periscope Installation (For use with dryer vent to wall vent mismatch): Part Number 26-49901 - Less than 5" (12.7 cm - Kenmore 9787 | Use and Care Guide - Page 12
exhaust hood. Connect vent to exhaust hood. Vent must fit inside exhaust hood. Secure vent to exhaust hood with 4" (10.2 cm) clamp. Run vent to dryer location. Use the straightest path possible. See "Determine vent path" in "Plan Vent System." Avoid 90 ° turns. Use clamps to seal all joints. Do not - Kenmore 9787 | Use and Care Guide - Page 13
in the supply line. The valve is open when the handle is parallel to the gas pipe. A. Dryer front panel B. Dryer door C. Screws A. Closed valve B. Open valve 4. 3, Remove the door. Lay the dryer door on a flat, protected surface with the inside door assembly facing up. Remove the 5 screws to - Kenmore 9787 | Use and Care Guide - Page 14
Reverse the hinge 1. Place the inner door, screw head side up, on the work space. 2. Remove the 4 hinge screws that hold the hinge to the door and remove hinge. A _... Reverse the door handle 1. 2. Place the outer door assembly face down on work space. Remove the 6 screws that hold the intermediate - Kenmore 9787 | Use and Care Guide - Page 15
the door and discard. Find label provided with the Use and Care Guide and apply over original hinge holes. 1. 2. 3. 4. Check that follow fire, or electrical A. Dryer door B. Dryer front panel C. Insert this hinge screw first. 3 prong outlet. prong. these instructions shock. can result in death, - Kenmore 9787 | Use and Care Guide - Page 16
on a clothesline or by using an Air Cycle. Failure to follow or fire. these instructions can result in death Follow these basic steps to start your dryer. Please refer to specific sections of this manual for more detailed information. 1. 2. 3. Clean lint screen before each load. See "Cleaning the - Kenmore 9787 | Use and Care Guide - Page 17
a fabric softener sheet. Follow package instructions. To reduce wrinkling, remove the load from the dryer as soon as tumbling stops. This or Timed Cycles Preset Settings chart (in the "Cycles" section) for a guide to drying various loads. • Drying temperature and Dryness Level are preset when you - Kenmore 9787 | Use and Care Guide - Page 18
In an Auto Cycle, if a wet item is not detected after 5 minutes, the dryer will run for a preset minimum run time (based on the selected cycle and dryness Wet light will glow green after 5 minutes and remain on until the dryer enters Cool Down. Auto Cycles Auto Cycles allow you to match the cycle - Kenmore 9787 | Use and Care Guide - Page 19
as clothes packed in a suitcase or items wrinkled from being left in the dryer too long. Air Fluff Rotate the dial to Air Fluff to use this low temperature setting. Timed Dry can also be used with the Tumble Free Heated Dryer Rack. EXPRESS DRY TM Use this cycle for drying small loads or loads that - Kenmore 9787 | Use and Care Guide - Page 20
Cycles. Adjust rimedCycle ¢' {_}Orum Light O WRINKLE GUARD _ WRINKLE GUARD ® helps smooth out wrinkles that form when you cannot unload the dryer promptly at the end of a cycle. During this option, the dryer stops tumbling and then tumbles again for a brief period Press WRINKLE GUARD ®to get - Kenmore 9787 | Use and Care Guide - Page 21
in the cycle by pressing More Time or Less Time. Start the dryer. End of Cycle Signal The End of Cycle Signal produces an audible remove any lint accumulated from items dried on the rack after the cycle is finished. Dryer Rack Cycle Timed Dry Temp. Low Time* 60 Cycle Signal ...HOLD t NLOCK }O - Kenmore 9787 | Use and Care Guide - Page 22
CARE Keep dryer area clear and free from items that would obstruct the flow of combustion and ventilation air. As needed cleaning Laundry detergent and fabric softener residue can build up on the lint screen. This buildup can cause longer drying times for your clothes, or cause the dryer to stop - Kenmore 9787 | Use and Care Guide - Page 23
or reconnect power. TROUBLESHOOTING First try the solutions suggested here and possibly avoid the cost of a service call... Dryer will not run • Has a household fuse blown, or circuit breaker tripped? Replace the fuse or reset the circuit breaker. If the problem continues, call an electrician. Was - Kenmore 9787 | Use and Care Guide - Page 24
the rear of the dryer requires 5" (12.7 cm). See the Installation Instructions. Has an air area where your dryer is located? If so, ventilate the area. When the odors or fumes are gone from the area, rewash and dry the clothing. • Was the load removed from dryer at the end of the cycle? Was the dryer - Kenmore 9787 | Use and Care Guide - Page 25
a smart purchase. Your new Kenmore ®product is designed and manufactured product. Here's what's included in the Agreement: _/Expert service by our 12,000 professional repair specialists and no charge - no _/Fast help by phone - phone support from a Sears technician on products requiring in-home - Kenmore 9787 | Use and Care Guide - Page 26
iNDICE GARANTiA ...SEGURIDAD DE LA SECADORA ...INSTRUCCIONES DE INSTALACION ...Herramientas y piezas ...Pedestal opcional ...Requisites de ubicaci6n ...Requisites electricos ...Requisitos del suministro de gas ...Requisites de ventilaci6n ...Planificaci6n del sistema de ventilacidn ...Instalaci6n - Kenmore 9787 | Use and Care Guide - Page 27
GARANTJA DE LOS ELECTRODOMI STICOS KENMORE ELITE GARANTIA LIMITADA DE UN AI_IO Cuando este electrodomestico haya sido instalado, operado y mantenido segQn las instrucciones provistas con el producto, si este electrodomestico falla per - Kenmore 9787 | Use and Care Guide - Page 28
las instrucciones. ADVERTENCIA: Para su seguridad, la informacibn en este manual debe ser observada para minimizar el riesgo de incendio o explosibn, aparato el_ctrico; • Desaloje a todos los ocupantes del cuarto, edificio o area. • Llame inmediatamente a su proveedor de gas desde el tel_fono de - Kenmore 9787 | Use and Care Guide - Page 29
se recomiende especificamente en el Manual del propietario o en instrucciones de ropa. Mantenga el area alrededor de la apertura de ventilaci6n y las areas adyacentes a esta apertura el C6digo Nacional de Gas Combustible (National Fuel Gas Code), ANSI Z223.1/NFPA 54. La secadora debe estar conectada - Kenmore 9787 | Use and Care Guide - Page 30
no se apague al final de un ciclo automatico. Los tiempos de secado pueden prolongarse. No debe instalarse ni guardarse la secadora en un Area en donde pueda estar expuesta al agua y/o a la intemperie. Verifique los requisitos de los c6digos. Algunos c6digos limitan, o no permiten, la instalaci6n de - Kenmore 9787 | Use and Care Guide - Page 31
*La mayorfa de las instalaciones requieren un espacio libre minimo de 5" (1 2,7 cm) detras de la secadora para acomodar ducto de escape con code. Vea "Requisites de ventilaci6n". **Para la ventilaci6n lateral o per la parte inferior, se permite 0" (0 cm) de espacio. el Instalaci6n empotrada pedestal - Kenmore 9787 | Use and Care Guide - Page 32
Recomendaciones de espacios de instalacibn para instalacibn empotrada o en el armario, con lavadora secadora apiladas Las dimensiones recomendados. 46 pulg.2, {310 cm 2) y que se muestran son para los espacios 3"* (7,6 cm) Peligro de Choque Conecte a un contacto 3 terminales. No quite la - Kenmore 9787 | Use and Care Guide - Page 33
de cierre individual a una distancia de unos 6 pies (1,8 m) de la secadora de acuerdo con el C6digo Nacional de Gas combustible (National Fuel Gas Code), ANSI Z223.1. La valvula debera ubicarse en un lugar donde se pueda alcanzar con facilidad para cerrarla y abrirla. A C E Si se conecta a un - Kenmore 9787 | Use and Care Guide - Page 34
reducci6n del flujo de aire y a un rendimiento insuficiente. No instale el ducto de escape de metal flexible en paredes, techos o pisos encerrados. Los codes de 45°proveen codes de 90 °. un mqorflujo de aire quelos • • Peligro de Incendio Use un ducto de escape de metal pesado. No use un ducto de - Kenmore 9787 | Use and Care Guide - Page 35
Respiradero Los estilos recomendados ilustran aqu[. de capotas de ventilaci6n B se B ...C ... F ...G (10,2 cm) (10,2 cm) A. Estilo de capota con ventilacidn tipo persiana B. Estilo de capota con ventilacidn tipo caja El estilo de capota de ventilaci6n angular (que se ilustra aquO es aceptable. - Kenmore 9787 | Use and Care Guide - Page 36
que proporcione el trayecto mas recto y directo al exterior. Planifique la instalaci6n a fin de usar el menor nQmero posible de codos y vueltas. Cuando use los codes o haga vueltas, deje todo el espacio que sea posible. 36 - Kenmore 9787 | Use and Care Guide - Page 37
mas informaci6n, sfrvase Ilamar al 1-800-4-MY-HOME ® (1-800-469-4663). B A. Conector flexible de gas de _" B. Tube de la secadora de _" C. Code de tuberfa de @"a @" D. Accesorio adaptador abocinado para tube de _" 1@ TEFLON es una marca registrada de E.I. Du Pont De Nemours and Company. 37 - Kenmore 9787 | Use and Care Guide - Page 38
3. Abra la valvula de cierre en la linea de suministro. La valvula esta abierta cuando la manija esta paralela al tubo de gas. 3. Quite la puerta. Coloque la puerta de la secadora en una superficie plana y protegida con el conjunto interne de la puerta boca arriba. Quite los 5 tornillos para - Kenmore 9787 | Use and Care Guide - Page 39
exterior de la b 3, Saque la etiqueta que esta del lado opuesto de la puerta y desechela. Busque la etiqueta provista con el Manual de use y cuidado, y apliquela sobre los orificios de bisagra originales, A. Tornillos para bisagras B. Tornillo para orificio grande C. Tornillos tapdn y tapones de - Kenmore 9787 | Use and Care Guide - Page 40
1. Revise para cerciorarse de que todas las piezas esten instaladas. Si hay alguna pieza extra, vuelva a revisar todos los pasos para ver cual se omiti6. Verifique si tiene todas las herramientas. Revise la ubicaci6n final de la secadora. AsegQrese de que el ducto de escape no este aplastado o - Kenmore 9787 | Use and Care Guide - Page 41
muerte o incendio. puede ocasionar Siga estos pasos basicos para poner su secadora en marcha. Por favor consulte las secciones especificas de este manual para obtener informaci6n mas detallada. 1. 2. 3. Limpie el filtro de pelusa antes de cada carga. Vea "Limpieza del filtro de pelusa'. Coloque la - Kenmore 9787 | Use and Care Guide - Page 42
Para hacer cambios durante un ciclo automatico: 4. 5. Presione Parada (STOP) una vez. Ajuste el nivel de secado. NOTA: Las selecciones de nivel de sequedad (Dryness Level) funcionan Qnicamente con los ciclos automaticos. Puede seleccionar un nivel de sequedad diferente segQn la carga, presionando - Kenmore 9787 | Use and Care Guide - Page 43
Quite la carga de la secadora tan pronto se detenga la rotaci6n para reducir la formaci6n de arrugas. Esto es de especial importancia para los tejidos de planchado permanente, de punto y de fibras sinteticas. Evite el secar livianas. Esto telas livianas, formaci6n de la ropa de trabajo gruesa junto - Kenmore 9787 | Use and Care Guide - Page 44
Pantalones de mezclilla (Jeans) Use este ciclo para obtener calor medio alto para secar pantalones de mezclilla. Normal Use este ciclo para obtener calor medio para secar telas resistentes como ropa de trabajo y sabanas. Informal (Casual) Use este ciclo para obtener calor bajo para secar telas que - Kenmore 9787 | Use and Care Guide - Page 45
EXPRESS DRY TM) Cargas peque_as Retoque (TOUCH UP) Ayuda a eliminar las arrugas Esponjar (AIR FLUFF) Secado sin calor Las almohadas de goma manuales Tiempo por omisi6n (Minutos) 40 Temperatura por omisi6n AIta (High) El protector antiarrugas WRINKLE GUARD ® esta prefijado en encendido (ON) en el - Kenmore 9787 | Use and Care Guide - Page 46
Use los modificadores para seleccionar el tiempo, la temperatura y los niveles de sequedad de los ciclos. No todos los modificadores estan disponibles con todos los ciclos y opciones. Los ajustes de modificadores que esten disponibles se pondran de color ambar. Las selecciones actuales se pondran - Kenmore 9787 | Use and Care Guide - Page 47
2. SePal de fin de ciclo (End of Cycle Signal) La serial de fin de ciclo produce un tone una vez terminado el ciclo. AI sacar la ropa tan pronto termina el ciclo se reduce la formaci6n de arrugas. I oud Soft Off Coloque el estante de secado encima de la parte inferior de la abertura de la puerta - Kenmore 9787 | Use and Care Guide - Page 48
de la secadora 1. Haga una pasta con un detergente de lavander[a en polvo y agua bien tibia. 2. Aplique la pasta a un paso suave. O Aplique al Area manchada un producto de limpieza domestico liquido, no inflamable y fr6telo con un paso suave hasta quitar todo el exceso de tinte y manchas. Limpie el - Kenmore 9787 | Use and Care Guide - Page 49
5. 6. En el interior del gabinete de la secadora SegQn el uso de la secadora, se debe quitar la pelusa cada 2 ar3os, o con mas frecuencia. La limpieza debera efectuarla una persona calificada. En el ducto de escape La pelusa debe ser quitada cada 2 a_os, o con mas frecuencia, de acuerdo con el use - Kenmore 9787 | Use and Care Guide - Page 50
&Es una secadora a gas? El chasquido de la valvula de gas es un sonido de funcionamiento normal. /.Hay una moneda, bot6n o sujetapapeles entre el tambor y la parte frontal o trasera de la secadora? Revise los bordes frontales y traseros del tambor para verificar si hay objetos pequeSos, Limpie los - Kenmore 9787 | Use and Care Guide - Page 51
barnizando recientemente el area donde se encuentra la secadora? De set asi, ventile el Area. Cuando los olores o humos se hayan esfumado del Area, vuelva a lavar Proteccibn iFelicitaciones per su inteligente adquisici6n! Su nuevo producto Kenmore _ ha side dise_ado y fabricado para brindarle a_os - Kenmore 9787 | Use and Care Guide - Page 52
who sold it! For the replacement parts, accessories and owner's manuals that you need to do-it-yourself. For Sears professional installation W10114658B © 2006 Sears Brands, LLC TM SM • ® Registered Trademark / Trademark / Service Mark of Sears Brands, LLC , . / SMMarca de servicio de Sears Brands,
-
 1
1 -
 2
2 -
 3
3 -
 4
4 -
 5
5 -
 6
6 -
 7
7 -
8
-
9
-
10
-
11
-
12
-
13
-
14
-
15
-
16
-
17
-
18
-
19
-
20
-
21
-
22
-
23
-
24
-
25
-
26
-
27
-
28
-
29
-
30
-
31
-
32
-
33
-
34
-
35
-
36
-
37
-
38
-
39
-
40
-
41
-
42
-
43
-
44
-
45
-
46
-
47
-
48
-
49
-
50
-
51
-
52
 |
 |
E
L
!
T
E
®
Gas
Dryer
Secadora
a gas
Models/Modelos
110.97875,
97895,
5 = color number/nOmero de color
W10114658B
Sears Roebuck
and Co., Hoffman
Estates,
I
L 6017g
U.S.A.
www.sears.com