Kenmore 9787 Use and Care Guide - Page 14
Kenmore 9787 - Elite HE3 7.0 cu. Ft. Gas Dryer Manual
 |
View all Kenmore 9787 manuals
Add to My Manuals
Save this manual to your list of manuals |
Page 14 highlights
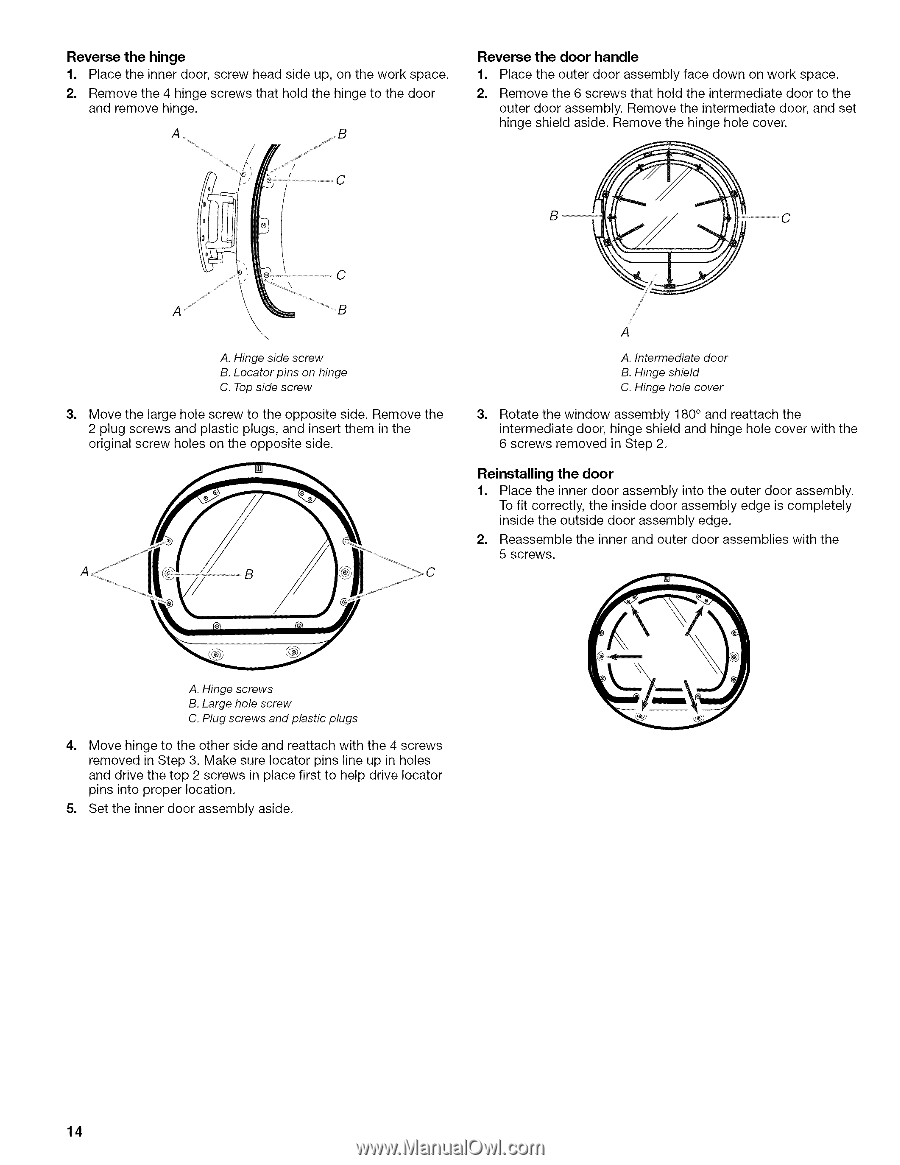
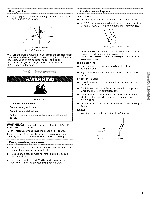
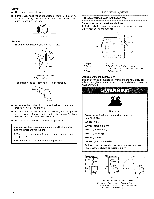
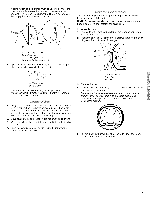
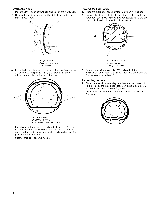
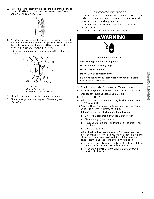
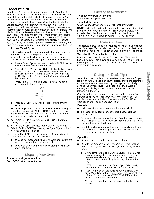
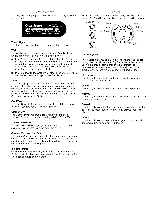
Reverse the hinge 1. Place the inner door, screw head side up, on the work space. 2. Remove the 4 hinge screws that hold the hinge to the door and remove hinge. A _... Reverse the door handle 1. 2. Place the outer door assembly face down on work space. Remove the 6 screws that hold the intermediate door to the outer door assembly. Remove the intermediate door, and set hinge shield aside. Remove the hinge hole cover. / / J A A. Hinge side screw B. Locator pins on hinge C. Top side screw 3, A. Intermediate door B. Hinge shield C. Hinge hole cover Move the large hole screw to the opposite side. Remove the 2 plug screws and plastic plugs, and insert them in the original screw holes on the opposite side. 3. Rotate the window assembly 180° and reattach the intermediate door, hinge shield and hinge hole cover with the 6 screws removed in Step 2. Reinstalling the door 1. Place the inner door assembly into the outer door assembly. To fit correctly, the inside door assembly edge is completely inside the outside door assembly edge. 2. Reassemble the inner and outer door assemblies with the 5 screws. A. Hinge screws B. Large hole screw C. Plug screws and plastic plugs 4. Move hinge to the other side and reattach with the 4 screws removed in Step 3. Make sure Iocator pins line up in holes and drive the top 2 screws in place first to help drive Iocator pins into proper location. Set the inner door assembly aside. 5. 14
-
 1
1 -
2
-
3
-
4
-
5
-
6
-
7
-
8
-
 9
9 -
 10
10 -
 11
11 -
 12
12 -
 13
13 -
 14
14 -
 15
15 -
 16
16 -
 17
17 -
 18
18 -
 19
19 -
20
-
21
-
22
-
23
-
24
-
25
-
26
-
27
-
28
-
29
-
30
-
31
-
32
-
33
-
34
-
35
-
36
-
37
-
38
-
39
-
40
-
41
-
42
-
43
-
44
-
45
-
46
-
47
-
48
-
49
-
50
-
51
-
52
 |
 |