Kenmore 9787 Use and Care Guide - Page 21
Kenmore 9787 - Elite HE3 7.0 cu. Ft. Gas Dryer Manual
 |
View all Kenmore 9787 manuals
Add to My Manuals
Save this manual to your list of manuals |
Page 21 highlights
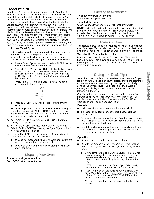
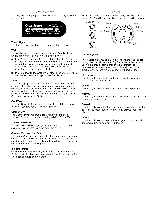
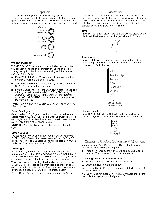
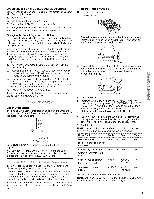
Changing Modifiers and Options after pressing Start You can change a Modifier or Option anytime before the selected Modifier or Option begins. 1. Press STOP once. 2. 3. Select the new Modifier and/or Option. Press and hold START to continue the cycle. To use the heated dryer rack: Do not remove the lint screen. 1. Open dryer door. NOTE: If you happen to press Stop twice, the program clears and your dryer shuts down. Restart the selection process. Changing the Preset Dryness Level Settings If all of your loads on all Auto Dry cycles are consistently not as dry as you would like, you may change the preset Dryness Level settings to increase the dryness. This change will affect all of your Auto Dry cycles. Your Dryness Level settings can be adjusted to adapt to different installations, environmental conditions or personal preference. There are 3 drying settings: 1 (factory preset dryness level), 2 (slightly dryer clothes, approximately 15% more drying time) and 3 (much dryer clothes, approximately 30% more drying time). 1. 2. The Dryness Level settings cannot be changed while the dryer is running. Press and hold the DRYNESS LEVEL button for 5 seconds. The dryer will beep, and "CF" will be displayed for 1 second followed by the current drying setting. To select a new drying setting, press the DRYNESS LEVEL button again until the desired drying setting is shown. NOTE: While cycling through the settings, the current setting will not flash, but the other settings will flash. Press START to save the drying setting. 3= 2. Place dryer rack over the bottom of the dryer door opening. Rest the back wire on the dryer back ledge. Push down on the frame front to secure over lint screen. Place wet items on top of the rack. Allow space around items for air to circulate. The rack does not move, but the drum will rotate. Make sure items do not hang over the edges or between rack grille. 3. 4. The drying setting you selected will become your new preset drying setting for all Auto Dry cycles. _ _/ C _,._ _,_ 4. 5. Close the door. Rotate the dial to the Air Fluff cycle or press Timed Dry. Select a drying time by pressing MORE TIME or LESS TIME. Press TEMPERATURE until the desired temperature glows. Items containing foam, rubber or plastic must be dried on a clothesline or by using the Air Fluff cycle. Refer to the following table. When Air Fluff is selected, the Estimated Time Remaining display shows the default time. You can change the actual time in the cycle by pressing More Time or Less Time. Start the dryer. End of Cycle Signal The End of Cycle Signal produces an audible sound when the drying cycle is finished. Promptly removing clothes at the end of the cycle reduces wrinkling. I oud Soft Off / 6. 7. NOTE: Check the lint screen and remove any lint accumulated from items dried on the rack after the cycle is finished. Dryer Rack Cycle Timed Dry Temp. Low Time* 60 Cycle Signal ...HOLD t NLOCK }O LOCK/ CONTROLS Wool Sweaters Block to shape and lay flat on the rack Stuffed toys or pillows Cotton or polyester fiber filled Stuffed toys or pillows Foam rubber filled Press CYCLE SIGNAL to adjust the sound level or turn off the signal. NOTE: When WRINKLE GUARD ® is selected and the End of Cycle Signal is on, a tone sounds every 5 minutes until the clothes are removed, or WRINKLE GUARD ®ends. Timed Dry Low 60 Air Fluff Air Only (no heat) Air Only (no heat) 90 The dryer rack is shipped in place in your dryer. Remove and discard any packing material before use. Use the TUMBLE EREF M Heated Dryer Rack for items that you do not want to tumble dry, such as sweaters. When you use the heated dryer rack, the heated air inside the dryer flows in a concentrated pattern to allow efficient and uniform drying. The dryer rack is recommended for use with the Air Fluff cycle or with Timed Dry cycles. The dryer rack cannot be used with Auto cycles. Sneakers shoes or canvas Air Fluff 90 *Reset cycle to complete drying if needed. NOTE: You must remove rack for normal tumbling. To remove the dryer rack, lift it straight up and out of the dryer. 21
-
 1
1 -
2
-
3
-
4
-
5
-
6
-
7
-
8
-
9
-
10
-
11
-
12
-
13
-
14
-
15
-
 16
16 -
 17
17 -
 18
18 -
 19
19 -
 20
20 -
 21
21 -
 22
22 -
 23
23 -
 24
24 -
 25
25 -
 26
26 -
27
-
28
-
29
-
30
-
31
-
32
-
33
-
34
-
35
-
36
-
37
-
38
-
39
-
40
-
41
-
42
-
43
-
44
-
45
-
46
-
47
-
48
-
49
-
50
-
51
-
52
 |
 |
