Kodak I1410 User Guide - Page 25
Linux operating systems, Application software, Start, Scanning, image01A.jpg, Scan>Select Scanner - i1420 i1440
 |
UPC - 041778232408
View all Kodak I1410 manuals
Add to My Manuals
Save this manual to your list of manuals |
Page 25 highlights
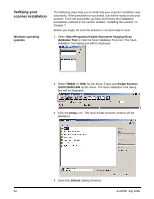
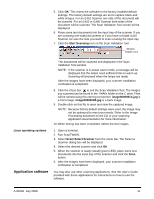
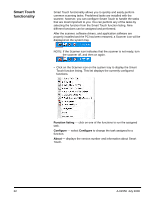
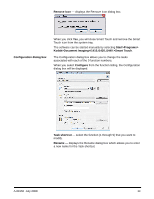
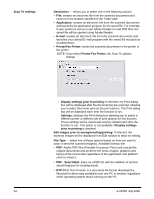
5. Click OK. This resets the software to the factory-installed default settings. The factory default settings are set to capture black and white images. For an i1410 Scanner one side of the document will be scanned. For an i1420 or i1440 Scanner both sides of the document will be scanned. The Scan Validation Tool screen will be displayed. 6. Place some test documents into the input tray of the scanner. If you are scanning one-sided documents or if you have a Kodak i1410 Scanner, be sure the side you want to scan is facing the input tray. 7. Click the Start Scanning icon on the Scan Validation Tool. Window display icons Linux operating systems Application software The documents will be scanned and displayed in the Scan Validation Tool window. NOTE: If the scanner is in power saver mode, a message will be displayed that the lamps need sufficient time to warm up. Scanning will proceed when the lamps are ready. After the images have been displayed, your scanner installation verification is completed. 8. Click the Close box to exit the Scan Validation Tool. The images you scanned can be found in the TWAIN folder on the C drive. Files will be named using this naming convention: image0000001A.jpg is a front image; image0000001B.jpg is a back image. 9. Double-click on this file to open and view the captured image. NOTE: Because factory default settings were used, the image may not be optimized to meet your needs. Refer to the Image Processing document on the CD or your scanning application documentation for more information. 10. When testing has been completed, delete the test images. 1. Open a terminal. 2. Run ScanTWAIN. 3. Select Scan>Select Scanner from the menu bar. The Select a Scanner dialog box will be displayed. 4. Select the desired scanner and click OK. 5. When the scanner is ready (steady green LED), place some test documents into the input tray of the scanner and click the Scan button. 6. After the images have been displayed, your scanner installation verification is completed. You may also use other scanning applications. See the User's Guide provided with these applications for instructions on how to use the software. A-61550 July 2008 21
-
 1
1 -
2
-
3
-
4
-
5
-
6
-
7
-
8
-
9
-
10
-
11
-
12
-
13
-
14
-
15
-
16
-
17
-
18
-
19
-
 20
20 -
 21
21 -
 22
22 -
 23
23 -
 24
24 -
 25
25 -
 26
26 -
 27
27 -
 28
28 -
 29
29 -
 30
30 -
31
-
32
-
33
-
34
-
35
-
36
-
37
-
38
-
39
-
40
-
41
-
42
-
43
-
44
-
45
-
46
-
47
-
48
-
49
-
50
-
51
-
52
-
53
-
54
-
55
-
56
-
57
-
58
-
59
-
60
-
61
-
62
-
63
-
64
-
65
-
66
-
67
-
68
-
69
-
70
-
71
-
72
-
73
-
74
-
75
-
76
 |
 |
