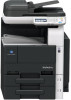
Konica Minolta bizhub 42 bizhub 36/42 Copy Operations User Guide
Konica Minolta bizhub 42 Manual
 |
View all Konica Minolta bizhub 42 manuals
Add to My Manuals
Save this manual to your list of manuals |
Konica Minolta bizhub 42 manual content summary:
- Konica Minolta bizhub 42 | bizhub 36/42 Copy Operations User Guide - Page 1
User's Guide [Copy Operations] - Konica Minolta bizhub 42 | bizhub 36/42 Copy Operations User Guide - Page 2
, Stop, Reset, C (Clear), and Power Save 4-4 Start ...4-4 Stop...4-4 Reset ...4-4 C (Clear) ...4-4 Power Save ...4-4 4.2 About Copy, Folder, E-mail, and Fax 4-6 Copy...4-6 Folder ...4-6 E-mail ...4-6 Fax ...4-7 4.3 Utility/Counter ...4-8 Accessibility ...4-9 bizhub 42/36 Contents-1 - Konica Minolta bizhub 42 | bizhub 36/42 Copy Operations User Guide - Page 3
procedure ...7-10 Slit Scan Glass ...7-10 Original Glass, Control Panel, Paper Take-Up Roller 7-10 Housing, Original Pad ...7-11 8 Troubleshooting 8.1 When a problem is detected (call a service representative 8-2 Problems that cannot be corrected by the user 8-2 bizhub 42/36 Contents-2 - Konica Minolta bizhub 42 | bizhub 36/42 Copy Operations User Guide - Page 4
machine...9-2 Authentication with IC Card ...9-3 Authentication with IC Card + Password 9-4 10 Specifications 10.1 Paper ...10-2 Paper types and paper capacities 10-2 10.2 Machine specifications...10-3 bizhub 42/36 ...10-3 Auto Duplex Unit...10-4 Reverse Automatic Document Feeder 10 - Konica Minolta bizhub 42 | bizhub 36/42 Copy Operations User Guide - Page 5
1 Introduction - Konica Minolta bizhub 42 | bizhub 36/42 Copy Operations User Guide - Page 6
[User's Guide Print Operations] [User's Guide Scan Operations] [User's Guide Fax Operations] [User's Guide Administrator Operations] [Trademarks/Copyrights] Overview This manual describes details on copy mode operations and the settings of this machine. • Specifications of originals and copy paper - Konica Minolta bizhub 42 | bizhub 36/42 Copy Operations User Guide - Page 7
instruction. The operation procedures are described using illustrations. % This symbol indicates transition of the Control Panel to access a desired menu item. This symbol indicates a desired page. d Reference This symbol indicates a reference. View the reference as required. bizhub 42/36 - Konica Minolta bizhub 42 | bizhub 36/42 Copy Operations User Guide - Page 8
of user's guide are indicated by these brackets. Bold text This presents a key name on the Control Panel, part name, product name or option name. 1.2.2 Original and paper indications Original and paper sizes The following explains the indication for originals and paper described in this manual - Konica Minolta bizhub 42 | bizhub 36/42 Copy Operations User Guide - Page 9
2 Part names and their functions - Konica Minolta bizhub 42 | bizhub 36/42 Copy Operations User Guide - Page 10
configuration 2 1 7 3 6 5 4 No. Name Description 1 Main unit The original is scanned by the scanner section, and the scanned image is printed by the printer section. The main unit is hereinafter referred to as "the machine", "this machine", "main unit", or bizhub 42/36 through the manual - Konica Minolta bizhub 42 | bizhub 36/42 Copy Operations User Guide - Page 11
Stopper 8 USB Port (Type A) USB2.0 9 Auto Duplex Unit Lock Release Lever 10 Top Right Door 11 Auto Duplex Unit 12 Top Right Door Release Lever 13 Tray 1 (Bypass Tray) 14 Paper-Empty Indicator 15 Tray 5 16 Tray 4 17 Tray 3 18 Tray 2 19 Front Door 20 Output Tray bizhub 42/36 2-3 - Konica Minolta bizhub 42 | bizhub 36/42 Copy Operations User Guide - Page 12
optional Paper Feed Cabinet PC-211 and Fax Kit FK509. 1 2 5 3 6 4 7 No. Name 1 USB Port (Type B) USB2.0 2 Network Connector (10Base-T/100Base-TX/1000Base-T) 3 Telephone Jack (LINE) 4 Jack for connecting a telephone (TEL) 5 Power Switch 6 Manual Holder 7 Power Code bizhub 42/36 - Konica Minolta bizhub 42 | bizhub 36/42 Copy Operations User Guide - Page 13
3 4 9 5 6 7 8 No. Name 1 Original Glass 2 Scanner Unit 3 Fusing Unit Top Cover 4 Fusing Unit Cover Lever 5 Fusing Unit 6 Drum Unit 7 Toner Bottle 8 Lock Release Lever 9 Total Counter 10 Scanner Lock Lever 11 Slit Scan Glass 12 Original Scale 13 Original Pad bizhub 42/36 2-5 - Konica Minolta bizhub 42 | bizhub 36/42 Copy Operations User Guide - Page 14
2.2 Main Body 2.2.4 Control Panel 1 No. Name 1 Touch Panel 2 Function key 3 Keypad 4 Error Indicator 5 Data Indicator 54 3 2 2 bizhub 42/36 2-6 - Konica Minolta bizhub 42 | bizhub 36/42 Copy Operations User Guide - Page 15
2.2 Main Body 2 Adjusting the angle of the Control Panel The Control Panel of this machine can be moved up/down to the desired angle. Set it to your desired position. NOTICE When tilting the Control Panel, do not grab the Touch Panel. % Grab the front center of the Control Panel, - Konica Minolta bizhub 42 | bizhub 36/42 Copy Operations User Guide - Page 16
function or to select a setting, lightly press the desired button Fax (Displayed if the Fax Kit FK-509 is installed and the fax function is available) 3 Scan to E-mail 4 Scan to Folder 5 Help 6 Copy 7 USB/HDD 8 Icon display area 9 Status 10 Job 11 Toner supply indicators bizhub 42/36 - Konica Minolta bizhub 42 | bizhub 36/42 Copy Operations User Guide - Page 17
2.2 Main Body Copy screen 4 3 No. Name 1 Number of copies 2 Copy mode operations 3 Mode Check 4 Home 2 1 2 bizhub 42/36 2-9 - Konica Minolta bizhub 42 | bizhub 36/42 Copy Operations User Guide - Page 18
2.3 Option 2 2.3 Option Finisher FS-529 5 4 No. Name 1 Staple Holder 2 Jam Removal Dial 3 Lock Release Lever 4 Output Tray 5 Tray Extension 3 2 1 bizhub 42/36 2-10 - Konica Minolta bizhub 42 | bizhub 36/42 Copy Operations User Guide - Page 19
3 Using this machine - Konica Minolta bizhub 42 | bizhub 36/42 Copy Operations User Guide - Page 20
is turned on. After the machine has finished warming up, the scanned image will be printed. 0 The default settings are the settings that are selected immediately after the machine is turned on and before any settings are configured from the Control Panel or Touch Panel, and those that are selected - Konica Minolta bizhub 42 | bizhub 36/42 Copy Operations User Guide - Page 21
- Originals that have just been printed with this machine - Photographic paper - Glossy originals like gloss coated paper 1 Slide the Lateral Guide to fit the size of the original. 2 Load the original face up in the Original Tray and arrange accord- ing to the scanning order. Load the original by - Konica Minolta bizhub 42 | bizhub 36/42 Copy Operations User Guide - Page 22
in the home screen, one sheet can be copied by setting the "Copy Initial Setting". 3 Using the Keypad, enter a value for the number of copies you desire. % If you have entered incorrect number of copies, press the C (clear) key on the keypad, and then reenter the correct number. bizhub 42/36 3-4 - Konica Minolta bizhub 42 | bizhub 36/42 Copy Operations User Guide - Page 23
3 4 Press the Start key. The original is scanned and copied. % To interrupt the copy operation being Configure each function as necessary. % For details on [Paper], refer to page 5-4. % For details on [Zoom], refer to page 5-6. % For details on [Duplex/Combine], refer to page 5-7. bizhub 42/36 - Konica Minolta bizhub 42 | bizhub 36/42 Copy Operations User Guide - Page 24
[↓] to display [3/3], and configure each function. % For details on [Separate Scan], refer to page 5-14. % For details on [ID Copy], refer to page 5-15. % For details on [Paper Margin], refer to page 5-17. % For details on [Image Quality], refer to page 5-18. 7 Press [Mode Check]. % For details on - Konica Minolta bizhub 42 | bizhub 36/42 Copy Operations User Guide - Page 25
they are combined improperly, the settings will be given priorities in either of the two ways described below. - The setting configured last is given priority. (The setting specified first is canceled.) - The setting configured first is given priority. (A warning message appears.) bizhub 42/36 3-7 - Konica Minolta bizhub 42 | bizhub 36/42 Copy Operations User Guide - Page 26
3.3 Help 3 3.3 Help Press this key to view and check descriptions of various functions and operating procedures. When the [?] is pressed, the help screen for the displayed screen appears. For details, refer to the [Quick Guide Copy/Print/Fax/Scan Operations]. % Press [?]. bizhub 42/36 3-8 - Konica Minolta bizhub 42 | bizhub 36/42 Copy Operations User Guide - Page 27
4 Control Panel Keys - Konica Minolta bizhub 42 | bizhub 36/42 Copy Operations User Guide - Page 28
the Folder key lights up in green. For details on the Scan to Folder function, refer to the [User's Guide Scan Operations]. Press this key to enter Copy mode. While the machine is in Copy mode, the indicator on the Copy key lights up in green. Page − p. 4-4 p. 4-7 p. 4-6 p. 4-6 p. 4-6 bizhub 42/36 - Konica Minolta bizhub 42 | bizhub 36/42 Copy Operations User Guide - Page 29
the [Utility Settings] screen. From the [Utility Settings] screen, settings can be specified for the parameters in the [Accessibility], [Meter Count], [Address Registration], [User Settings], and [Admin Settings] screens. Allows you to register (store) the desired copy/fax/scan settings as a program - Konica Minolta bizhub 42 | bizhub 36/42 Copy Operations User Guide - Page 30
setting, the machine mode does not change from Sleep mode to Lower power mode. 0 The machine can receive jobs (PC print, Fax reception) during Lower power mode and Sleep mode. Only in Sleep mode, the machine goes into Sleep mode again after completion of jobs (PC print, Fax reception). bizhub 42/36 - Konica Minolta bizhub 42 | bizhub 36/42 Copy Operations User Guide - Page 31
contact the administrator of the machine. % When you press Power Save, the machine goes into Sleep mode. To wake the machine from Sleep mode, press Power Save again. The machine returns from Sleep mode when any other key on the Control Panel or the Touch Panel surface is pressed. bizhub 42/36 4-5 - Konica Minolta bizhub 42 | bizhub 36/42 Copy Operations User Guide - Page 32
. Folder % Press this key to enter Scan to Folder mode. For details on Scan to Folder functions, refer to the [User's Guide Scan Operations]. E-mail % Press this key to enter Scan to E-mail mode. For details on Scan to E-mail functions, refer to the [User's Guide Scan Operations]. bizhub 42/36 - Konica Minolta bizhub 42 | bizhub 36/42 Copy Operations User Guide - Page 33
4.2 About Copy, Folder, E-mail, and Fax 4 Fax % Press this key to enter Fax mode. For details on the fax function, refer to the [User's Guide Fax Operations]. bizhub 42/36 4-7 - Konica Minolta bizhub 42 | bizhub 36/42 Copy Operations User Guide - Page 34
the [User's Guide Fax Operations] and [User's Guide Scan Operations]. Provides setting items that can be operated by the user. Provides setting items that can only be operated by the administrator of the machine. For details, refer to the [User's Guide Administrator Operations]. bizhub 42/36 4-8 - Konica Minolta bizhub 42 | bizhub 36/42 Copy Operations User Guide - Page 35
to change. [Set All] • [Enable]: Specify [ON] or [OFF] to output all sounds. • [Volume]: To adjust the volume, press [Low], [Medium], or [High]. Configure the settings for sounding associated completed normally [Completion Preparation]: A sound produced when a device is ready bizhub 42/36 4-9 - Konica Minolta bizhub 42 | bizhub 36/42 Copy Operations User Guide - Page 36
press the Stop or Reset key. • If the Touch Panel cannot be adjusted, contact your service representative. Specify the duration of time for displaying warning messages, which appear, for example, when an incorrect operation is performed. Adjust the brightness of the Touch Panel. bizhub 42/36 4-10 - Konica Minolta bizhub 42 | bizhub 36/42 Copy Operations User Guide - Page 37
machine. These programs can easily be recalled as programs. Up to 400 programs (copy/fax/scan) can be registered. 0 Up to 15 copy programs can be registered. 0 To register a copy program, configure the copy settings to be registered before pressing the Mode Memory key. % Press [Copy] or the Copy key - Konica Minolta bizhub 42 | bizhub 36/42 Copy Operations User Guide - Page 38
Manager, check with your server administrator for information on the login procedure. 0 For details of the settings of user authentication/account track, contact the administrator of the machine. % Press the Access key. Screen for user authentication Screen for account track bizhub 42/36 4-12 - Konica Minolta bizhub 42 | bizhub 36/42 Copy Operations User Guide - Page 39
Mode] is set to [ON], [Public User] cannot be selected. [User Name] Enter the user name. [Password] Enter the password. [Server] Press [Server] to display the names of the registered servers. Select the desired server. [Begin Printing] Displayed when the ID & Print function is enabled - Konica Minolta bizhub 42 | bizhub 36/42 Copy Operations User Guide - Page 40
while an original is being scanned. 0 Pressing the Interrupt key restores the default settings. 1 Load the original. 2 Press the Interrupt key. The indicator on the Interrupt key lights up in green and printing of the current job is suspended. 3 Configure the copy settings. 4 Press the Start key - Konica Minolta bizhub 42 | bizhub 36/42 Copy Operations User Guide - Page 41
5 Copy Function - Konica Minolta bizhub 42 | bizhub 36/42 Copy Operations User Guide - Page 42
the original to be scanned. Press this button to configure the paper type and paper tray for making copies. Press this button to select the zoom ratio of the image to be copied. Press this button to configure the double-sided copy and combined copy settings. p. 5-3 p. 5-4 p. 5-6 p. 5-7 Item (Page - Konica Minolta bizhub 42 | bizhub 36/42 Copy Operations User Guide - Page 43
size of the original page. 2 Arrange originals in the order you want them to be scanned and load them face up in the ADF. 3 Press [Original Size]. 4 Press [Letter/Legal]. % When [Letter/Legal] is selected, [Zoom] is set to [Full Size] and [Paper] to [Auto]. 5 Press the Start key. bizhub 42/36 5-3 - Konica Minolta bizhub 42 | bizhub 36/42 Copy Operations User Guide - Page 44
type and size to be printed or change the paper size and paper type settings configured for each paper tray. The paper size can be selected automatically according to the original size or it can be specified manually. 0 The auto zoom setting and the auto paper setting cannot both be selected at - Konica Minolta bizhub 42 | bizhub 36/42 Copy Operations User Guide - Page 45
5.2 [Paper] 5 Configuring a custom size % Press [Copy] or the Copy key ö [Paper] ö [Bypass Tray] ö [Change Tray Settings] ö [Paper Size] ö [Custom Size]. Settings [X] / [Y] Enter the paper length [X] and width [Y]. Using [+] and [-] or the ten key pad, specify the size. bizhub 42/36 5-5 - Konica Minolta bizhub 42 | bizhub 36/42 Copy Operations User Guide - Page 46
- 400.0%) of the copy. Copies an original image slightly smaller than the original size or the specified size. The image in the original is centered on the paper without any cutoff. Select this setting when you want to copy the entire scope of the original within the paper used. bizhub 42/36 5-6 - Konica Minolta bizhub 42 | bizhub 36/42 Copy Operations User Guide - Page 47
) or duplex (double-sided) copies are to be printed. [1 > 1] [1 > 2] [2 > 1] [2 > 2] Select whether to make combined copies. [No] Disables combined copy. [2 in 1] Copies images on two original pages on one sheet of paper. Portrait original pages Landscape original pages bizhub 42/36 5-7 - Konica Minolta bizhub 42 | bizhub 36/42 Copy Operations User Guide - Page 48
. If Output Binding Position is set to [Auto], the binding position is set at the top or on the left. Select the orientation of the original loaded into the ADF or placed on the Original Glass. Without setting [Original Direction], the resulting copy may not be what you intended. bizhub 42/36 5-8 - Konica Minolta bizhub 42 | bizhub 36/42 Copy Operations User Guide - Page 49
] 5 5.5 [Density] Press this button to specify the density for making copies. % Press [Copy] or the Copy key ö [Density]. Settings [-] / [+] [Standard] Adjust the copy density to one of nine levels. Select this setting to return the copy density to the standard setting. bizhub 42/36 5-9 - Konica Minolta bizhub 42 | bizhub 36/42 Copy Operations User Guide - Page 50
containing only text. Select this setting when copying documents containing both text and photos. Text color and shading are automatically recognized, and the most appropriate image processing is performed. Select this setting when copying documents containing printed photos. bizhub 42/36 5-10 - Konica Minolta bizhub 42 | bizhub 36/42 Copy Operations User Guide - Page 51
separate each set of copies from another set in the output tray when copying multiple sets of multi-page originals. The copies are fed out and stacked on top of each other with each set shifted to separate it. This function is available only when the Finisher FS-529 is installed. bizhub 42/36 5-11 - Konica Minolta bizhub 42 | bizhub 36/42 Copy Operations User Guide - Page 52
on the Original Glass. Without setting [Original Direction], the resulting paper is selected if the original length exceeds 11-11/16 inches (297 mm). • Staple positions are set on the upper or left-side end. • Load the original by placing it so that its head (top side) faces the left. bizhub 42/36 - Konica Minolta bizhub 42 | bizhub 36/42 Copy Operations User Guide - Page 53
step 9. % Using the keypad, the number of copies can be changed. % To print another proof copy, press [Proof Copy]. % To change the settings, press [Cancel], and then perform steps 2 through 8. 9 Press [Print]. The number of copies yet to be printed is registered as a copy job. bizhub 42/36 5-13 - Konica Minolta bizhub 42 | bizhub 36/42 Copy Operations User Guide - Page 54
Settings]. 9 Repeat Step 8 until all pages of the original are scanned. 10 After all original pages have been scanned, press [Finish]. d Reference To set the Separate Scan output method: Press the Utility/Counter key ö [User Settings] ö [Copy Settings] ö [Separate Scan Output Method]. bizhub 42/36 - Konica Minolta bizhub 42 | bizhub 36/42 Copy Operations User Guide - Page 55
ID copy function and the auto paper function cannot be selected at the same time. 1 Place the card, front side down, on the original glass. 2 Press [Copy] or the Copy key. 3 Specify the copy settings. 4 Press [ID Copy]. 5 Press the Start key. Scanning of the front side begins. bizhub 42/36 5-15 - Konica Minolta bizhub 42 | bizhub 36/42 Copy Operations User Guide - Page 56
5.10 [ID Copy] 5 6 Position the card, back side down, at the same location on the original glass. % To copy only the front side, press [Print]. 7 Press the Start key. Scanning of the back side begins. The copy is fed out. bizhub 42/36 5-16 - Konica Minolta bizhub 42 | bizhub 36/42 Copy Operations User Guide - Page 57
to set the paper binding position and the original direction. Otherwise, the original image part of the image is lost when copied with the specified binding margin settings, reduce the zoom and perform copying. % Press [Copy] or the Copy key ö [Page Margin]. Settings [-] / [+] [None] bizhub 42/36 - Konica Minolta bizhub 42 | bizhub 36/42 Copy Operations User Guide - Page 58
the [-] direction to make the image softer. The sharpness of text and image outlines can be adjusted. Adjust the sharpness to one of seven levels. Select a setting in the [+] direction to increase the sharpness, or select a setting in the [-] direction to decrease the sharpness. bizhub 42/36 5-18 - Konica Minolta bizhub 42 | bizhub 36/42 Copy Operations User Guide - Page 59
5.13 [Mode Check] 5 5.13 [Mode Check] From the Mode Check screens, the current copy settings can be checked and changed if desired. 1 Press [Mode Check]. 2 Check the copy settings. 3 After checking the settings, press [Close]. bizhub 42/36 5-19 - Konica Minolta bizhub 42 | bizhub 36/42 Copy Operations User Guide - Page 60
jobs being processed. For details, refer to the [User's Guide Fax Operations]. [Save] Displays the lists of the stored jobs that have been registered and the stored jobs being processed. For details, refer to the [User's Guide Scan Operations]. [Delete] Deletes a job. bizhub 42/36 5-20 - Konica Minolta bizhub 42 | bizhub 36/42 Copy Operations User Guide - Page 61
[Save] Displays the list of the completed stored jobs. For details, refer to the [User's Guide Scan Operations]. [Details] Results, user name, registration time, completed time, number of sheets of originals, number of copies and other items for the log list can be checked. bizhub 42/36 5-21 - Konica Minolta bizhub 42 | bizhub 36/42 Copy Operations User Guide - Page 62
6 [User Settings] - Konica Minolta bizhub 42 | bizhub 36/42 Copy Operations User Guide - Page 63
Guide Scan Operations]. Configure the settings for print functions to be used in print operations. For details, refer to the [User's Guide Print Operations]. Configure the settings for fax functions to be used in fax operations. For details, refer to the [User's Guide Fax Operations]. bizhub 42/36 - Konica Minolta bizhub 42 | bizhub 36/42 Copy Operations User Guide - Page 64
mail screen. For details, refer to the [User's Guide Scan Operations]. Configure the default tab of Scan to Folder screen. For details, refer to the [User's Guide Scan Operations]. Configure the default tab of Fax screen. For details, refer to the [User's Guide Fax Operations]. bizhub 42/36 6-3 - Konica Minolta bizhub 42 | bizhub 36/42 Copy Operations User Guide - Page 65
depending on the area. [OFF] [Tray 1] [ON] [Tray 2] [ON] [Tray 3] [ON] [Tray 4] [ON] [Tray 5] [ON] When the optional paper tray is installed, [Tray 4] or [Tray 5] is displayed. 2 d Reference To enable Auto Paper: Press [Copy] or the Copy key ö [Paper] ö [Auto]. bizhub 42/36 6-4 - Konica Minolta bizhub 42 | bizhub 36/42 Copy Operations User Guide - Page 66
. % Press the Utility/Counter key ö [User Settings] ö [Copy Settings]. Settings [Auto Zoom for Combine] [Default Copy Settings] [Separate Scan Output Method] Configure whether the preset zoom ratios are automatically selected when Combine is selected in Auto Paper mode. • Select the Auto Zoom for - Konica Minolta bizhub 42 | bizhub 36/42 Copy Operations User Guide - Page 67
6.3 [Scan Settings] 6 6.3 [Scan Settings] This setting is for the scan operations. For details, refer to the [User's Guide Scan Operations]. bizhub 42/36 6-6 - Konica Minolta bizhub 42 | bizhub 36/42 Copy Operations User Guide - Page 68
6.4 [Print Settings] 6 6.4 [Print Settings] This setting is for the print operations. For details, refer to the [User's Guide Print Operations]. bizhub 42/36 6-7 - Konica Minolta bizhub 42 | bizhub 36/42 Copy Operations User Guide - Page 69
6.5 [Fax Settings] 6 6.5 [Fax Settings] This setting is for the fax operations. For details, refer to the [User's Guide Fax Operations]. bizhub 42/36 6-8 - Konica Minolta bizhub 42 | bizhub 36/42 Copy Operations User Guide - Page 70
7 Maintenance - Konica Minolta bizhub 42 | bizhub 36/42 Copy Operations User Guide - Page 71
- Paper with labels attached - Paper with ribbons, hooks, buttons, etc., attached Paper storage Store paper in a cool, dark location with little humidity. If the paper becomes damp, a paper jam may occur. Store the paper flat, not on its edge. Curled paper may cause a paper jam. bizhub 42/36 7-2 - Konica Minolta bizhub 42 | bizhub 36/42 Copy Operations User Guide - Page 72
% If paper is curled, flatten it before loading it. % If special paper is loaded, the paper type must be specified. % Load letterhead paper so that the side to be printed on faces up. 4 Close Tray 2. d Reference To configure paper settings: Press [Copy] or the Copy key ö [Paper]. bizhub 42/36 7-3 - Konica Minolta bizhub 42 | bizhub 36/42 Copy Operations User Guide - Page 73
the size on the Custom Size screen before using them. % When using envelopes: Expel air from the envelopes, and then load them while holding the folds of the envelopes. Load them with the flap side up, as shown in the illustration. The flap side of envelopes cannot be printed on. bizhub 42/36 7-4 - Konica Minolta bizhub 42 | bizhub 36/42 Copy Operations User Guide - Page 74
7.1 Paper 7 3 Slide the Lateral Guide to fit the size of paper being loaded. 4 Select the paper type. % To use postcards, select [Postcard]. % To use envelopes, select [Envelope]. d Reference To configure paper settings: Press [Copy] or the Copy key ö [Paper]. bizhub 42/36 7-5 - Konica Minolta bizhub 42 | bizhub 36/42 Copy Operations User Guide - Page 75
, an advanced warning message appears at the top of the screen. For details on replacing the Toner Bottle, refer to [Quick Guide Copy/Print/Fax/Scan Operations]. For details on replacing the Drum Unit, contact your service representative. When the message appears, make a preparation and replace the - Konica Minolta bizhub 42 | bizhub 36/42 Copy Operations User Guide - Page 76
If a user continues to operate the machine while a warning message is displayed, the following replacement message appears. Replace the Toner Bottle according to the guidance contained in your maintenance agreement. For Drum Unit, contact your service representative. Toner Bottle bizhub 42/36 7-7 - Konica Minolta bizhub 42 | bizhub 36/42 Copy Operations User Guide - Page 77
7.2 Consumables 7 Drum Unit 7.2.2 Checking consumables status In the Consumable screen, you can check the status (usage level) of consumables. 1 Press [Status] in the Home screen. 2 Press [Consumables]. bizhub 42/36 7-8 - Konica Minolta bizhub 42 | bizhub 36/42 Copy Operations User Guide - Page 78
counting started. For details, refer to the [Quick Guide Copy/Print/Fax/Scan Operations]. % Press the Utility/Counter key ö [Meter Count]. Checking the total number of pages printed Pressing Total Counter displays the total number of pages printed to date. 1. Total counter 1 bizhub 42/36 7-9 - Konica Minolta bizhub 42 | bizhub 36/42 Copy Operations User Guide - Page 79
Scan Glass with a dry cloth. % Wipe off stains from the back side to the front side along the guide. Original Glass, Control Panel, Paper Take-Up Roller NOTICE Do not press the Control Panel hard, or the keys and Touch Panel may be damaged. % Wipe the surface using a soft, dry cloth. bizhub 42/36 - Konica Minolta bizhub 42 | bizhub 36/42 Copy Operations User Guide - Page 80
7.4 Cleaning procedure 7 Housing, Original Pad NOTICE Never use solvents, such as benzene or thinner, to clean the Original Pad. % Wipe the surface using a soft cloth moistened with a mild household detergent. bizhub 42/36 7-11 - Konica Minolta bizhub 42 | bizhub 36/42 Copy Operations User Guide - Page 81
8 Troubleshooting - Konica Minolta bizhub 42 | bizhub 36/42 Copy Operations User Guide - Page 82
your service representative. Problems that cannot be corrected by the user 1 Write down the malfunction code in the Service Call screen. 2 Turn off the Power Switch. 3 Unplug the machine. 4 Contact your service representative and inform them of the written down malfunction code. bizhub 42/36 8-2 - Konica Minolta bizhub 42 | bizhub 36/42 Copy Operations User Guide - Page 83
appropriate size into the paper tray. Press [+] in the Density screen to copy at the desired copy density. (p. 5-9) If the above does not resolve the problem, make settings in [Maintenance Menu] available from Admin Settings. For details, refer to the [User's Guide Administrator Operations]. Replace - Konica Minolta bizhub 42 | bizhub 36/42 Copy Operations User Guide - Page 84
The edge of the printed image is dirty Even though a paper jam was cleared, copies cannot be produced Printing with the "2 > 1" or "2 > 2" settings are not available Copying is not possible even though the password is entered on a machine with user authentication settings configured Copying is not - Konica Minolta bizhub 42 | bizhub 36/42 Copy Operations User Guide - Page 85
you connect the authentication unit to a different USB port from the one used when installing the driver, the hardware uninstall wizard may start. Use the same USB port as the one used when installing the driver. For details, refer to the [User's Guide Administrator Operations]. bizhub 42/36 8-5 - Konica Minolta bizhub 42 | bizhub 36/42 Copy Operations User Guide - Page 86
% and 400%. Cancel duplex (double-sided) printing, or change the paper type and size settings. Remove all paper from the indicated tray. Remove paper from the finisher tray. Enter the correct user name and password. (p. 4-12) Enter the correct account name and password. (p. 4-12) bizhub 42/36 8-6 - Konica Minolta bizhub 42 | bizhub 36/42 Copy Operations User Guide - Page 87
] [Open and close ADF cover.] [Toner is low] [Prepare new toner bottle.] [Replace toner] [Replace toner by following the instruction and close front door.] [Imaging Unit Missing] [Drum and Developing Unit is not set.] [Replace Staples] [Replace the staple cartridge.] [Exceeds the no. of pages being - Konica Minolta bizhub 42 | bizhub 36/42 Copy Operations User Guide - Page 88
Appears when this unit is receiving data or documents. Appears when enhanced security settings have been applied. Appears when a external memory device is connected. Appears when the parts replacement by service engineer becomes necessary. Contact your service representative. bizhub 42/36 8-8 - Konica Minolta bizhub 42 | bizhub 36/42 Copy Operations User Guide - Page 89
9 Authentication unit - Konica Minolta bizhub 42 | bizhub 36/42 Copy Operations User Guide - Page 90
reads the IC card to perform personal authentication. Using this system, you can perform authentication with an IC card to log in to this machine or execute a print job when User Authentication is enabled in this machine. The administrator of the machine performs the registration and configurations - Konica Minolta bizhub 42 | bizhub 36/42 Copy Operations User Guide - Page 91
Type] is set to [Card Authentication]. Control Panel - In Utility/Counter key ö [Admin Settings] ö [Authentication Setting] ö [Card Authentication], the in- formation of a user's IC card is registered. % Place the IC card on the Working Table WT-510. The home screen appears. bizhub 42/36 9-3 - Konica Minolta bizhub 42 | bizhub 36/42 Copy Operations User Guide - Page 92
configured by the administrator of the machine. PageScope Web Connection - In [Administrator Mode] ö [Security] ö [Authentication Device Settings], [Authentication Type] is set to [Card Authentication + Password]. Control Panel - In Utility/Counter key ö [Admin Settings] ö [Authentication Setting - Konica Minolta bizhub 42 | bizhub 36/42 Copy Operations User Guide - Page 93
10 Specifications - Konica Minolta bizhub 42 | bizhub 36/42 Copy Operations User Guide - Page 94
special paper and colored paper. If the paper size or paper type is not correctly specified, it will result in a paper jam or image failure. Plain Paper (2nd Side) can be selected for Tray 1 (Bypass Tray). Select 2nd Side when you load paper where something is printed on one side. bizhub 42/36 10 - Konica Minolta bizhub 42 | bizhub 36/42 Copy Operations User Guide - Page 95
specifications bizhub 42/36 Specifications Type Document holder Photo conductor Light source Copy system Developing system Fusing system Resolution Originals Copying paper type Copy paper size Number of sheets loaded in Output Tray Paper tray capacity (8-1/2 e 11(A4)) Warm-up time Image chipping - Konica Minolta bizhub 42 | bizhub 36/42 Copy Operations User Guide - Page 96
speed (When printing A4 v) Copy magnification Number of continuous copies Density adjustment Power supply Max. power consumption Size Machine occupation dimensions Memory capacity Hard disk capacity SSD Weight 1-Sided bizhub 42 42 sheets/min. (Thick 1/2: 13 sheets/min.) bizhub 36 36 sheets/min - Konica Minolta bizhub 42 | bizhub 36/42 Copy Operations User Guide - Page 97
Document Feeder Specifications Original feed function Original types Original Size Original loading capacity Power supply 1-sided original, 2-sided original, mixed original 1-Sided Plain paper (13 or 2-sided original: Max. 50 sheets (21-1/4 lb (80 g/m2)) Supply from machine bizhub 42/36 10-5 - Konica Minolta bizhub 42 | bizhub 36/42 Copy Operations User Guide - Page 98
your service representative. Top tray (Tray 4) Plain paper: 500 sheets Bottom tray (Tray 5) Plain paper: 500 sheets Supply from machine 15 W or less Width 25-3/16 inches (640 mm) Depth 27-3/8 inches (696 mm) Height 14-5/8 inches (372 mm) Approx. 63-15/16 lb (29 kg) Paper tray, 2 levels bizhub 42/36 - Konica Minolta bizhub 42 | bizhub 36/42 Copy Operations User Guide - Page 99
be requested only from the printer driver. 1-3/16 inches (30 mm) Supply from machine 56 W or less Width 18-9/16 inches (471 mm), 25-3/4 inches* (654 mm*) Depth 22-5/16 inches (566 mm) Height 5-13/16 inches (147 mm) * Size when the tray is pulled out Approx. 26-7/16 lb (12 kg) bizhub 42/36 10-7 - Konica Minolta bizhub 42 | bizhub 36/42 Copy Operations User Guide - Page 100
1 unit Authentication Unit AU-201 Specifications Name Dimensions Weight Power supply System conditions Memory HDD Monitor Network Application Interface Supported Operating Systems AU-201 USB 1.1 or later Windows XP Professional Edition (SP2) Windows Vista Business/Enterprise bizhub 42/36 10-8 - Konica Minolta bizhub 42 | bizhub 36/42 Copy Operations User Guide - Page 101
11 Appendix - Konica Minolta bizhub 42 | bizhub 36/42 Copy Operations User Guide - Page 102
the edges of text so that it can be read more easily. This function also enables you to adjust the original image. Function that prints a document in sets of copies. The second copy set is printed after all of the first copy set is finished. Function that staples copies. bizhub 42/36 11-2 - Konica Minolta bizhub 42 | bizhub 36/42 Copy Operations User Guide - Page 103
Reverse Automatic Document Feeder. This function is available only for originals of Letter and Legal sizes that have the same width (8-1/2 inch). Function used when printing on paper that has already been printed on one side. Function that changes the zoom ratio of the copy. bizhub 42/36 11-3 - Konica Minolta bizhub 42 | bizhub 36/42 Copy Operations User Guide - Page 104
12 Index - Konica Minolta bizhub 42 | bizhub 36/42 Copy Operations User Guide - Page 105
Manual holder 2-4 Message display area 2-8 Meter count 7-9 Mode check 2-8, 5-19 Mode memory 4-11 Mount Kit 2-2 N Name 4-11 Network connector 2-4 Number of copies 2-8 O Offsetting 5-11 Option configuration 2-2 Options 10-6 Original glass 2-5, 7-10 Original output tray 2-3 bizhub 42/36 - Konica Minolta bizhub 42 | bizhub 36/42 Copy Operations User Guide - Page 106
message 7-2 Reset 4-4 Reverse automatic document feeder 2-3, 10-5 S Scan settings 6-6 Scan to E-mail 2-8 Scan to Folder 2-8 Scanner lock lever 2-5 Scanner unit 2-5 Separate scan 5-14 Service call 8-2 Sleep mode 4-4 Slit scan glass 2-5, 7-10 Sorting 5-11 Specifications 10-2 Stapling - Konica Minolta bizhub 42 | bizhub 36/42 Copy Operations User Guide - Page 107
Position 5-8 Original direction 5-8 Original Size 5-3 Original Type 5-10 Output Binding Position 5-8 P Page Margin 5-17 Paper 5-4 Paper Tray Settings 6-3 Password 4-13 Photo 5-10 Power Save 4-4 Print 5-20, 5-21 Print Settings 6-7 Proof Copy 5-13 Public User 4-13 bizhub 42/36 12-4 - Konica Minolta bizhub 42 | bizhub 36/42 Copy Operations User Guide - Page 108
Sound Settings 4-9 Standard 5-9 Standard Size 5-3 Staple 5-12 Start 4-4 Stop 4-4 T Text 5-10 Text/Photo 5-10 Touch Panel Adjustment 4-10 Tray 2 5-4 Tray 3 5-4 Tray 4 5-4 Tray 5 5-4 U User Name 4-13 User Settings 4-8, 6-2 Utility/Counter 4-8 X X / Y 5-5 Z Zoom 5-6 bizhub 42/36 12 - Konica Minolta bizhub 42 | bizhub 36/42 Copy Operations User Guide - Page 109
http://konicaminolta.com A3EW-9554CO-11 2011 Copyright 2011. 11
-
 1
1 -
 2
2 -
 3
3 -
 4
4 -
 5
5 -
 6
6 -
 7
7 -
8
-
9
-
10
-
11
-
12
-
13
-
14
-
15
-
16
-
17
-
18
-
19
-
20
-
21
-
22
-
23
-
24
-
25
-
26
-
27
-
28
-
29
-
30
-
31
-
32
-
33
-
34
-
35
-
36
-
37
-
38
-
39
-
40
-
41
-
42
-
43
-
44
-
45
-
46
-
47
-
48
-
49
-
50
-
51
-
52
-
53
-
54
-
55
-
56
-
57
-
58
-
59
-
60
-
61
-
62
-
63
-
64
-
65
-
66
-
67
-
68
-
69
-
70
-
71
-
72
-
73
-
74
-
75
-
76
-
77
-
78
-
79
-
80
-
81
-
82
-
83
-
84
-
85
-
86
-
87
-
88
-
89
-
90
-
91
-
92
-
93
-
94
-
95
-
96
-
97
-
98
-
99
-
100
-
101
-
102
-
103
-
104
-
105
-
106
-
107
-
108
-
109
 |
 |
User’s Guide
[Copy Operations]