Konica Minolta bizhub C3350 bizhub C3850/C3350 Maintenance/Troubleshooting Use - Page 27
Replacing the Transfer Belt Unit - waste toner
 |
View all Konica Minolta bizhub C3350 manuals
Add to My Manuals
Save this manual to your list of manuals |
Page 27 highlights
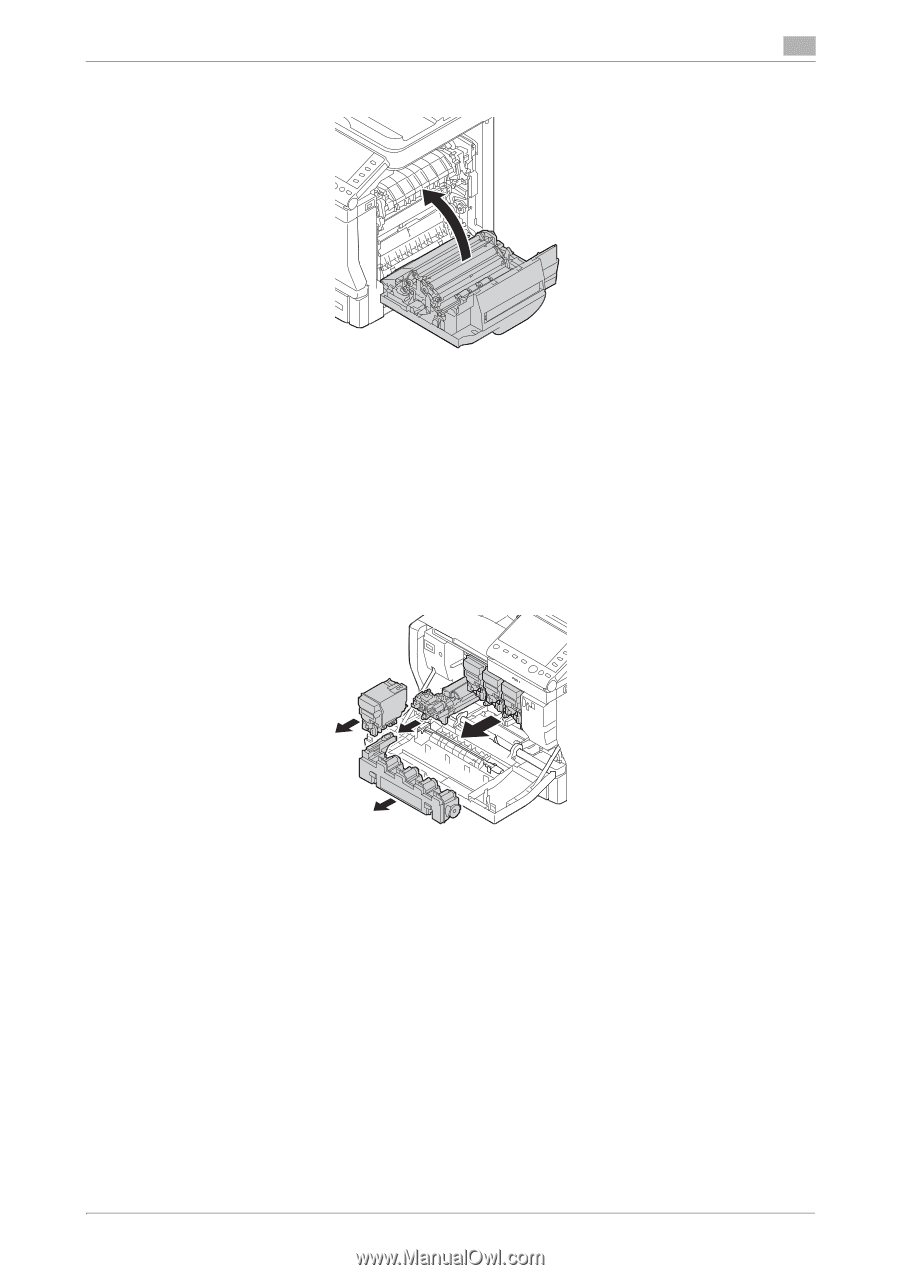
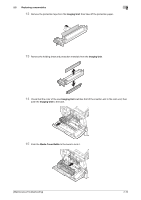
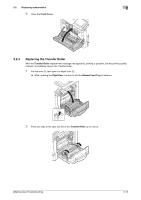
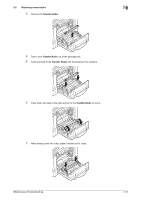
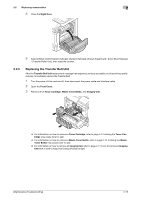
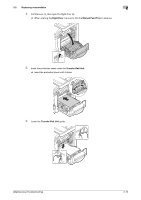
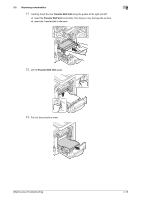
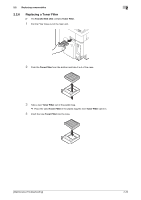
2.2 Replacing consumables 2 8 Close the Right Door. 9 Select [Utility] - [Administrator Settings] - [System Settings] - [Expert Adjustment] - [Life] - [New Release] - [Transfer Roller Unit], then reset the counter. 2.2.5 Replacing the Transfer Belt Unit After the Transfer Belt Unit replacement message has appeared, printing is possible, but the printing quality reduces. Immediately replace the Transfer Belt. 1 Turn the power of this machine off, then disconnect the power cable and interface cable. 2 Open the Front Cover. 3 Remove all of Toner Cartridge, Waste Toner Bottle, and Imaging Unit. % For information on how to remove a Toner Cartridge, refer to page 2-3. Inclining the Toner Cartridge may cause toner to spill. % For information on how to remove a Waste Toner Bottle, refer to page 2-12. Inclining the Waste Toner Bottle may cause toner to spill. % For information on how to remove an Imaging Unit, refer to page 2-7. Cover the removed Imaging Unit with a cloth to keep from being affected by light. [Maintenance/Troubleshooting] 2-15
-
 1
1 -
2
-
3
-
4
-
5
-
6
-
7
-
8
-
9
-
10
-
11
-
12
-
13
-
14
-
15
-
16
-
17
-
18
-
19
-
20
-
21
-
 22
22 -
 23
23 -
 24
24 -
 25
25 -
 26
26 -
 27
27 -
 28
28 -
 29
29 -
 30
30 -
 31
31 -
 32
32 -
33
-
34
-
35
-
36
-
37
-
38
-
39
-
40
-
41
-
42
-
43
-
44
-
45
-
46
-
47
-
48
-
49
-
50
-
51
-
52
-
53
-
54
-
55
-
56
-
57
-
58
-
59
-
60
-
61
-
62
-
63
-
64
-
65
-
66
-
67
-
68
-
69
-
70
-
71
-
72
-
73
-
74
-
75
-
76
-
77
-
78
-
79
-
80
-
81
 |
 |