Konica Minolta bizhub C3350 bizhub C3850/C3350 Maintenance/Troubleshooting Use - Page 34
Replacing a Fusing Unit, Replacing consumables, Fusing Unit, Right Door, Manual Feed Tray
 |
View all Konica Minolta bizhub C3350 manuals
Add to My Manuals
Save this manual to your list of manuals |
Page 34 highlights
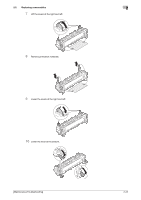
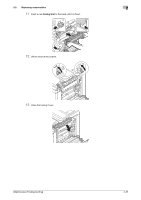
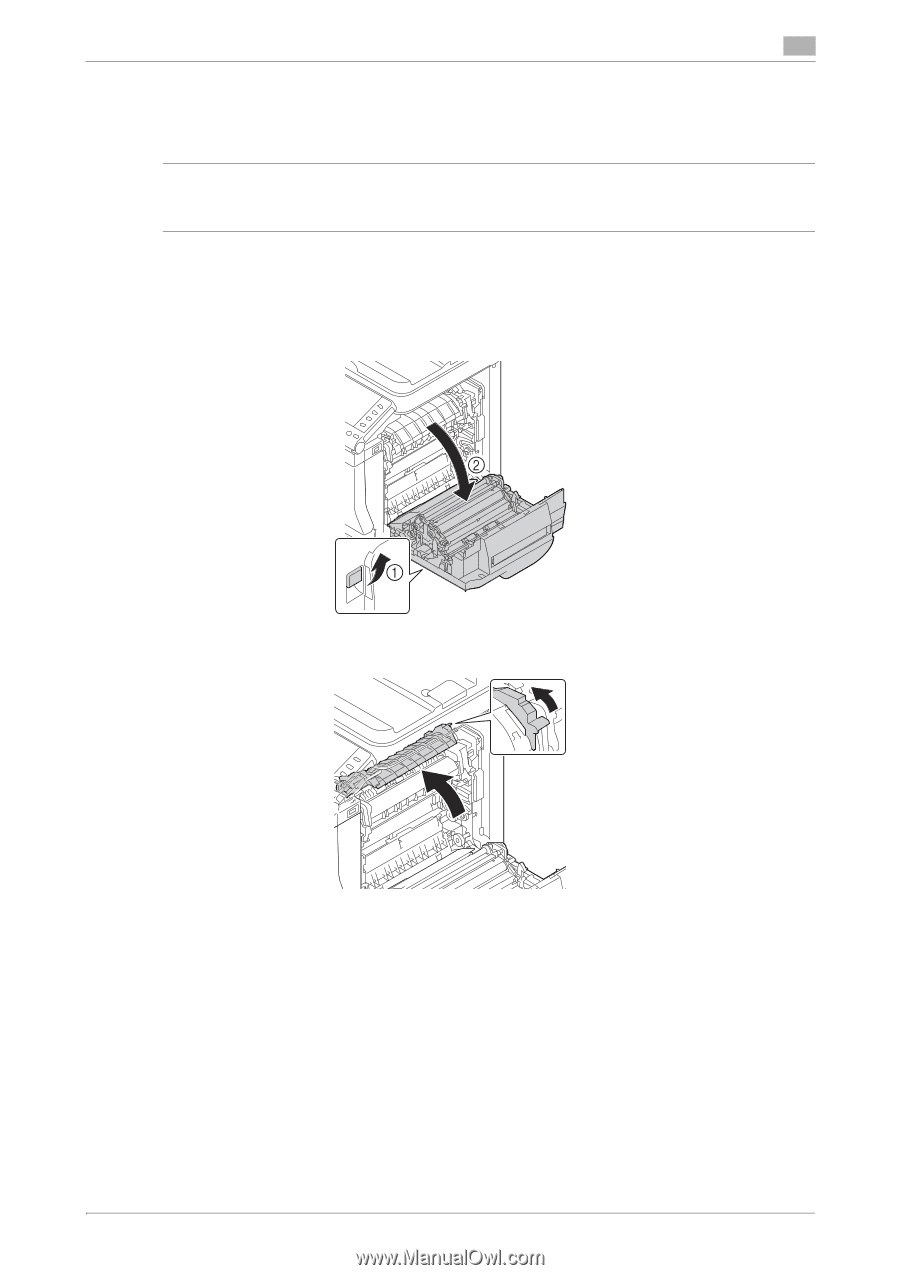
2.2 Replacing consumables 2 2.2.7 Replacing a Fusing Unit After the Fusing Unit replacement message has appeared, printing is possible, but the printing quality reduces. Immediately replace the Fusing Unit. 7CAUTION - The Fusing Unit is too hot. It may cause a burn injury; therefore, leave the Fusing Unit out for 20 minutes or more until it reaches room temperature after turning the power off. Then, replace the Fusing Unit. 1 Turn off the power of this machine. 2 Pull the lever (1), then open the Right Door (2). % When opening the Right Door, be sure to fold the Manual Feed Tray in advance. 3 Open the Fusing Cover. [Maintenance/Troubleshooting] 2-22
-
 1
1 -
2
-
3
-
4
-
5
-
6
-
7
-
8
-
9
-
10
-
11
-
12
-
13
-
14
-
15
-
16
-
17
-
18
-
19
-
20
-
21
-
22
-
23
-
24
-
25
-
26
-
27
-
28
-
 29
29 -
 30
30 -
 31
31 -
 32
32 -
 33
33 -
 34
34 -
 35
35 -
 36
36 -
 37
37 -
 38
38 -
 39
39 -
40
-
41
-
42
-
43
-
44
-
45
-
46
-
47
-
48
-
49
-
50
-
51
-
52
-
53
-
54
-
55
-
56
-
57
-
58
-
59
-
60
-
61
-
62
-
63
-
64
-
65
-
66
-
67
-
68
-
69
-
70
-
71
-
72
-
73
-
74
-
75
-
76
-
77
-
78
-
79
-
80
-
81
 |
 |
[Maintenance/Troubleshooting]
2-22
2.2
Replacing consumables
2
2.2.7
Replacing a Fusing Unit
After the
Fusing Unit
replacement message has appeared, printing is possible, but the printing quality re-
duces. Immediately replace the Fusing Unit.
7
CAUTION
-
The Fusing Unit is too hot. It may cause a burn injury; therefore, leave the Fusing Unit out for 20 minutes
or more until it reaches room temperature after turning the power off. Then, replace the Fusing Unit.
1
Turn off the power of this machine.
2
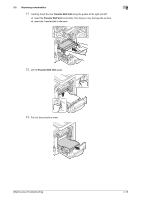
Pull the lever (1), then open the Right Door (2).
%
When opening the
Right Door
, be sure to fold the
Manual Feed Tray
in advance.
3
Open the Fusing Cover.