LG LRE3083BD Owners Manual - English Spanish - Page 40
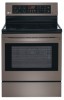
Replacing the oven door, REMOVING AND REPLACING THE, OVEN DOOR AND DRAWER, Removing the oven door
 |
View all LG LRE3083BD manuals
Add to My Manuals
Save this manual to your list of manuals |
Page 40 highlights
ENGLISH REMOVING AND REPLACING THE OVEN DOOR AND DRAWER CAUTION • The door is very heavy. Be careful when removing and lifting the door. • DO NOT lift the door by the handle. • DO NOT hit the glass with pots, pans, or any other object. • Scratching, hitting, jarring or stressing the glass may weaken its structure, causing an increased risk of breakage at a later time. Removing the oven door 1. Fully open the door. Pull the hinge locks down toward the door frame, to the unlocked position. A tool, such as a small flat-blade screwdriver, may be required. Slot Hinge lock Hinge arm Door frame Pull hinge locks down to unlock 2. Firmly grasp both sides of the door at the top. Close the door to the removal position (approximately five degrees) which is halfway between the broil stop position and fully closed. About 5˚ care and cleaning 39 Replacing the oven door 1. Firmly grasp both sides of the door at the top. Hinge arm Bottom edge of slot Indentation 2. With the door at the same angle as the removal position, seat the indentation of the hinge arm into the bottom edge of the hinge slot. The notch in the hinge arm must be fully seated into the bottom of the slot. Slot Hinge lock Hinge arm Door frame Push hinge locks up to lock 3. Fully open the door. If the door will not fully open, the indentation is not seated correctly in the bottom edge of the slot. 4. Push the hinge locks down against the front frame of the oven cavity to the locked position. Close the oven door. Removal Position 3. Lift the door up and out until the hinge arm is clear of the slot. Put the door on the floor.
-
 1
1 -
2
-
3
-
4
-
5
-
6
-
7
-
8
-
9
-
10
-
11
-
12
-
13
-
14
-
15
-
16
-
17
-
18
-
19
-
20
-
21
-
22
-
23
-
24
-
25
-
26
-
27
-
28
-
29
-
30
-
31
-
32
-
33
-
34
-
 35
35 -
 36
36 -
 37
37 -
 38
38 -
 39
39 -
 40
40 -
 41
41 -
 42
42 -
 43
43 -
 44
44 -
 45
45 -
46
-
47
-
48
-
49
-
50
-
51
-
52
-
53
-
54
-
55
-
56
-
57
-
58
-
59
-
60
-
61
-
62
-
63
-
64
-
65
-
66
-
67
-
68
-
69
-
70
-
71
-
72
-
73
-
74
-
75
-
76
-
77
-
78
-
79
-
80
-
81
-
82
-
83
-
84
-
85
-
86
-
87
-
88
-
89
-
90
-
91
-
92
-
93
-
94
-
95
-
96
-
97
 |
 |
