Lenovo ThinkPad X60 (English) Rescue and Recovery 4.5 Deployment Guide - Page 38
Customizing the preboot environment, Editing pdagui.ini - sata
 |
View all Lenovo ThinkPad X60 manuals
Add to My Manuals
Save this manual to your list of manuals |
Page 38 highlights
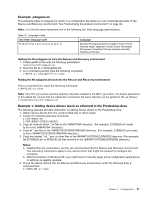
Example 2 : Adding mass-storage controller drivers (such as SATA) to the Predesktop Area 1. Create a subdirectory under \minint\system32\ to contain the driver. 2. Copy *.sys into \minint\systme32\drivers. 3. Update \minint\system32\winpeoem.sif to include the subdirectory containing the driver (for an example, examine this file from 4.5 build 37). 4. Ensure the iastor file and folder are in the subdirectory you created.. 5. Make sure the subdirectory you created containing the iastor driver has a valid txtsetup.oem file. Customizing the preboot environment By editing the configuration file pdaguixx.ini (where xx is the language designation), you can customize the following elements of the Rescue and Recovery environment: • Changing the main GUI fonts • Changing the environment background • Entries and functions in the left panel of the user interface • The HTML-based help system for the Rescue and Recovery environment Note: To obtain, edit, and replace the pdaguien.ini file, see "Example: pdaguixx.ini" on page 31. Changing the main GUI fonts You can change the font of the main graphical user interface (GUI). The default settings might not display all characters correctly, depending on the language and characters required. In pdaguixx.ini (where xx is the language designation) the [Fonts] section contains the default settings for the character style that is displayed. The following are default settings for most single-byte character set languages: [Fonts] LeftNavNorm = "Microsoft Sans Serif" LeftNavBold = "Arial Bold" MenuBar = "Microsoft Sans Serif" Depending on your visual and character set requirements, the following fonts are compatible and tested with the Rescue and Recovery environment: • Courier • Times New Roman • Comic Sans MS Other fonts might be compatible, but have not been tested. Changing the environment background The background of the right panel is a bitmap graphic and is named mainbk.bmp. The file mainbk.bmp is located in the \PREBOOT\USRINTFC directory. If you create your own bitmap image for the right-panel background, it must conform to the following dimensions: • 620 pixels wide • 506 pixels high You must place the file in the \PREBOOT\USRINTFC directory in order for the Rescue and Recovery program to present the desired background. Note: To get, edit, and replace the mainbk.bmp file, see "Using RRUTIL.EXE" on page 26. Editing pdagui.ini Changing the left-panel entries requires editing the pdaguixx.ini (where xx is the language designation) file. For information about getting pdaguixx.ini from the Rescue and Recovery environment and replacing the file, see "Using RRUTIL.EXE" on page 26. 32 Rescue and Recovery 4.5 Deployment Guide
-
 1
1 -
2
-
3
-
4
-
5
-
6
-
7
-
8
-
9
-
10
-
11
-
12
-
13
-
14
-
15
-
16
-
17
-
18
-
19
-
20
-
21
-
22
-
23
-
24
-
25
-
26
-
27
-
28
-
29
-
30
-
31
-
32
-
 33
33 -
 34
34 -
 35
35 -
 36
36 -
 37
37 -
 38
38 -
 39
39 -
 40
40 -
 41
41 -
 42
42 -
 43
43 -
44
-
45
-
46
-
47
-
48
-
49
-
50
-
51
-
52
-
53
-
54
-
55
-
56
-
57
-
58
-
59
-
60
-
61
-
62
-
63
-
64
-
65
-
66
-
67
-
68
-
69
-
70
-
71
-
72
-
73
-
74
-
75
-
76
-
77
-
78
-
79
-
80
-
81
-
82
-
83
-
84
-
85
-
86
 |
 |
