Lexmark E450DN User's Guide - Page 22
Extending the tray for legal or folio size paper, Printing, Attaching the dust cover
 |
View all Lexmark E450DN manuals
Add to My Manuals
Save this manual to your list of manuals |
Page 22 highlights
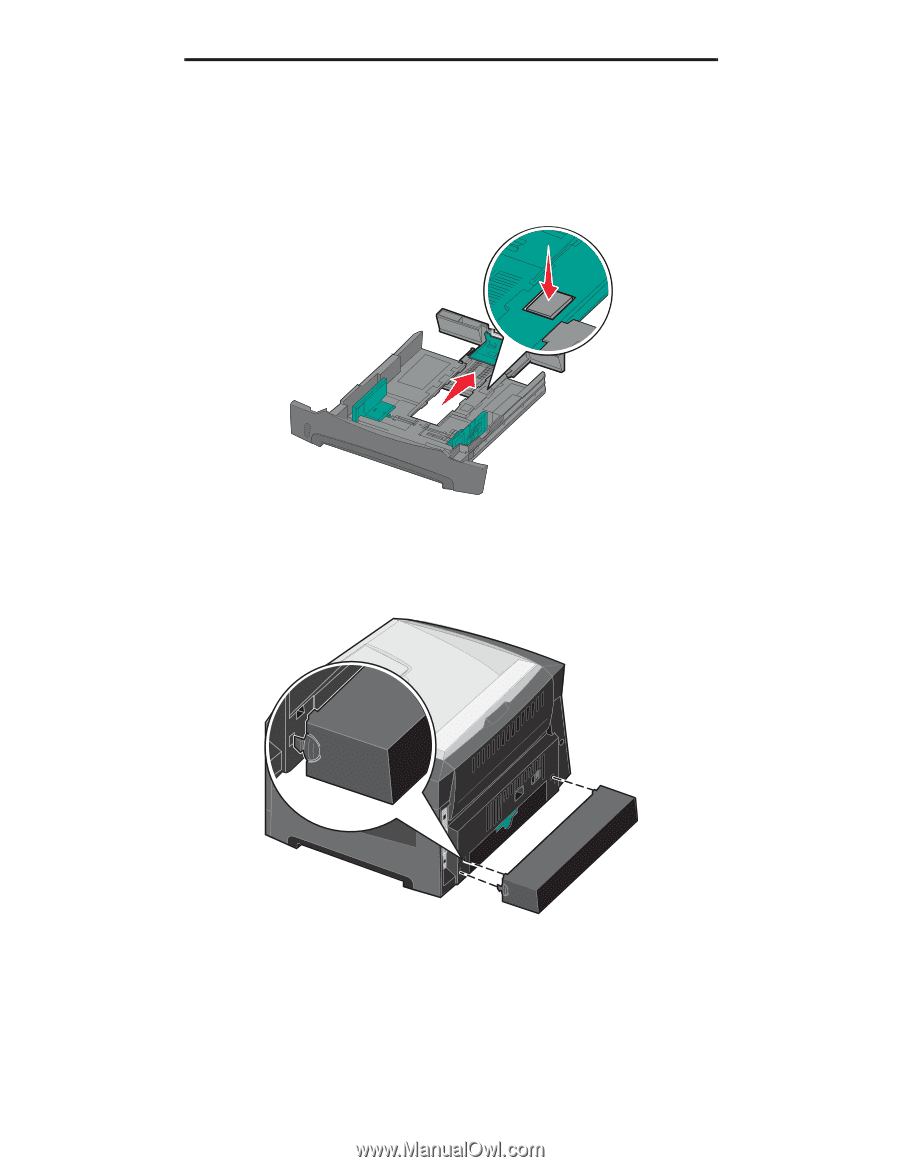
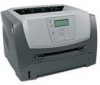
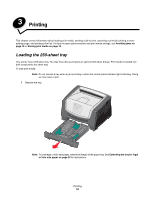
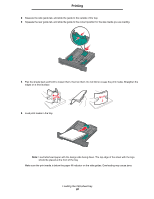
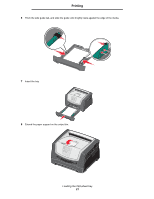
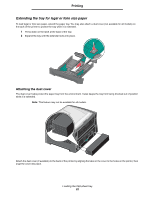
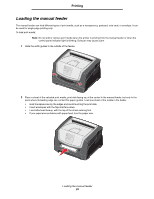
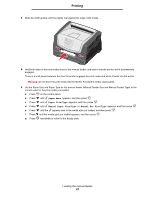
Printing Extending the tray for legal or folio size paper To load legal or folio size paper, extend the paper tray. You may also attach a dust cover (not available for all models) on the back of the printer to protect the tray while it is extended. 1 Press down on the latch at the back of the tray. 2 Expand the tray until the extender locks into place. Attaching the dust cover The dust cover helps protect the paper tray from the environment. It also keeps the tray from being knocked out of position while it is extended. Note: This feature may not be available for all models. Attach the dust cover (if available) to the back of the printer by aligning the tabs on the cover to the holes on the printer, then snap the cover into place. Loading the 250-sheet tray 22
-
 1
1 -
2
-
3
-
4
-
5
-
6
-
7
-
8
-
9
-
10
-
11
-
12
-
13
-
14
-
15
-
16
-
 17
17 -
 18
18 -
 19
19 -
 20
20 -
 21
21 -
 22
22 -
 23
23 -
 24
24 -
 25
25 -
 26
26 -
 27
27 -
28
-
29
-
30
-
31
-
32
-
33
-
34
-
35
-
36
-
37
-
38
-
39
-
40
-
41
-
42
-
43
-
44
-
45
-
46
-
47
-
48
-
49
-
50
-
51
-
52
-
53
-
54
-
55
-
56
-
57
-
58
-
59
-
60
-
61
-
62
-
63
-
64
-
65
-
66
-
67
-
68
-
69
-
70
 |
 |