Lexmark E450DN User's Guide - Page 29
Macintosh, At the printer, Print All Jobs
 |
View all Lexmark E450DN manuals
Add to My Manuals
Save this manual to your list of manuals |
Page 29 highlights
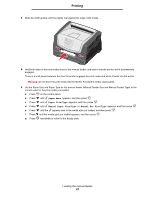
Printing Macintosh 1 From a word processor, spreadsheet, browser, or other application, select File Æ Print. 2 In the Copies & Pages or General pop-up menu, select Job Routing. a When using Mac OS 9, if Job Routing is not a choice on the pop-up menu, select Plug-in Preferences Æ Print Time Filters. b Turn down the disclosure triangle to the left of Print Time Filters, and select Job Routing. c In the pop-up menu, select Job Routing. 3 In the radio group, select the type of held job you want, enter a user name, and then send your job to the printer. Go to the printer when you are ready to retrieve your print job, and follow the At the printer steps on page 29. At the printer 1 Press 2 Press 3 Press until Held jobs appears, and then press . until the appears next to your user name, and then press . until the appears next to the type of action you want to perform: Print All Jobs Print A Job Print Copies Delete All Jobs Delete A Job 4 Press . 5 Press until the appears next to the job you want, and then press . The job will print or be deleted according to the type of print job and action you selected. Printing held jobs 29
-
 1
1 -
2
-
3
-
4
-
5
-
6
-
7
-
8
-
9
-
10
-
11
-
12
-
13
-
14
-
15
-
16
-
17
-
18
-
19
-
20
-
21
-
22
-
23
-
 24
24 -
 25
25 -
 26
26 -
 27
27 -
 28
28 -
 29
29 -
 30
30 -
 31
31 -
 32
32 -
 33
33 -
 34
34 -
35
-
36
-
37
-
38
-
39
-
40
-
41
-
42
-
43
-
44
-
45
-
46
-
47
-
48
-
49
-
50
-
51
-
52
-
53
-
54
-
55
-
56
-
57
-
58
-
59
-
60
-
61
-
62
-
63
-
64
-
65
-
66
-
67
-
68
-
69
-
70
 |
 |