Lexmark Interact S608 SmartSolutions User's Guide - Page 13
Lexmark Interact S608 Manual
 |
View all Lexmark Interact S608 manuals
Add to My Manuals
Save this manual to your list of manuals |
Page 13 highlights
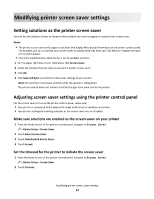
Modifying printer screen saver settings Setting solutions as the printer screen saver You can use the Solution Center to choose which solution you want to appear on your printer screen saver. Notes: • The printer screen saver only supports solutions that display Web-based information on the printer control panel. For example, you can customize your screen saver to display headlines from your RSS feeds or images from your online photo viewer. • Check the SmartSolutions Web site for a list of available solutions. 1 On the upper right side of your workspace, click Screen Saver. 2 Select the solution that you want to use as the printer screen saver. 3 Click OK. 4 Click Save and Sync to send the screen saver settings to your printer. Note: Do not close the browser window while the update is taking place. The printer control panel will indicate that the changes have been sent to the printer. Adjusting screen saver settings using the printer control panel For the screen saver to run on the printer control panel, make sure: • Your printer is connected to the Internet through an Ethernet or wireless connection. • Your printer settings for running solutions as the screen saver are not disabled. Make sure solutions are enabled as the screen saver on your printer 1 From the home screen of the printer control panel, navigate to Screen Saver: > Device Setup > Screen Saver 2 Touch Select Screen Saver. 3 Touch Downloaded Screen Saver. 4 Touch Accept. Set the timeout for the printer to initiate the screen saver 1 From the home screen of the printer control panel, navigate to Screen Saver: > Device Setup > Screen Saver 2 Touch Timeout. Modifying printer screen saver settings 13
-
 1
1 -
2
-
3
-
4
-
5
-
6
-
7
-
 8
8 -
 9
9 -
 10
10 -
 11
11 -
 12
12 -
 13
13 -
 14
14 -
 15
15 -
 16
16 -
 17
17 -
 18
18 -
19
-
20
-
21
-
22
-
23
-
24
-
25
-
26
-
27
-
28
-
29
-
30
-
31
-
32
-
33
-
34
-
35
-
36
-
37
-
38
-
39
-
40
-
41
-
42
 |
 |