Lexmark Interact S608 SmartSolutions User's Guide - Page 36
Lexmark Interact S608 Manual
 |
View all Lexmark Interact S608 manuals
Add to My Manuals
Save this manual to your list of manuals |
Page 36 highlights
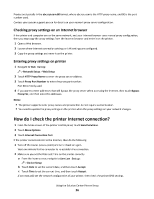
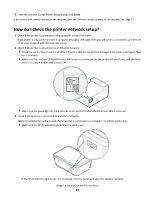
Proxies are typically in the abc.xyz.com:80 format, where abc.xyz.com is the HTTP proxy name, and 80 is the port number used. Contact your system support person for details on your network proxy server configuration. Checking proxy settings on an Internet browser If the printer and computer are on the same network, and your Internet browser uses manual proxy configuration, then you may copy the proxy settings from the Internet browser and enter it on the printer. 1 Open a Web browser. 2 Locate where Internet connection settings or LAN settings are configured. 3 Copy the proxy settings and enter it on the printer. Entering proxy settings on printer 1 Navigate to Web Setup: > Network Setup > Web Setup 2 Touch HTTP Proxy Name to enter the proxy server address. 3 Touch Proxy Port Number to enter the proxy port number. Port 80 is mostly used. 4 If you want to enter addresses that will bypass the proxy server when accessing the Internet, then touch Bypass Proxy For, and then enter the addresses. Notes: • The printer supports static proxy names and proxies that do not require authentication. • You need to update the proxy settings on the printer when the proxy settings on your network changes. How do I check the printer Internet connection? 1 From the home screen of the printer control panel, touch SmartSolutions. 2 Touch More Options. 3 Touch Internet Connection Test. If the printer cannot connect to the Internet, then do the following: 1 Turn off the router (access point) and turn it back on again. Wait one minute for the computer to re-establish the connection. 2 Make sure you set the Date and Time on the printer correctly. a From the home screen, navigate to Device Setup: > Device Setup b Touch Date to set the current date, and then touch Accept. c Touch Time to set the current time, and then touch Accept. If you manually set the network configuration of your printer, then check the printer DNS settings. Using the Solution Center Printer Setup 36
-
 1
1 -
2
-
3
-
4
-
5
-
6
-
7
-
8
-
9
-
10
-
11
-
12
-
13
-
14
-
15
-
16
-
17
-
18
-
19
-
20
-
21
-
22
-
23
-
24
-
25
-
26
-
27
-
28
-
29
-
30
-
 31
31 -
 32
32 -
 33
33 -
 34
34 -
 35
35 -
 36
36 -
 37
37 -
 38
38 -
 39
39 -
 40
40 -
 41
41 -
42
 |
 |