Lexmark T630n Setup Guide - Page 16
Installing a 250-sheet or 500-sheet drawer
 |
UPC - 734646532211
View all Lexmark T630n manuals
Add to My Manuals
Save this manual to your list of manuals |
Page 16 highlights
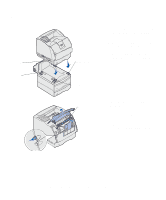
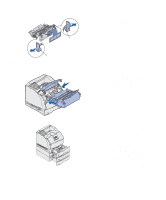
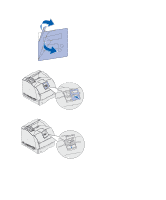
Locking pins Guides 4 Pull each locking pin up to unlock it, and then pull up on the guides to remove them. 5 Reposition the paper guides in the color-coded slots, located at the top of the unit, corresponding to the paper size you selected. 6 Insert the paper guides into the matching colored slots located on the inside bottom of the unit. The guides should now be aligned flush against the top of the unit. 7 Push each pin down to lock the guides in place. Installing a 250-sheet or 500-sheet drawer CAUTION: Floor-mounted configurations require additional furniture. You must use either a printer stand or printer base if you are using a 2000-sheet drawer, a duplex unit and an input option, or more than one input option. If you purchased an MFP that scans, copies, and faxes, you may need additional furniture. More information is available on our Lexmark Web site at www.lexmark.com/multifunctionprinters. Decals Optional drawers attach under the printer and optional duplex unit. The printer automatically recognizes any drawer that is installed. A drawer consists of a tray and a support unit. The 250-sheet drawer and the 500-sheet drawer are installed the same way. Set up the printer and print media handling options 11
-
 1
1 -
2
-
3
-
4
-
5
-
6
-
7
-
8
-
9
-
10
-
 11
11 -
 12
12 -
 13
13 -
 14
14 -
 15
15 -
 16
16 -
 17
17 -
 18
18 -
 19
19 -
 20
20 -
 21
21 -
22
-
23
-
24
-
25
-
26
-
27
-
28
-
29
-
30
-
31
-
32
-
33
-
34
-
35
-
36
-
37
-
38
-
39
-
40
-
41
-
42
-
43
-
44
-
45
-
46
-
47
-
48
-
49
-
50
-
51
-
52
-
53
-
54
-
55
-
56
-
57
-
58
-
59
-
60
-
61
-
62
-
63
-
64
-
65
-
66
-
67
 |
 |
