Lexmark T630n Setup Guide - Page 48
Fiber optic, 11b wireless, options, Attach cables, Publications
 |
UPC - 734646532211
View all Lexmark T630n manuals
Add to My Manuals
Save this manual to your list of manuals |
Page 48 highlights
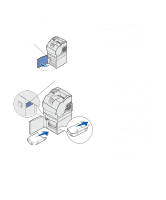
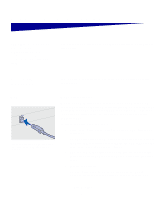
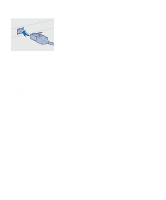
Use Category 5 cable with an RJ-45 connector for the standard network port. Note: If you see a message other than Ready on the display, refer to the Publications CD for instructions on clearing the message. Look for information about understanding printer messages. To attach the printer to a network: 1 Make sure the printer is turned off and unplugged. 2 Plug one end of the standard network cable into a LAN drop or hub and the other end into the Ethernet port on the back of the printer. The printer automatically adjusts for the network speed. 3 Plug one end of the printer power cord into the socket at the back of the printer and the other end into a properly grounded outlet. 4 Turn on the printer. After the printer completes its internal tests, the Ready message indicates that the printer is ready to receive jobs. 5 Turn on your computer and any other peripherals. 6 Continue with "Verify printer setup" on page 54. Fiber optic Fiber optic is a type of Ethernet, but uses different cables. Various fiber optic Ethernet ports are available on optional MarkNet print server cards that can be installed in your printer. If you purchased a fiber optic option card, see "Installing an option card" on page 34 for hardware instructions. 802.11b wireless options Your printer can be converted to wireless networking by using an optional 802.11b Wireless Print Adapter. This adapter is a piece of hardware that plugs into the Ethernet port on your printer. If you purchased this adapter for your printer, refer to the documentation that shipped with the adapter for installation and configuration. Attach cables 43
-
 1
1 -
2
-
3
-
4
-
5
-
6
-
7
-
8
-
9
-
10
-
11
-
12
-
13
-
14
-
15
-
16
-
17
-
18
-
19
-
20
-
21
-
22
-
23
-
24
-
25
-
26
-
27
-
28
-
29
-
30
-
31
-
32
-
33
-
34
-
35
-
36
-
37
-
38
-
39
-
40
-
41
-
42
-
 43
43 -
 44
44 -
 45
45 -
 46
46 -
 47
47 -
 48
48 -
 49
49 -
 50
50 -
 51
51 -
 52
52 -
 53
53 -
54
-
55
-
56
-
57
-
58
-
59
-
60
-
61
-
62
-
63
-
64
-
65
-
66
-
67
 |
 |
