Lexmark W812 Setup Guide
Lexmark W812 Manual
 |
View all Lexmark W812 manuals
Add to My Manuals
Save this manual to your list of manuals |
Lexmark W812 manual content summary:
- Lexmark W812 | Setup Guide - Page 1
W812 Setup Guide July 2002 www.lexmark.com - Lexmark W812 | Setup Guide - Page 2
described in the operating instructions, to a professional service person. • This product is designed, tested, and approved to meet strict global safety standards with the use of specific Lexmark components. The safety features of some parts may not always be obvious. Lexmark is not responsible for - Lexmark W812 | Setup Guide - Page 3
optional drawers 3 Step 3: Position the printer 5 Step 4: Install an optional duplex unit 8 Step 5: Install the print cartridge 11 Step 6: Apply an operator panel overlay 14 Step 7: Load paper 15 Loading 250-sheet trays 16 Loading 500-sheet trays 21 Loading the multipurpose feeder 22 Step - Lexmark W812 | Setup Guide - Page 4
40 Configuring for Pull Printing 40 Step 12: Install printer drivers 41 Configuring for network printing 41 Configuring for local printing 44 Step 13: Distribute information to users 46 Identifying printer users 46 Finding information 46 Distributing the information 47 Storing quick - Lexmark W812 | Setup Guide - Page 5
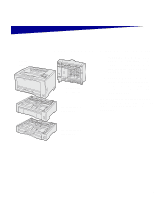
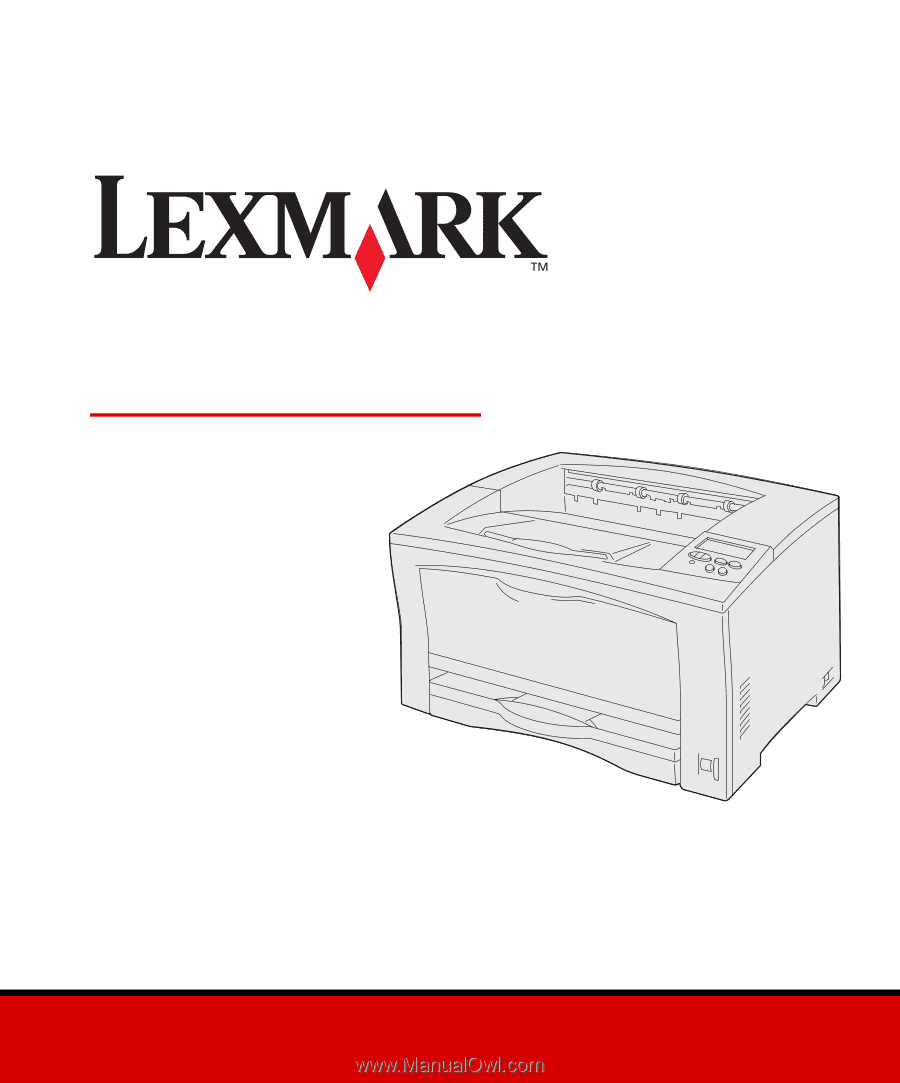
unit (see page 8) 500-sheet drawer (see page 3) Your printer is available in two models: • Lexmark™ W812, with 300 to 600 dots per inch (dpi) resolution, 16MB of standard memory, one 250-sheet tray, and USB and parallel connectors. • Lexmark W812n, a network model with 32MB of standard memory, an - Lexmark W812 | Setup Guide - Page 6
complete setup, refer to the other printer documentation. Lexmark W812 Publications CD The Publications CD provides information about loading paper, clearing error messages, ordering and replacing supplies, installing maintenance kits, and troubleshooting. It also provides general information for - Lexmark W812 | Setup Guide - Page 7
200 mm (7.9 in.) 200 mm (7.9 in.) 700 mm (27.5 in.) • Leave enough room to open the printer trays, covers, doors, and options. It is also important to allow space around the printer for proper ventilation. • Provide the proper environment: - A firm, level surface - Away from the direct airflow of - Lexmark W812 | Setup Guide - Page 8
with one 250-sheet tray • Power cord • Print cartridge • Setup Guide with a Publications CD • Quick Reference card, Clearing Paper Jams card, and printer pocket • Drivers CD If any items are missing or damaged, refer to the Publications CD for the designated Lexmark support phone number for your - Lexmark W812 | Setup Guide - Page 9
drawer 250-sheet drawer 500-sheet drawers 500-sheet drawer Your printer supports up to two additional paper drawers: • 250-sheet drawer-supports paper sizes up to A3 and ledger. • 500-sheet drawer-supports either A4 or letter size paper only, depending on which 500-sheet drawer you purchase. The - Lexmark W812 | Setup Guide - Page 10
you have chosen for your printer. If you are installing the drawer on top of another drawer, align the guide pins on the bottom drawer with the holes in the bottom of the top drawer. 3 Install another drawer, or continue with Step 3: "Position the printer" on page 5. 4 Install optional drawers - Lexmark W812 | Setup Guide - Page 11
two people to lift it safely. Once you have selected a location and set up any optional drawers, you are ready to position the printer. 1 Have someone help you lift the printer using the handholds on the sides of the printer. 2 Place the printer in the location you have chosen. Position the - Lexmark W812 | Setup Guide - Page 12
If you are installing the printer on an optional drawer: a Align the guide pins on the drawer with the holes in the bottom of the printer. Make sure the printer is seated securely on the option. 6 Position the printer - Lexmark W812 | Setup Guide - Page 13
drawers. There are two insertion points in the front and two in the rear. e Insert the trays into the printer. 3 Remove any tape or packing material from the outside of the printer. What do I do next? Task Install an optional duplex unit Install the print cartridge Go to page... 8 11 Position the - Lexmark W812 | Setup Guide - Page 14
you are installing a duplex unit sometime after setting up the printer, turn the printer off and unplug the power cord before continuing. Your printer supports an optional duplex unit that lets you print on both sides of a sheet of paper. Note: You need a small Phillips screwdriver to install the - Lexmark W812 | Setup Guide - Page 15
. 4 Lower the duplex unit into place. Make sure the connector near the bottom of the duplex unit connects properly with the printer. Screw 5 Open the duplex unit upper cover. 6 Tighten the attached screw in the center of the duplex unit. 7 Close the cover. Install an optional duplex - Lexmark W812 | Setup Guide - Page 16
Screws 8 Tighten the attached screws on the lower left and right of the duplex unit. 10 Install an optional duplex unit - Lexmark W812 | Setup Guide - Page 17
Step 5: Install the print cartridge Follow these instructions to install the print cartridge: 1 Press the release button on the left side of the printer, and then open the top cover. Install the print cartridge 11 - Lexmark W812 | Setup Guide - Page 18
2 Push down and in on the orange plastic packing tabs inside the printer to remove them. Discard the tabs. 3 Remove all cardboard or other packing material from inside the printer. 4 Remove the print cartridge from its packing materials. Warning! Do not touch the photoconductor drum on the bottom of - Lexmark W812 | Setup Guide - Page 19
to distribute the toner. 6 Place the cartridge on a flat surface and remove the toner seal. 7 Align the cartridge with the grooves in the printer. 8 Insert the cartridge as far as it will go. 9 Close the top cover. What do I do next? Task Apply an operator panel overlay Load paper Go to page - Lexmark W812 | Setup Guide - Page 20
operator panel overlay If English is not your preferred language and your printer shipped with an operator panel overlay, attach the overlay that has the overlay. Refer to the Publications CD for instructions on changing the language of the text displayed on the operator panel. 14 Apply an - Lexmark W812 | Setup Guide - Page 21
table lists page numbers where you can find loading instructions for each tray. Source Tray 1 Trays 2 and 3 (250-sheet drawer) Trays 2 and 3 (500-sheet letter drawer) Trays 2 and 3 (500-sheet A4 drawer) Multipurpose feeder 1 75 g/m2 (20 lb) Paper sizes supported A3, A4, A5, JIS B4, JIS B5, letter - Lexmark W812 | Setup Guide - Page 22
B5 size paper Follow these instructions to load paper that is long-edge fed into the printer. 1 Remove the tray, and then set it on a flat surface. 2 Remove the tray cover. Make sure all packing materials have been removed from inside the tray. 16 Load paper 3 Squeeze the front guide lever and - Lexmark W812 | Setup Guide - Page 23
print side up. Do not load bent or wrinkled paper. 7 Slide the side guides until they lightly touch the stack of paper. Warning! Do not exceed the maximum stack height indicated on the tray. Overfilling the tray may cause jams. 8 Squeeze the front guide lever and slide it back until it touches the - Lexmark W812 | Setup Guide - Page 24
to match the size of the paper loaded in the tray. 12 Select the paper type and paper source from the operator panel. You will also need to select the paper size, type, and source from your software application when you send a job to print. Universal Warning! Paper jams or errors may occur if the - Lexmark W812 | Setup Guide - Page 25
legal, 8.5x13, or 11x17 size paper Follow these instructions to load paper that is short-edge fed into the printer. 1 Remove the tray, and then set it on a flat surface. 2 Remove the tray cover. Make sure all packing materials have been removed from inside the tray. 3 Slide the locking mechanisms - Lexmark W812 | Setup Guide - Page 26
4 Pull the extension out until it stops. 5 Slide the locking mechanisms outward to lock the extension in place. 6 Follow steps 3 through 12 under "Loading letter, A4, A5, or JIS B5 size paper" on page 16 to finish loading the tray. 20 Load paper - Lexmark W812 | Setup Guide - Page 27
Loading 500-sheet trays Follow these instructions to load A4 or letter size paper into a 500-sheet tray, depending on which tray you purchased. Do not exceed the recommended capacity (see page 15). 1 Remove the tray, and then set it on a flat surface. 2 Remove the tray cover. Make sure all packing - Lexmark W812 | Setup Guide - Page 28
Loading the multipurpose feeder Follow these instructions to load paper into the multipurpose feeder. Do not exceed the recommended capacity (see page 15). 1 Open the multipurpose feeder. 2 Slide the side guides to the correct position for the size paper you are loading. 22 Load paper - Lexmark W812 | Setup Guide - Page 29
exceed the maximum stack height indicated on the feeder. Overfilling the feeder may cause jams. 5 Select the paper size, paper type, and paper source from the operator panel. You will also need to select the paper size, type, and source from your software application when you send a job to print - Lexmark W812 | Setup Guide - Page 30
to remove the system board access panel and to install some of the cards. The instructions in this section help you install any of the following: • Memory cards - Printer memory - Flash memory • Firmware cards - Additional functionality - Internet capabilities • Option cards - Hard disk with - Lexmark W812 | Setup Guide - Page 31
Removing the system board access panel Follow these instructions to remove the printer system board access cover and panel: 1 Press the release button on the left side of the printer, and then open the top cover. 2 While pushing the side release button, slide the right cover toward the rear of the - Lexmark W812 | Setup Guide - Page 32
4 Loosen the screws on the access panel and remove the panel. What do I do next? Task Install a memory card Install a firmware card Install an option card Go to page... 27 28 30 26 Install memory, firmware, or option cards - Lexmark W812 | Setup Guide - Page 33
Installing a memory card Follow the instructions in this section to install either a printer memory card or a flash memory card. Note: Some memory options offered for other Lexmark printers cannot be used with your printer. Refer to the Publications CD for memory specifications. The system board - Lexmark W812 | Setup Guide - Page 34
Installing a firmware card Follow the instructions in this section to install an optional firmware card. The system board has one location to install a firmware card. Note: Firmware cards for other Lexmark printers cannot be used with this printer. 1 Remove the system board access panel (see page - Lexmark W812 | Setup Guide - Page 35
damage the contacts on the card connector. After reinstalling the system board access panel, we recommend that you apply the Option Added label to your printer. See "Applying the Option Added label" on page 33. What do I do next? Task Install an option card Reinstall the system board access panel - Lexmark W812 | Setup Guide - Page 36
supports the following option cards: • Hard disk with adapter card • MarkNet internal print server • RS-232C Serial/Parallel 1284-C Interface Card Install a hard disk with adapter card to add additional storage space to your printer your printer to a network. Follow the instructions in this - Lexmark W812 | Setup Guide - Page 37
Warning! Option cards are easily damaged by static electricity. Touch something metal on the printer before you touch a card. 3 Unpack the option card. Save the packing materials. 4 Align the connector on the option card with the connector on the system - Lexmark W812 | Setup Guide - Page 38
Reinstalling the system board access panel Follow these instructions to reinstall the printer system board access cover and panel. 1 Insert the metal tab on the bottom of the access panel behind the printer frame, and then secure the panel with the screws. 2 Insert the two tabs at the front of the - Lexmark W812 | Setup Guide - Page 39
the Option Added label The Option Added label alerts service personnel that an option has been installed. Follow these instructions to apply the Option Added label: 1 Remove the backing from the Option Added label. 2 Place the label next to the printer model and serial number label. Install memory - Lexmark W812 | Setup Guide - Page 40
network printing cables. Note: A 10BaseT/100BaseTX Fast Ethernet port is standard on the Lexmark W812n. To attach the printer to a network: 1 Make sure the printer is turned off and unplugged. 2 Connect the printer to a LAN drop or hub using standard cabling that is compatible with your network - Lexmark W812 | Setup Guide - Page 41
, only the Windows 98 SE, Windows Me, Windows 2000, and Windows XP operating systems support USB connections. Some UNIX, Linux, and Macintosh computers also support USB connections. Refer to your computer operating system documentation to see if your system supports USB. To attach the printer to - Lexmark W812 | Setup Guide - Page 42
• A parallel port requires an IEEE-1284 compliant parallel cable such as Lexmark part number 1329605 (3 m [10 ft]) or 1427498 (6 m [20 ft]). Use an IEEE-1284 compliant parallel cable to ensure that you can access all of your printer functions. Be sure to match the USB symbol on the cable to the - Lexmark W812 | Setup Guide - Page 43
10: Verify printer setup Turning on the printer 1 Plug one end of the power cord into the socket at the back of the printer and the other end into a properly grounded outlet. 2 Turn on the printer. If the printer instructions on clearing the message. Click Printing, and then Understanding printer - Lexmark W812 | Setup Guide - Page 44
paper trays are configured for the sizes and types of paper you loaded. 6 If you attached your printer to a network, continue with "Printing a network setup page" on page 38. Printing a network setup page If the printer printer returns support - Lexmark W812 | Setup Guide - Page 45
Note: You can find instructions for other methods of setting the IP address in the online documentation on the drivers CD that shipped with your printer. Launch the CD, click View Documentation, and then Network Printer Install. If your network is not using DHCP, then you must manually assign an IP - Lexmark W812 | Setup Guide - Page 46
, you should receive a reply. Configuring for Pull Printing If your printer has an optional Lexmark ImageQuick™ firmware card installed, you can configure for Pull Printing once an IP address is assigned to the printer. For detailed configuration instructions, refer to the CD that shipped with the - Lexmark W812 | Setup Guide - Page 47
guide to finding the printer driver installation instructions you need. Type of printer installation Network (Ethernet or Token-Ring connections) Local (parallel or USB connections) Network environment or operating system Windows 95/98/Me, Windows NT 4.0, Windows 2000, and Windows XP Macintosh - Lexmark W812 | Setup Guide - Page 48
functionality, such as printer status alerts. • Lexmark network port-works with Windows 95/98/Me, Windows NT 4.0, Windows 2000, and Windows XP) Supported printer drivers • Windows system printer driver • Lexmark custom printer driver System drivers are built into Windows operating systems. Custom - Lexmark W812 | Setup Guide - Page 49
.com for a complete list of supported UNIX and Linux platforms. The User's Guide in each package gives detailed instructions for installing and using Lexmark printers in UNIX and Linux environments. You can download these printer driver packages from Lexmark's Web site. Depending on which version - Lexmark W812 | Setup Guide - Page 50
, and Windows XP • USB-works only with Windows 98 SE/Me, Windows 2000, and Windows XP Note: Using the custom printer driver provides enhanced functionality, such as printer status alerts. Supported printer drivers • Windows system printer driver • Lexmark custom printer driver System drivers are - Lexmark W812 | Setup Guide - Page 51
Hat. Lexmark provides a printer driver package for each supported UNIX and Linux platform. Visit Lexmark's Web site at www.lexmark.com for a complete list of supported UNIX and Linux platforms. The User's Guide in each package gives detailed instructions for installing and using Lexmark printers in - Lexmark W812 | Setup Guide - Page 52
print quality • Information about using the operator panel • Instructions for replacing a print cartridge or other supplies • Solutions to common printing problems • Methods for clearing paper jams • Overview of printer menus • Explanation of printer messages 46 Distribute information to users - Lexmark W812 | Setup Guide - Page 53
then click File locations. • Send Lexmark's printer documentation URL to printer users (www.lexmark.com/publications). Users with Internet access can browse the site. • Print the information on the CD and store it near the printer for easy access. For printing instructions, launch the CD, and then - Lexmark W812 | Setup Guide - Page 54
P/N 14K0601 E.C. 4K0202 Lexmark and Lexmark with diamond design are trademarks of Lexmark International, Inc., registered in the United States and/or other countries. © 2002 Lexmark International, Inc. 740 West New Circle Road Lexington, Kentucky 40550 www.lexmark.com
-
 1
1 -
 2
2 -
 3
3 -
 4
4 -
 5
5 -
 6
6 -
 7
7 -
8
-
9
-
10
-
11
-
12
-
13
-
14
-
15
-
16
-
17
-
18
-
19
-
20
-
21
-
22
-
23
-
24
-
25
-
26
-
27
-
28
-
29
-
30
-
31
-
32
-
33
-
34
-
35
-
36
-
37
-
38
-
39
-
40
-
41
-
42
-
43
-
44
-
45
-
46
-
47
-
48
-
49
-
50
-
51
-
52
-
53
-
54
 |
 |
www.lexmark.com
Setup Guide
July 2002
W812