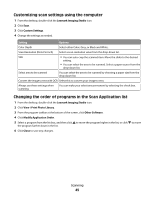
Lexmark X2550 User's Guide - Page 47
Receiving a fax using the software, Using the computer Phone Book, Printing fax activity reports
 |
UPC - 734646044585
View all Lexmark X2550 manuals
Add to My Manuals
Save this manual to your list of manuals |
Page 47 highlights
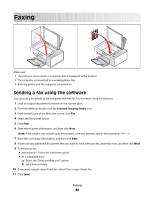
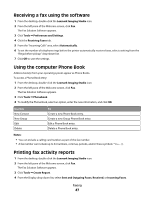
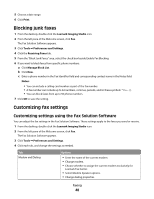
Receiving a fax using the software 1 From the desktop, double-click the Lexmark Imaging Studio icon. 2 From the left pane of the Welcome screen, click Fax. The Fax Solution Software appears. 3 Click Tools Œ Preferences and Settings. 4 Click the Receiving Faxes tab. 5 From the "Incoming Calls" area, select Automatically. 6 To set the number of telephone rings before the printer automatically receives faxes, select a setting from the "Rings before pickup" drop-down list. 7 Click OK to save the settings. Using the computer Phone Book Address book(s) from your operating system appear as Phone Books. To access a Phone Book entry: 1 From the desktop, double-click the Lexmark Imaging Studio icon. 2 From the left pane of the Welcome screen, click Fax. The Fax Solution Software appears. 3 Click Tools Œ Phonebook. 4 To modify the Phone Book, select an option, enter the new information, and click OK. Use this New Contact New Group Edit Delete To Create a new Phone Book entry. Create a new Group Phone Book entry. Edit a Phone Book entry. Delete a Phone Book entry. Notes: • You can include a calling card number as part of the fax number. • A fax number can include up to 64 numbers, commas, periods, and/or these symbols Printing fax activity reports 1 From the desktop, double-click the Lexmark Imaging Studio icon. 2 From the left pane of the Welcome screen, click Fax. The Fax Solution Software appears. 3 Click Tools Œ Create Report. 4 From the Display drop-down list, select Sent and Outgoing Faxes, Received, or Incoming Faxes. Faxing 47
-
 1
1 -
2
-
3
-
4
-
5
-
6
-
7
-
8
-
9
-
10
-
11
-
12
-
13
-
14
-
15
-
16
-
17
-
18
-
19
-
20
-
21
-
22
-
23
-
24
-
25
-
26
-
27
-
28
-
29
-
30
-
31
-
32
-
33
-
34
-
35
-
36
-
37
-
38
-
39
-
40
-
41
-
 42
42 -
 43
43 -
 44
44 -
 45
45 -
 46
46 -
 47
47 -
 48
48 -
 49
49 -
 50
50 -
 51
51 -
 52
52 -
53
-
54
-
55
-
56
-
57
-
58
-
59
-
60
-
61
-
62
-
63
-
64
-
65
-
66
-
67
-
68
-
69
-
70
-
71
-
72
-
73
-
74
-
75
-
76
-
77
-
78
-
79
-
80
-
81
-
82
-
83
-
84
 |
 |