Lexmark Z53 User's Guide for Windows 95 and Windows 98 (1.9 MB) - Page 28
Aligning print cartridges, From the Control Program's Cartridges
 |
View all Lexmark Z53 manuals
Add to My Manuals
Save this manual to your list of manuals |
Page 28 highlights
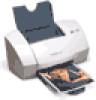
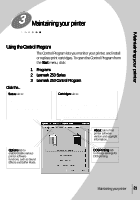
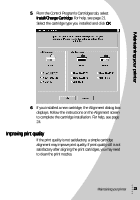
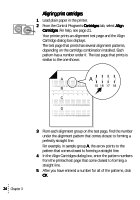
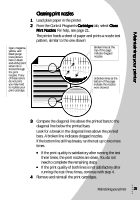
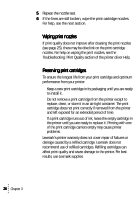
Aligning print cartridges 1 Load plain paper in the printer. 2 From the Control Program's Cartridges tab, select Align Cartridges. For help, see page 21. Your printer prints an alignment test page and the Align Cartridge dialog box displays. The test page that prints has several alignment patterns, depending on the cartridge combination installed. Each pattern has a number under it. The test page that prints is similar to the one shown: 24 Chapter 3 3 From each alignment group on the test page, find the number under the alignment pattern that comes closest to forming a perfectly straight line. For example, in sample group A, the arrow points to the pattern that comes closest to forming a straight line. 4 In the Align Cartridges dialog box, enter the pattern numbers from the printed test page that come closest to forming a straight line. 5 After you have entered a number for all of the patterns, click OK.
-
 1
1 -
2
-
3
-
4
-
5
-
6
-
7
-
8
-
9
-
10
-
11
-
12
-
13
-
14
-
15
-
16
-
17
-
18
-
19
-
20
-
21
-
22
-
 23
23 -
 24
24 -
 25
25 -
 26
26 -
 27
27 -
 28
28 -
 29
29 -
 30
30 -
 31
31 -
 32
32 -
 33
33 -
34
-
35
-
36
-
37
-
38
-
39
-
40
-
41
-
42
-
43
-
44
-
45
-
46
 |
 |