Magellan RoadMate 6000T Manual - UK English
Magellan RoadMate 6000T - Automotive GPS Receiver Manual
 |
UPC - 763357115055
View all Magellan RoadMate 6000T manuals
Add to My Manuals
Save this manual to your list of manuals |
Magellan RoadMate 6000T manual content summary:
- Magellan RoadMate 6000T | Manual - UK English - Page 1
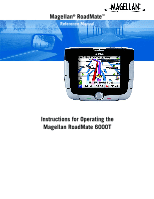
Magellan® RoadMate™ Reference Manual Instructions for Operating the Magellan RoadMate 6000T - Magellan RoadMate 6000T | Manual - UK English - Page 2
to direct sunlight for an extended period of time. • Take care when mounting the Magellan RoadMate 6000T in your vehicle, whether using the windscreen mount or other mount or accessories, that it does not obstruct the driver's view of the road, interfere with the operation of the vehicle's safety - Magellan RoadMate 6000T | Manual - UK English - Page 3
Do not attempt to replace the battery. Please contact Magellan Technical Support for issues related to the battery. • Use the charger approved for your Magellan RoadMate 6000T. IMPORTANT INSTRUCTIONS FOR SERVICE PERSONNEL ONLY: • Caution: Risk of explosion if battery is replaced by an incorrect type - Magellan RoadMate 6000T | Manual - UK English - Page 4
installed and used in accordance with the instructions, it may cause harmful interference to this device must accept any interference received, including interference that may cause authority to operate this equipment inapplicable. The Magellan RoadMate 6000T must be installed and operated at a - Magellan RoadMate 6000T | Manual - UK English - Page 5
or transmitter. © 2006 Thales Navigation, Inc. All rights reserved. The Magellan Logo, Magellan, Magellan RoadMate 6000T, Turn it on and go, TrueView, QuickSpell, SmartDetour, and SmartVolume are trademarks of Thales. No part of this user manual may be reproduced or transmitted in any form or by any - Magellan RoadMate 6000T | Manual - UK English - Page 6
Line of Sight ...2 A Word on the Safe Usage of GPS Maps ...3 From Source to Destination...3 Placement of Your GPS Receiver for Optimal Satellite Reception ...3 Signal Acquisition Time ...3 GPS Maps and Your Safety ...4 Chapter 3: Magellan RoadMate 6000T ...5 Front View ...5 Rear View ...6 Top View - Magellan RoadMate 6000T | Manual - UK English - Page 7
Options ...64 Select Map Colour ...64 Route Preferences ...65 Detour Options ...66 Voice Options ...67 Menu Colours ...67 Tone Options ...67 GPS Options ...67 GPS Status...68 Set GPS Position ...68 Simulator Mode ...69 Automatic Volume ...69 TMC Options ...69 Navigation Instruction ...69 Backup and - Magellan RoadMate 6000T | Manual - UK English - Page 8
Bluetooth Settings ...83 How to Exit ...83 Chapter 11: System Settings ...84 Brightness ...84 Power Management Touchscreen Test ...86 Keypad Test ...86 Video Test ...86 Contact Us ...87 Chapter 13: Magellan RoadMate Tools Installation ...88 Installing the Software ...88 Chapter 14: Magellan RoadMate - Magellan RoadMate 6000T | Manual - UK English - Page 9
...97 Preferences...97 Delete Files ...97 About ...97 Chapter 18: Magellan RoadMate POI Manager ...98 Latitude ...98 Longitude ...98 Altitude ...99 Opening ...104 PC Requirements ...104 GPS Status Screen ...105 Optional Mounting ...108 Instructions for Mounting the Adhesive Disk ...108 Frequently - Magellan RoadMate 6000T | Manual - UK English - Page 10
Service To order accessories or obtain unlock codes, you can visit our web site at www.magellanGPS.com or contact our Technical Support. 1.4 Registration Please ensure that you register your Magellan RoadMate at www.magellanGPS.com. By registering you will be informed of the latest product updates - Magellan RoadMate 6000T | Manual - UK English - Page 11
and a complete upgrade of the existing satellite systems. This second phase is already well underway. GALILEO, scheduled to begin service in 2008, is simply as a point on an electronic map. Many Thales Navigation receivers provide comprehensive mapping data, making satellite navigation an easy tool - Magellan RoadMate 6000T | Manual - UK English - Page 12
or covered parking area will affect the GPS signal. The GPS receiver constantly monitors and updates the GPS signal status and will reacquire the signal once it is clear of any obstructions. 2.5 Signal Acquisition Time The first time you use your Magellan RoadMate 6000T, or if you travel over 500 - Magellan RoadMate 6000T | Manual - UK English - Page 13
RoadMate 6000T GPS receiver should be operated only by vehicle passengers or by the driver when the vehicle has come to a complete stop. The driver must not attempt to view the display while driving. Disregard any unsafe, hazardous or illegal route suggestions. Magellan maps do not include, analyse - Magellan RoadMate 6000T | Manual - UK English - Page 14
turn unit off completely. While viewing the map, press to zoom in to the centre of the display. The Zoom In Button can also be used with long lists to scroll one page at a time. LED indicates the battery charging status of the Magellan RoadMate 6000T. Orange - Charging; Green - Fully charged. Press - Magellan RoadMate 6000T | Manual - UK English - Page 15
Chapter 3: Magellan RoadMate 6000T 3.2 Rear View 1 Speaker 3.3 Top View Used for audible manoeuvring instructions and music playback. 1 Volume Adjustment Increases (slide right) or decreases (slide left) the volume level. Press to repeat the last voice prompt. 6 - Magellan RoadMate 6000T | Manual - UK English - Page 16
the Magellan RoadMate 6000T into your PC to upload music, photos, and custom POIs. 3 Reset Button In the event the Magellan RoadMate 6000T should fail to respond, press the reset button to reboot. 4 Power Connection Insert the vehicle power adapter or optional AC adapter to charge the battery - Magellan RoadMate 6000T | Manual - UK English - Page 17
Card. 1 Cradle Release Press to release Magellan RoadMate 6000T from cradle. 2 FM Antenna Connection Used to connect FM (traffic) antenna. 3 External GPS Antenna connection Used to connect external GPS antenna. 4 Power Connect to Cigarette Lighter Power Adapter or external power source. 8 - Magellan RoadMate 6000T | Manual - UK English - Page 18
Cards (MMC). These cards are used to backup navigation data or to store music and photos. The memory card slot on your Magellan RoadMate 6000T employs what is called a "push-push" method of locking and releasing. In other words, when you insert the card you must push it to lock it in, and to - Magellan RoadMate 6000T | Manual - UK English - Page 19
4: Vehicle Installation Take care when mounting the Magellan RoadMate 6000T in your vehicle, whether using the windscreen mount or another mount, that it does not obstruct the driver's view of the road. Make sure that the placement of the Magellan RoadMate 6000T and cable does not interfere with - Magellan RoadMate 6000T | Manual - UK English - Page 20
Chapter 4: Vehicle Installation Plug the power adapter into your vehicle's cigarette lighter or 12 volt receptacle. Installation is complete, and you are ready to turn the Magellan RoadMate 6000T on and go. 11 - Magellan RoadMate 6000T | Manual - UK English - Page 21
or touchscreen. Press the MENU key on the Magellan RoadMate 6000T then, select System Settings and select Power Management. Select the Auto Power Off time and then, select OK. For more information on Power Management, see "Power Management" on page 84. 5.2 Resetting the Magellan RoadMate 6000T In - Magellan RoadMate 6000T | Manual - UK English - Page 22
key (see "Front View" on page 5) to select the item. 5.6 Inputting Text Characters Whenever you need to input names, street addresses, etc., the Magellan RoadMate 6000T will display a keyboard. Touch the letter you want and, if you make a mistake, use the Backspace key to go back one character at - Magellan RoadMate 6000T | Manual - UK English - Page 23
or looking for a town or street that is not in the loaded database. As you begin entering characters, the QuickSpell feature of the Magellan RoadMate 6000T dims out those characters that are not available, thereby speeding up the process of entering data. Example: Suppose that you need to input the - Magellan RoadMate 6000T | Manual - UK English - Page 24
the spacebar. When enough characters have been entered, the Magellan RoadMate 6000T will automatically display the list of towns; or, if guidelines to help you find your selection: • Do not enter prefixes such as "N" or "North". • Do not enter the street type such as "Ave." or "Avenue" except in - Magellan RoadMate 6000T | Manual - UK English - Page 25
entire name of the street, you can simply enter "Red". The Magellan RoadMate will return all database entries containing the word 'Red' as part be indexed. When entering street names, do not enter prefixes such as "N" or "North" unless the whole word is part of the street name. By entering "N" the - Magellan RoadMate 6000T | Manual - UK English - Page 26
Chapter 6: Travelling 6.1 Guidance Information Screens The Magellan RoadMate 6000T has three screens you can use to assist you in travelling to your destination: the Map screen, the Manoeuvre List screen, and the TrueView/Split TrueView screen. Map: When a new destination is selected and calculated, - Magellan RoadMate 6000T | Manual - UK English - Page 27
Chapter 6: Travelling 6.2 Map Screen The Map screen is the most commonly used screen in the Magellan RoadMate 6000T and provides you with detailed information about where you are and where you are going. Current Road SmartDetour Icon POI Icon † Planned Route (pink) Current - Magellan RoadMate 6000T | Manual - UK English - Page 28
Manoeuvre List screen can be viewed only after a route has been calculated. From the Map screen, press the VIEW key to bring up a list of all of the manoeuvres Manoeuvre List screen, press the VIEW key twice to return to the Map screen, or wait a few moments and it will return automatically. Next - Magellan RoadMate 6000T | Manual - UK English - Page 29
Chapter 6: Travelling 6.6 TrueView Screen The Magellan RoadMate 6000T uses TrueView technology to display a three-dimensional picture of the next manoeuvre. The TrueView screen can be viewed only after a route has been calculated. From the Map screen, press the VIEW key twice to view the TrueView - Magellan RoadMate 6000T | Manual - UK English - Page 30
criteria selected. Every time a new destination is selected, the Magellan RoadMate 6000T prompts you for the method that will be used to using toll roads. 6.8 Changing the Route Method While routing and viewing the Map screen, the Manoeuvre List screen, or the TrueView screen, press the ESCAPE - Magellan RoadMate 6000T | Manual - UK English - Page 31
the Magellan RoadMate 6000T will switch to battery power, unless your cigarette lighter maintains constant power. In either situation, the Magellan RoadMate 6000T will automatically suspend power when that was chosen originally. After the route is recalculated, the Map screen is displayed. 22 - Magellan RoadMate 6000T | Manual - UK English - Page 32
you are currently travelling on, the distance to and the next street on the map, and the distance from and the last street you passed. 6.13 Saving Your you need to find a petrol station, cash point or other POI, the Magellan RoadMate 6000T can find the nearest POI and route to it. Then, when you have - Magellan RoadMate 6000T | Manual - UK English - Page 33
of the nearest POI's is displayed. Use the Navigation key to scroll the list up or down (if necessary) and select the desired POI. The Magellan RoadMate 6000T will calculate a new route to the selected POI from your current position. When you have arrived at the new destination, you will be prompted - Magellan RoadMate 6000T | Manual - UK English - Page 34
number of miles for your detour and then select OK. Select Route. The Magellan RoadMate 6000T will recalculate the alternative route to your destination. You can also choose to have the Magellan RoadMate 6000T detour you around traffic automatically by enabling SmartDetour. See "Detour Options" on - Magellan RoadMate 6000T | Manual - UK English - Page 35
Destinations 7.1 Destination Screen Current Country for Destination Map Button Select Address Home Button Address Book of the Destination screen. 7.3 Entering and Routing to Your Home Address The Magellan RoadMate 6000T enables you to enter an address to assign to your Home button. The Home - Magellan RoadMate 6000T | Manual - UK English - Page 36
Chapter 7: Selecting Destinations Now, when you press the Home button, you will be prompted to either route to or change the Home address. 7.4 Selecting a Destination Using Select Address Search by Town - page 28 Select Address Search by Postcode - page 28 Search by County / Area - page 29 - Magellan RoadMate 6000T | Manual - UK English - Page 37
is displayed at the top of the screen. Select Done. Select the desired Route Method. The Magellan RoadMate 6000T will calculate the route. When the calculations are complete, the Map screen will be displayed. 7.4.2 Search by Postcode From the Destination screen, select Select Address then, select - Magellan RoadMate 6000T | Manual - UK English - Page 38
is displayed at the top of the screen. Select Done. Select the desired Route Method. The Magellan RoadMate 6000T will calculate the route. When the calculations are complete, the Map screen will be displayed. 7.4.3 Search by County / Area From the Destination screen, select Select Address, then - Magellan RoadMate 6000T | Manual - UK English - Page 39
. Enter the street address. The acceptable range of numbers is displayed at the top of the screen. Select Done. Select the desired Route Method. The Magellan RoadMate 6000T will calculate the route. When the calculations are complete, the - Magellan RoadMate 6000T | Manual - UK English - Page 40
Chapter 7: Selecting Destinations 7.5 Selecting a Destination Using the Address Book Previous Destinations - page 31 Favourites - page 33 Address Book List Addresses - page 35 Create New Entry - page 36 Trip Planner - page 40 The Address Book can store up to 200 addresses. When you select - Magellan RoadMate 6000T | Manual - UK English - Page 41
Chapter 7: Selecting Destinations Select Route. Select the desired Route Method. The Magellan RoadMate 6000T will calculate the route. When the calculations are complete, the Map screen will be displayed. 7.5.1.1 Saving a Previous Destination to the Address Book From the Destination screen, select - Magellan RoadMate 6000T | Manual - UK English - Page 42
scroll the list up or down (if necessary) and select the destination from the list of addresses. Select Route. Select the desired Route Method. The Magellan RoadMate 6000T will calculate the route. When the calculations are complete, the - Magellan RoadMate 6000T | Manual - UK English - Page 43
Chapter 7: Selecting Destinations 7.5.2.1 Editing a Favourite From the Destination screen, select Address Book then, select Favourites. Use the Navigation key to scroll the list up or down (if necessary) and select the desired favourite. Select Edit. The top line (Name) and the bottom line ( - Magellan RoadMate 6000T | Manual - UK English - Page 44
the destination from the list of addresses. Select Route. Select the desired Route Method. The Magellan RoadMate 6000T will calculate the route. When the calculations are complete, the Map screen will be displayed. 7.5.3.1 Editing an Address From the Destination screen, select Address Book then - Magellan RoadMate 6000T | Manual - UK English - Page 45
Chapter 7: Selecting Destinations 7.5.3.2 Deleting an Address From the Destination screen, select Address Book then, select List Addresses. Use the Navigation key to scroll the list up or down (if necessary) and select the desired address. Select Delete. A dialogue box will appear to confirm your - Magellan RoadMate 6000T | Manual - UK English - Page 46
Chapter 7: Selecting Destinations Enter the street name (see "Help with Address Entry" on page 15). Select OK. Use the Navigation key to scroll the list up or down (if necessary) and select the desired street. Enter the street address. The acceptable range of numbers is displayed at the top of the - Magellan RoadMate 6000T | Manual - UK English - Page 47
Chapter 7: Selecting Destinations Enter the street name (see "Help with Address Entry" on page 15). Select OK. Use the Navigation key to scroll the list up or down (if necessary) and select the desired street. Enter the street address. The acceptable range of numbers is displayed at the top of the - Magellan RoadMate 6000T | Manual - UK English - Page 48
Chapter 7: Selecting Destinations Enter the street name (see "Help with Address Entry" on page 15). Select OK. Use the Navigation key to scroll the list up or down (if necessary) and select the desired street. Use the Navigation key to scroll the list up or down and select the desired town. (These - Magellan RoadMate 6000T | Manual - UK English - Page 49
Chapter 7: Selecting Destinations Use the Navigation key to scroll the list up or down (if necessary) and select the desired town. Enter the street name (see "Help with Address Entry" on page 15). Select OK. Use the Navigation key to scroll the list up or down (if necessary) and select the desired - Magellan RoadMate 6000T | Manual - UK English - Page 50
Add. From the Select Trip Planner Address screen, select the method for adding a destination to your trip: Map (Map button) will add a destination by selecting a point on the map; Select Address will add a destination by creating a new address; Address Book will add a destination from a previous - Magellan RoadMate 6000T | Manual - UK English - Page 51
Chapter 7: Selecting Destinations 7.5.5.2 Optimising a Trip With Route Optimisation, you can sort the destinations in your trip from closest to farthest. From the Trip Planner screen, select Edit. Select the trip to optimise. Select Optimise. The destinations are sorted from closest to farthest from - Magellan RoadMate 6000T | Manual - UK English - Page 52
Book. then select the Trip (Trip button). Select Guide Me. Select the Trip. Select the first destination in on. Select the desired Route Method. The Magellan RoadMate 6000T will calculate the route. When the calculations are complete, the Map screen will be displayed. 7.5.5.4 Edit Destinations - Magellan RoadMate 6000T | Manual - UK English - Page 53
Chapter 7: Selecting Destinations Select the trip to edit. Select the destination you wish to delete, and select Delete from the pop-up menu. Select the destination you wish to change, and select Move Up from the pop-up menu. When you have finished, select Save and you are returned to the Trip - Magellan RoadMate 6000T | Manual - UK English - Page 54
Select Delete. Chapter 7: Selecting Destinations Select the trip you wish to delete. A dialogue box will appear to confirm your selection. Select Yes. The trip has been deleted. Select Rename. Select the trip to be renamed. 45 - Magellan RoadMate 6000T | Manual - UK English - Page 55
Interest (or POIs) are commercial or recreational locations, landmarks or services that are preloaded into the Magellan RoadMate 6000T database. There are over six million POIs in the database, of popular destinations without having to enter the address manually in order to route to them. 46 - Magellan RoadMate 6000T | Manual - UK English - Page 56
the list up or down (if necessary) and select the desired POI. Select the desired Route Method. The Magellan RoadMate 6000T will calculate the route. When the calculations are complete, the Map screen will be displayed. 7.6.1.2 List By Town Selecting List by Town will list the POIs matching the name - Magellan RoadMate 6000T | Manual - UK English - Page 57
the list up or down (if necessary) and select the desired POI. Select the desired Route Method. The Magellan RoadMate 6000T will calculate the route. When the calculations are complete, the Map screen will be displayed. 7.6.2 Select Category If you do not know the name of the POI you are looking - Magellan RoadMate 6000T | Manual - UK English - Page 58
list up or down (if necessary) and select the desired POI. Select the desired Route Method. The Magellan RoadMate 6000T will calculate the route. When the calculations are complete, the Map screen will be displayed. 7.6.2.3 Spell Name Selecting Spell Name will list the POIs in the category selected - Magellan RoadMate 6000T | Manual - UK English - Page 59
list up or down (if necessary) and select the desired POI. Select the desired Route Method. The Magellan RoadMate 6000T will calculate the route. When the calculations are complete, the Map screen will be displayed. 7.6.3 Custom POIs Please refer to page 98 for information on creating and loading - Magellan RoadMate 6000T | Manual - UK English - Page 60
. Select Route to go to the selected Address, or select Cancel to return to the Select Custom POI menu. Select the desired Route Method. The Magellan RoadMate 6000T will calculate the route. When the calculations are complete, the - Magellan RoadMate 6000T | Manual - UK English - Page 61
Chapter 7: Selecting Destinations 7.7 Selecting a Junction as a Destination Search by Town - page 52 Junction Search by Postcode - page 53 Search by County / Area - page 53 Previous Towns - page 54 A junction of two streets can be used as a destination. You can search for a junction whether you - Magellan RoadMate 6000T | Manual - UK English - Page 62
(if necessary) and select the second street from the list. Select the desired Route Method. The Magellan RoadMate 6000T will calculate the route. When the calculations are complete, the Map screen will be displayed. 7.7.2 Search by Postcode From the Destination screen, select Junction then, select - Magellan RoadMate 6000T | Manual - UK English - Page 63
necessary) and select the second street from the list. Select the desired Route Method. The Magellan RoadMate 6000T will calculate the route. When the calculations are complete, the Map screen will be displayed. 7.7.4 Previous Town From the Destination screen, select Junction, then select Previous - Magellan RoadMate 6000T | Manual - UK English - Page 64
Navigation key to scroll the list up or down (if necessary) and select the second street from the list. Select the desired Route Method. The Magellan RoadMate 6000T will calculate the route. When the calculations are complete, the - Magellan RoadMate 6000T | Manual - UK English - Page 65
8: Navigation Options To access these features, press the MENU key on the Magellan RoadMate 6000T and select Navigation Options. This will enable you to customise the advanced navigation features of the Magellan RoadMate 6000T. 8.1 Trip Computer The Trip Computer is a valuable tool for recording the - Magellan RoadMate 6000T | Manual - UK English - Page 66
Chapter 8: Navigation Options 8.1.1.1 Stopping or Starting the Trip Computer The Trip Computer can be stopped or started at any time. If the Trip Computer is currently running, select Stop. The Trip Computer will stop recording until restarted or reset. While the Trip Computer is in a "Stopped" - Magellan RoadMate 6000T | Manual - UK English - Page 67
. 8.2 POI Selection From the POI Selection menu, you can choose which icons to display on the Map screen. We recommend being selective about which icons you choose to display in order to prevent your map screen from being cluttered. For a list of POI Categories, see "POI Categories" on page 103. 58 - Magellan RoadMate 6000T | Manual - UK English - Page 68
Magellan RoadMate 6000T using the Magellan RoadMate POI Manager software (see page 99). The following instructions assume that you have loaded one or more custom POIs into your Magellan RoadMate 6000T all POI icons on the Map screen. Select Clear All if you wish not to have any POI icons displayed - Magellan RoadMate 6000T | Manual - UK English - Page 69
you approach a custom POI. The Set Alarm function works for Custom POIs only and only if the POI has been selected to show on the Map screen. Select Set Alarms. Again, you can select all, none, or individual POIs to have an alert set. Select Mark All to set an alert - Magellan RoadMate 6000T | Manual - UK English - Page 70
Chapter 8: Navigation Options The Detection Angle is set to alert you when you are within so many degrees of the POI. Select Detection Angle. Use the numeric keypad to enter the number of degrees in which to set the alert. When you have finished, select OK. 61 - Magellan RoadMate 6000T | Manual - UK English - Page 71
Chapter 8: Navigation Options The First Warning is set to alert you when you are within a certain number of feet from the POI. 1000 ft. 1000 ft. Select First Warning. Use the numeric keypad to enter the number of feet in which to set the alert. When you have finished, select OK. 62 - Magellan RoadMate 6000T | Manual - UK English - Page 72
300 ft. Chapter 8: Navigation Options The Last Warning is set as a final alert when you are within a certain number of feet from the POI. 300 ft. Select Last Warning. Use the numeric keypad to enter the number of feet in which to set the alert. When you have finished, select OK. When you have set - Magellan RoadMate 6000T | Manual - UK English - Page 73
North Up sets the map display so that North is always at the top of the screen. North Up is only available in 2D Map screen to appear during routing. Select Manual TrueView to show the TrueView screen Map Colour Select Select Map Colour. With Automatic Night Mode enabled, the Magellan RoadMate 6000T - Magellan RoadMate 6000T | Manual - UK English - Page 74
schemes: When you have finished, select Save and you will be returned to the Select Map Colour menu. 8.7 Route Preferences Route Preferences enable you to set parameters for the Magellan RoadMate 6000T to follow when calculating a route. Select Route Preferences. Automatic Re-Route will cause the - Magellan RoadMate 6000T | Manual - UK English - Page 75
on the motorway with SmartDetour enabled and your speed drops below 15 MPH, you may press the detour icon on the Map screen in order for the Magellan RoadMate 6000T to calculate an alternate route around traffic. Select Detour Options. Select the distance of the detour. You can select from a preset - Magellan RoadMate 6000T | Manual - UK English - Page 76
, the Detour icon will flash on the Map screen. Touch the icon on the screen to allow the Magellan RoadMate 6000T to calculate the detour. You can choose or Beep. When you have finished, select Save. 8.12 GPS Options GPS Options provide you with information on the satellite signal as well as the - Magellan RoadMate 6000T | Manual - UK English - Page 77
Screen" on page 105. 8.12.2 Set GPS Position Set GPS Position enables you to manually set the location of the Current Position icon. If you have travelled a long distance with the Magellan RoadMate 6000T off, it may take some time for the Magellan RoadMate 6000T to reacquire a satellite signal. By - Magellan RoadMate 6000T | Manual - UK English - Page 78
Map screen to view the simulation. To disable Simulator Mode, select Stop, or when the power is turned off the Simulator will stop. 8.14 Automatic Volume The Magellan RoadMate 6000T Magellan RoadMate 6000T. Please refer to Chapter 9, Using Magellan Traffic, for details. 8.16 Navigation Instruction - Magellan RoadMate 6000T | Manual - UK English - Page 79
GPS context sensitive help. Make your selection and select Save. 8.20 Map Information Product Information displays information about the map and database installed in your Magellan RoadMate 6000T. This information assists our Technical Support Representative in finding a solution to whatever problem - Magellan RoadMate 6000T | Manual - UK English - Page 80
system will deliver traffic event information to your Magellan RoadMate. 9.1.1 Glossary RDS: Radio Data System. Infrastructure that broadcasts digital information on the FM band. The TrafficKit module can only receive and decode the free-access service. TMC: Traffic Message Channel, one of the - Magellan RoadMate 6000T | Manual - UK English - Page 81
. The existing categories of TMC events are listed at the beginning of this manual in the Glossary. Checking an option in this list implies that: • The Magellan RoadMate's map screen will show ALL of the received events pertaining to this category at their respective locations. • Any event from this - Magellan RoadMate 6000T | Manual - UK English - Page 82
the status bar will be updated to reflect the delay. In this case, you will see the event in the manoeuvre list when you get closer to it. • If the alternative route is the best route to follow, the Magellan RoadMate will start guiding you along this route. • The map screen will also show road - Magellan RoadMate 6000T | Manual - UK English - Page 83
mi: If you check this option, the Magellan RoadMate will remind you of the traffic event that it received earlier. The message will appear when this can obtain detailed information on any event by selecting the icon on the map screen. A dialogue box will open containing a description of the event. - Magellan RoadMate 6000T | Manual - UK English - Page 84
is off, the Magellan RoadMate ignores all incoming TMC messages. 9.4 FAQs Q1- How does the Magellan RoadMate module choose the frequency on which to receive TMC data? R1: be saved in the memory to be used the next time the system is powered up. Q2- Why do we have to wait between 2 and 5 minutes - Magellan RoadMate 6000T | Manual - UK English - Page 85
is an important feature of the Magellan RoadMate 6000T that allows you to use it as a hands-free device for a Bluetooth enabled mobile phone. You can answer and dial your phone using the touchscreen on the Magellan RoadMate. 10.1.2 Main Interface The Magellan Bluetooth Main Screen is as shown: 10 - Magellan RoadMate 6000T | Manual - UK English - Page 86
by clicking in the connecting window. • If your mobile phone doesn't support "Hands-free" service and just supports the "Headset" service, you needn't connect. If you dial a number from your mobile phone or receive an incoming call the "Headset" service will connect automatically. The main - Magellan RoadMate 6000T | Manual - UK English - Page 87
phone, click to see the services that the mobile phone provides. Select Hands-free Service, and Click to connect using the hands-free mobile phone. A passkey entry window will pop up in your mobile phone if you haven't paired your mobile phone with the Magellan RoadMate before. You only need to - Magellan RoadMate 6000T | Manual - UK English - Page 88
Bluetooth Note: If your mobile phone doesn't support the "Hands-free" service but just supports the "Headset" service receive an incoming call the "Headset" service will connect automatically. The main interface will display a "xx connected, partial function supported the "Keypads" window. • Use - Magellan RoadMate 6000T | Manual - UK English - Page 89
is no call history, the button will be shown as Manager menu. in the Bluetooth After tapping the dialling window will pop up: • Tap to cancel the call. • Tap to mute the waiting ring before the call is received. • After tapping the mute button, it will show as , tap it to cancel mute - Magellan RoadMate 6000T | Manual - UK English - Page 90
to finish the call. Note: If the mobile phone that has been paired with the Magellan RoadMate does not support the Hands-free service and only supports the Headset service, when you make a call from that mobile phone the connected window will be displayed: • Tap to mute the microphone in your - Magellan RoadMate 6000T | Manual - UK English - Page 91
Chapter 10: Bluetooth 10.1.6 Incoming call When there is an incoming call, the "Incoming Call" window will pop up: • has been paired with the Magellan RoadMate does not support the Hands-free service and only supports the Headset service, the "Incoming Call" window will be displayed differently. • - Magellan RoadMate 6000T | Manual - UK English - Page 92
10.2 How to use Bluetooth Settings 10.2.0.1 Tap in the Bluetooth Manager window. 10.2.0.2 Tap to enter the "Bluetooth Settings" window: • Select the white box in front of "Other devices can discover me" so that other devices can discover your Magellan RoadMate. • Select the white box in - Magellan RoadMate 6000T | Manual - UK English - Page 93
confirm or select ESC to cancel changes. 11.2 Power Management The Power Management features enable you to customise the features that will conserve battery power and display life. Select Power Management. Select the time period to put the Magellan RoadMate 6000T in "sleep" mode. Select to enable or - Magellan RoadMate 6000T | Manual - UK English - Page 94
to the System Settings menu without setting the password, select ESC. Once the password is enabled, you will be required to enter it when the Magellan RoadMate 6000T is turned on or when it wakes up from "sleep" mode. 11.3.3 Delete Password Select Delete Password and use the keyboard to enter the - Magellan RoadMate 6000T | Manual - UK English - Page 95
you to test key performance elements of the Magellan RoadMate 6000T 12.3.1 Audio Test The Audio Test will check the performance of the built-in speaker. 12.3.2 Touchscreen Test The Touchscreen test will enable you to re-calibrate the touchscreen should it not be tracking properly. 12.3.3 Keypad - Magellan RoadMate 6000T | Manual - UK English - Page 96
Chapter 12: System Status 12.4 Contact Us If you experience problems using your Magellan RoadMate 6000T, you can contact us on the numbers indicated. 87 - Magellan RoadMate 6000T | Manual - UK English - Page 97
POIs and load them onto your Magellan RoadMate 6000T. Additionally, you can load pictures and music onto an SD or MMC card (sold separately) to view or play any time. See "Using Removable Memory Cards" on page 9. 13.1 Installing the Software Insert the Magellan RoadMate Tools PC Application CD into - Magellan RoadMate 6000T | Manual - UK English - Page 98
on your Magellan RoadMate 6000T by pressing and holding the Power button for Magellan RoadMate 6000T and the large end into an available USB port on your computer. Launch the Magellan RoadMate Tools application. From the Magellan RoadMate Tools screen, click on Music. The left side of the window - Magellan RoadMate 6000T | Manual - UK English - Page 99
Music Manager (page 89). You can also use a memory card that has been preloaded from a card reader. Press the MENU key on the Magellan RoadMate 6000T (see page 5) and select the Music Player . The Music Player control pad will appear. 15.1 Single Song Play Select Browse Music . Use the - Magellan RoadMate 6000T | Manual - UK English - Page 100
Chapter 15: Music Player Select Playlist . The Playlist menu will appear. To exit from the playlist menu, select ESC. 15.2.1 Play To hear a previously created playlist, select Play. Use the Up or Down arrow to select the desired playlist. Select OK. The songs will begin playing automatically in - Magellan RoadMate 6000T | Manual - UK English - Page 101
Chapter 15: Music Player 15.2.5 Rename If you want to change the name of a playlist, select Rename. Select the playlist you wish to rename and then, select OK. Use the backspace key ( - Magellan RoadMate 6000T | Manual - UK English - Page 102
: Default (flat), Jazz, Classical, Rock, Techno, Dance Hall, Live, Full Bass, Full Treble, and Full Bass & Treble. You are not however able to manually set the equaliser. Select the Equaliser . Select the equaliser preset by pressing the button at the top of the screen . When you are satisfied - Magellan RoadMate 6000T | Manual - UK English - Page 103
. Insert the memory card into the memory card slot as shown page 9. Turn on your Magellan RoadMate 6000T by pressing and holding the Power button for approximately 2-3 seconds (Ten seconds if the Magellan RoadMate 6000T is not in sleep mode.) When the Warning screen appears, insert the small end of - Magellan RoadMate 6000T | Manual - UK English - Page 104
Photo Viewer . The Photo Viewer screen will appear. The Photo viewer will show the contents of the SD or MMC card installed in your Magellan RoadMate 6000T. 17.1 View Single Photo The next screen to appear shows the file structure of the memory card. Select List Files . Use the Navigation key - Magellan RoadMate 6000T | Manual - UK English - Page 105
Chapter 17: Photo Viewer 17.1.3 Slideshow Press the Slideshow button to browse through all the photos in the Pictures folder automatically. 17.1.4 Pan If you enlarge an image beyond the screen boundaries, press the Pan button to enable image scrolling. While enabled, you can drag the image in any - Magellan RoadMate 6000T | Manual - UK English - Page 106
(trash can). A dialogue box will appear asking to confirm your selection. Select Yes to delete the file. 17.3.3 About This option will display the current version of the Photo Viewer software. 97 - Magellan RoadMate 6000T | Manual - UK English - Page 107
your computer to your Magellan RoadMate 6000T. Before we add any custom POIs to the Magellan RoadMate 6000T, you should understand how South Latitude. 18.2 Longitude 0° 10° 20° 30° 40° 50° 60° 70° 80° North Latitude 90° (North Pole) Equator 80° 70° 60° 50° 40° 30° 20° 10° 0° South Latitude - Magellan RoadMate 6000T | Manual - UK English - Page 108
on your Magellan RoadMate 6000T by pressing and holding the Power button for Magellan RoadMate 6000T, and the large end into an available USB port on your computer. Launch the Magellan RoadMate Tools application. From the Magellan RoadMate Tools screen, click on POIs. The left side of the window - Magellan RoadMate 6000T | Manual - UK English - Page 109
, the Copy To Unit arrow will turn green. Click on the arrow to copy the file to your Magellan RoadMate 6000T. When you have finished copying files, remove the USB cable from the Magellan RoadMate 6000T. 18.5 Creating a New POI FIle There are two ways to create a POI file. You can either add POIs - Magellan RoadMate 6000T | Manual - UK English - Page 110
Chapter 18: Magellan RoadMate POI Manager Select the Category field and select New. A dialogue box will appear to create a new POI category. Enter the Name and assign an Image ( - Magellan RoadMate 6000T | Manual - UK English - Page 111
18: Magellan RoadMate POI Manager 18.7 Importing a Data File The POI Manager software supports ASCII file format (.ASC,.CSV,.TXT); GPS Exchange file format (.GPS,.XML); Magellan Waypoint to upload the file to your Magellan RoadMate 6000T. See page 59 for information on accessing custom POIs on your - Magellan RoadMate 6000T | Manual - UK English - Page 112
Appendix POI Categories The Magellan RoadMate 6000T POI database has 25 different categories. The icons will appear on the Map screen (if enabled): Restaurant Petrol Station Hospital/Health clinic Vehicle Services Airport Car Rental Casino Town Centre Convention Centre Education Entertainment - Magellan RoadMate 6000T | Manual - UK English - Page 113
Display: Screen Resolution: Accepted Card Media: Audio: GPS Aerial: Battery: USB Interface: Operating Temperature: Storage Temperature: Humidity PC, Pentium or higher • Microsoft ® WIndows® 2000 or XP • 128 MB RAM • CD Drive for Software Installation • DVD Drive for Map Upgrades • USB Port 104 - Magellan RoadMate 6000T | Manual - UK English - Page 114
Appendix GPS Status Screen GPS STATUS Screen Structure-first page CH 01 02 03 04 05 06 07 08 09 10 11 12 13 14 PRN d1 d1 d1 d1 - Magellan RoadMate 6000T | Manual - UK English - Page 115
Usually, Bad code is 20 and 23. If fix is good, it would be 0. GPS Status Screen Structure - second page Heading XXX (degree) Speeding XX.X (metre per second) Current Figures Of Merits for position, velocity and heading in map matching) UTC TIME MM/DD/YY HH:MM:SS (UTC time without local zone) 106 - Magellan RoadMate 6000T | Manual - UK English - Page 116
02 03 04 05 06 07 08 09 10 11 12 13 14 Second Page Heading 0 Speed 0,0 m/s Current Lat: 34.10939 N Current Long:117.82599 W GPS Version: Current altitude 255 TTFF 116s #Satellite (U/T) 11/12 PDOP 2.3 VDOP 1.7 TTFF 0.0 HDOP 1.3 FOMS P/V/H 2 UTC TIME 08/16/2004 22:56:53 PRN 27V 03E 13e - Magellan RoadMate 6000T | Manual - UK English - Page 117
laws may also prohibit drivers from using suction cups on their windscreens. Other Magellan dashboard or friction mounting options should be used Vehicle Code Section 26708(a); Minnesota Statutes 2005, Section 169.71.) Instructions for Mounting the Adhesive Disk 1. Locate a flat, non-porous surface - Magellan RoadMate 6000T | Manual - UK English - Page 118
at the same time? Yes Can I import a playlist from Windows Media Player? No. The Music Player does not support playlists from other applications. Can I use any third party SD/MMC card with the Magellan RoadMate 6000T The Magellan RoadMate 6000T is compatible with most major brands of SD/MMC card
-
 1
1 -
 2
2 -
 3
3 -
 4
4 -
 5
5 -
 6
6 -
 7
7 -
8
-
9
-
10
-
11
-
12
-
13
-
14
-
15
-
16
-
17
-
18
-
19
-
20
-
21
-
22
-
23
-
24
-
25
-
26
-
27
-
28
-
29
-
30
-
31
-
32
-
33
-
34
-
35
-
36
-
37
-
38
-
39
-
40
-
41
-
42
-
43
-
44
-
45
-
46
-
47
-
48
-
49
-
50
-
51
-
52
-
53
-
54
-
55
-
56
-
57
-
58
-
59
-
60
-
61
-
62
-
63
-
64
-
65
-
66
-
67
-
68
-
69
-
70
-
71
-
72
-
73
-
74
-
75
-
76
-
77
-
78
-
79
-
80
-
81
-
82
-
83
-
84
-
85
-
86
-
87
-
88
-
89
-
90
-
91
-
92
-
93
-
94
-
95
-
96
-
97
-
98
-
99
-
100
-
101
-
102
-
103
-
104
-
105
-
106
-
107
-
108
-
109
-
110
-
111
-
112
-
113
-
114
-
115
-
116
-
117
-
118
 |
 |

Magellan
®
RoadMate
™
Reference Manual
Instructions for Operating the
Magellan RoadMate 6000T