Motorola WR850G User Guide - Page 22
Manual Install – Wireless Connection, black - repeater
 |
UPC - 612572095027
View all Motorola WR850G manuals
Add to My Manuals
Save this manual to your list of manuals |
Page 22 highlights
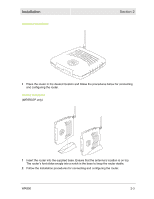
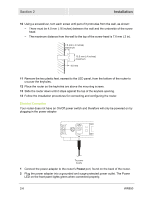
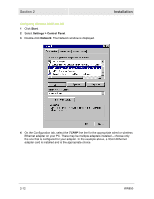
Section 2 Installation 1 If you are currently running broadband to a single computer: Unplug the Ethernet cable that runs between your modem and PC from the back of your PC and plug it into the port labeled WAN on the back of your router. If you are not running broadband to a single computer: Connect an Ethernet cable to the WAN port on your router. 2 Connect the other end of the same cable to your cable or DSL modem. You have now connected the router to the modem. It will be necessary to restart your cable or DSL modem after making this connection. 3 To connect the PC to the router, use a second Ethernet cable and connect it to the Ethernet port on your PC. 4 Connect the other end of the same cable into one of the LAN ports on your router. You have now connected your PC to the router. 5 Your PC's Ethernet adapter may need to be configured to work with the WR850. By default, the WR850 has a LAN IP Address of 192.168.10.1, and dynamically assigns an IP Address to connected devices. The PC will not communicate properly with the WR850 if the Ethernet adapter is not configured either: (a) to accept a dynamic IP Address, or (b) with a compatible static IP Address (i.e., 192.168.10.x, where x is a number between 2 and 254). To make any necessary adjustments to your PC's Ethernet Adapter, you can follow the instructions in this section under Configuring Computers to Communicate with the WR850. NOTE: You can make wired connections between the WR850 and other devices by repeating Steps 3, 4, and 5 with each of those devices. 6 Once the PC is communicating with the WR850, you can proceed to Section 3: Configuration to access the built-in Web-based Configuration Utility and configure the WR850: • For a typical WR850 configuration as a wired/wireless router, review and adjust as necessary only those configuration options designated as "commonly used" or "recommended". These fields are labeled with white letters. • For advanced WR850 configuration, review and adjust any and all configuration options as desired. Field codes requiring more advanced knowledge to configure are labeled with black letters. Manual Install - Wireless Connection WARNING! When first configuring your router, it is recommended that you have an Ethernet cable connected to the router. Performing the INITIAL configuration using a wireless connection is not secure and is not recommended. After you have finished the initial configuration of the router, your connection will be secure and you can safely use either a wired or wireless connection. 2-8 WR850
-
 1
1 -
2
-
3
-
4
-
5
-
6
-
7
-
8
-
9
-
10
-
11
-
12
-
13
-
14
-
15
-
16
-
 17
17 -
 18
18 -
 19
19 -
 20
20 -
 21
21 -
 22
22 -
 23
23 -
 24
24 -
 25
25 -
 26
26 -
 27
27 -
28
-
29
-
30
-
31
-
32
-
33
-
34
-
35
-
36
-
37
-
38
-
39
-
40
-
41
-
42
-
43
-
44
-
45
-
46
-
47
-
48
-
49
-
50
-
51
-
52
-
53
-
54
-
55
-
56
-
57
-
58
-
59
-
60
-
61
-
62
-
63
-
64
-
65
-
66
-
67
-
68
-
69
-
70
-
71
-
72
-
73
-
74
-
75
-
76
-
77
-
78
-
79
-
80
-
81
-
82
-
83
-
84
-
85
-
86
-
87
-
88
-
89
-
90
-
91
-
92
-
93
-
94
-
95
-
96
-
97
-
98
-
99
-
100
-
101
-
102
-
103
-
104
-
105
-
106
-
107
-
108
-
109
-
110
-
111
-
112
-
113
-
114
-
115
-
116
-
117
-
118
-
119
-
120
-
121
-
122
-
123
 |
 |