NEC e228 Product Manual
NEC e228 Manual
 |
View all NEC e228 manuals
Add to My Manuals
Save this manual to your list of manuals |
NEC e228 manual content summary:
- NEC e228 | Product Manual - Page 1
e228 product manual - NEC e228 | Product Manual - Page 2
of the NEC e228 product manual, please see http://www.neceurope.com/mobile_phones.asp - Windows® XP and Windows® 2000 are registered trademarks of Microsoft Corporation in the United States and/or other countries. - This product contains ACCESS Co., Ltd.s NetFront3 Internet browser software - NEC e228 | Product Manual - Page 3
only be replaced by a qualified service engineer. There is a risk of explosion if the battery is replaced with an incorrect battery type. Dispose of the used battery in accordance with the manufacturer's instructions. • Do not allow the phone, battery or accessories to come into contact with liquids - NEC e228 | Product Manual - Page 4
not attempt to dismantle the phone or any of its accessories. • Do not put a battery into a microwave oven, dryer or high-pressure container. • Do not let the battery come into direct contact with an electric outlet or cigarette lighter charger. Use only authorised charger units. • Do not pierce the - NEC e228 | Product Manual - Page 5
Failure to observe this instruction may lead to suspension or denial of mobile network services to the offender or legal action or both. • Do not use the phone on the ground without the permission of the ground staff. Hospital safety • Switch off your phone and remove its battery in areas where the - NEC e228 | Product Manual - Page 6
batteries, cables or accessories, not made or authorised by NEC, may invalidate the warranty of your phone and also adversely affect the phone's operation. Service The phone, batteries and charger contain no user-serviceable parts. We recommend that your NEC phone is serviced or repaired by an NEC - NEC e228 | Product Manual - Page 7
NEC dichiara, sotto la propria responsabilità, che il prodotto descritto in questo manuale (e in combinazione con i propri accessori Memory card • Use only "Memory Stick Duo" (up to 128MB) in the e228. • Always insert/remove the memory card while the phone power is off. If you remove the memory card - NEC e228 | Product Manual - Page 8
sharp object, such as a ballpoint pen, to move the erasure prevention switch. • Data may be damaged if: - you remove the memory card or turn off the phone while it is reading or writing data. - you use the memory card in a location subject to the effects of static electricity or electric noise. • We - NEC e228 | Product Manual - Page 9
Important Safety Information PL-7 - NEC e228 | Product Manual - Page 10
USIM Card ...5 Battery ...7 To Insert the Battery ...7 To Charge the Battery Using the Charger ...7 Inserting the Memory card ...9 Switching your e228 on and off ...11 To Switch On ...11 To Switch Off ...11 Power Saver ...12 Setting the Clock ...12 To Set the Clock ...12 Entering your PIN Code ...12 - NEC e228 | Product Manual - Page 11
Making and Receiving a Video Call ...25 To Make a Video Call to a Video Capable phone 25 To Make a Video Call to a PC with Webcam ...26 To Receive a Video Call ...26 Operations During a Video Call ...27 Locking your e228 ...28 Setting the Key lock ...28 To set the Key lock on/off - NEC e228 | Product Manual - Page 12
Message or Multimedia Message 49 To Receive a Video Message/Multimedia Message Manually 49 To Read a Message ...50 To Control the Multimedia Message Player Messages to the Memory Card 57 To Create a Folder Under My Folders ...58 Changing the Settings on your e228 ...59 Handset Settings ...60 CL - NEC e228 | Product Manual - Page 13
67 Security ...68 Locks ...68 Set codes ...68 Supplementary ...69 Date and time ...70 Language ...71 Clear settings ...71 Using the Browser to Access the Internet 72 Browser Menus ...72 To End a Browser session ...76 To Download and Save a File in your e228 File Manager 76 To Bookmark ...76 Using - NEC e228 | Product Manual - Page 14
View an Image File ...102 To Play a Video File ...103 To Play an Audio File ...105 Connecting your e228 to a PC ...107 USB ...107 To Establish a Dial-up Connection to a PC using a USB Cable 108 Data exchange ...108 To activate Data Exchange ...109 To Transfer Data between the phone and a PC 109 - NEC e228 | Product Manual - Page 15
Settings ...111 Using the Toolbox ...113 Calendar ...114 To add a new calendar entry ...115 To edit a calendar entry ...117 To synchronise calendar entries between e228 and a PC 117 To delete a calendar entry or entries ...118 To Do ...119 To Add a New To Do Task ...119 To Edit To Do - NEC e228 | Product Manual - Page 16
Shortcut Keys ...131 Index ...137 CL-7 Contents - NEC e228 | Product Manual - Page 17
Contents CL-8 - NEC e228 | Product Manual - Page 18
to make video calls, send multimedia messages, view photos and videos and much more. Overview of the e228 Front and sides LED indicator Headset connector Display Earpiece Memory stick Duo™ card slot Inward camera Microphone I/O connector for USB cable or charger -1- Key area Introducing your - NEC e228 | Product Manual - Page 19
Rear Battery cover Outward camera Second LED indicator Speaker Introducing your e228 -2- - NEC e228 | Product Manual - Page 20
Start key End (on-off) key C (clear) key Keypad characters (0-9, and #) Internal antenna (not shown) See Efficient Use on page PL-4 for precautions. -3- Introducing your e228 - NEC e228 | Product Manual - Page 21
(External) Active tasks (one-three or more) Memory card (Available/Protected/ Accessed/Unformatted) Area mode (single SIM) 3G/2.5G/2G Area mode (dual SIM) 3G/2.5G/Out of coverage/ Manual 3G/Manual 2.5G Radio field level (strong-weak/out of service) Voice call received The call is on hold SK1 - NEC e228 | Product Manual - Page 22
Setting up your e228 This section explains how to prepare your phone for use. Before you use your phone you must do the following: • Insert a valid USIM (Universal Subscriber Identity Module) card • Charge the battery • Insert the memory card (Memory Stick Duo™) in the side slot (optional) • Set the - NEC e228 | Product Manual - Page 23
Insert a USIM card 1 Remove the battery cover (and the battery). 2 Insert the USIM card into the USIM card holder. USIM card holder 3 Slide the USIM card into place. Setting up your e228 -6- - NEC e228 | Product Manual - Page 24
and then recharged two or three times before reaching full capacity. Charging To Charge the Battery Using the Charger 1 Insert the battery into the phone (see To Insert the Battery section above). 2 Connect the charger plug to your e228 I/O connector (see the diagram on the next page). 3 Plug the - NEC e228 | Product Manual - Page 25
Connecting the battery charger to the phone When the phone is being used, the battery level may decrease even if the phone remains connected to the charger. The battery must be charged at room temperature. Ensure that your phone is switched off. If the phone temperature is high, wait until it - NEC e228 | Product Manual - Page 26
Your e228 supports a "Memory Stick Duo™" (referred to as the memory card) up to 128MB. Please read the important instructions about the memory card in the Important Safety Information section on page PL-5 and in the File Manager section on page 83. Always insert/remove the memory card with the phone - NEC e228 | Product Manual - Page 27
the memory card and its components. Memory Card (Memory Stick Duo™) Overview Front Back Memory Stick Duo Adapter Label Memory erasure prevention switch Memo area Connector (do not touch) Memory Stick Duo Adaptor INSERT Insert Memory Stick Duo in this direction Setting up your e228 -10 - NEC e228 | Product Manual - Page 28
memory card. To remove the memory card 1 Push the memory card to release. 2 Carefully pull the memory card out of the slot. Switching your e228 on and off To Switch On After inserting the USIM card (see pages 5 and 6) and the battery (see pages 7 and 8), press the End (On-Off) key until the phone - NEC e228 | Product Manual - Page 29
68 in the Settings section.) PIN1 and PIN2 numbers are usually supplied with your USIM card. If not, or you have lost them, contact 3. To Enter your PIN Code 1 Ensure that your USIM card is in your e228 and that the battery is charged. 2 Press and hold the End (On-Off) key until power is on - NEC e228 | Product Manual - Page 30
settings. • Icon list An icon is a graphic image with a name that represents and links to a category of functions or a particular function. • Menu list Your e228's functions are reached through a system of menus. You can select a menu option by scrolling up or down to select an item followed by the - NEC e228 | Product Manual - Page 31
to highlight Wallpaper and press the Enter key, or, alternatively press 2. 6 Select an image Press the Enter key and open the folders. Highlight an image file and press the Enter key. The selected image is displayed in the box. 7 Set the selected image Press SK1 (OK). as wallpaper The image is - NEC e228 | Product Manual - Page 32
Quick Menu and Home Screen Shortcut You can create shortcuts to an application or a function that you frequently use in the Quick menu or on the Home screen. Whenever you can create a shortcut to an application/function, the Link this menu is available on the SK1. From the SK1, you can select where - NEC e228 | Product Manual - Page 33
Use the navigation keys to select the desired shortcut and press the Enter key to select. Changing the active phone profile Press the Options menu key and select Handset profile. Select a profile option. Accessing the Quick menu Press the Options menu key and select Quick menu. Displaying call - NEC e228 | Product Manual - Page 34
Taskbar Pressing and holding the MENU key displays the taskbar at the bottom of the screen. When there are multiple tasks active at the same time, they are displayed on the taskbar as icons. Highlight using the Left and Right keys and press the Enter key to switch to that task. On the taskbar, you - NEC e228 | Product Manual - Page 35
calls. This section guides you through the following the phone number 2 Dial the phone number 3 Talk 4 End the call Do This Enter the phone instructions on page 28 to make an emergency call. Tell the operator your location and which emergency service you require: ambulance, police, rescue services - NEC e228 | Product Manual - Page 36
0 to display a "+" symbol. Enter the international country code, then the phone number. Press the Start key to make an international call Enter a contact memory number from 2 to 99. Press the Start key to call the phone number registered for the memory number. For the contact memory whose number is - NEC e228 | Product Manual - Page 37
pressing the SK1 until you have dialled all the required numbers. After entering the phone number, press the key and enter the subaddress number. You can specify one screen. Clear all logs Deletes all the call log data. Automatic delete Turns the automatic deletion function on/off. This function - NEC e228 | Product Manual - Page 38
the caller's phone number is displayed. If the caller opts to hide their phone number, the e228 generates a message indicating that the phone number has can mute the ringtune by setting the active phone profile's Ring volume to Silent. Refer to Handset profile on page 61. Turning off the ringtune - NEC e228 | Product Manual - Page 39
for the phone number. Voicemail When you forward a call to the voicemail centre, the caller may leave a message for you. If a message is left, either a voicemail icon or message envelope is displayed on your screen. Call the voicemail centre to retrieve the message, following the instructions below - NEC e228 | Product Manual - Page 40
the tasks described here are only available if you have subscribed to certain services. Ask 3 about details on service subscription. Common Tasks To Make a Second Call To 1 Enter the second phone number 2 Dial the second phone number 3 Talk 4 End the calls Do This Press the Start key. The numbers - NEC e228 | Product Manual - Page 41
in the phone. A call memo is displayed with its date and time of recording. For further information about using call memos, refer to Call memo on page 130. Note: Always ask the other party's permission to record. Note: You cannot attach call memos to messages or copy them to the memory card. Making - NEC e228 | Product Manual - Page 42
changing the default settings for a video call, refer to Video calls on page 64. To Make a Video Call to a Video Capable phone To Do This 1 Enter a phone number Enter the phone number, using the keypad or the call logs. For further information on Call Logs, refer to page 20. 2 Start the video - NEC e228 | Product Manual - Page 43
Make a Video Call to a PC with Webcam This service is network dependent. Please contact 3 for further details. Incoming calls number list Rejecting the incoming video call Making and Receiving Calls Do This The phone indicates that you are receiving a video call. Press the Start key or SK1 (Answer) - NEC e228 | Product Manual - Page 44
Task Screen setting Operations During a Video Call Task Setting the handsfree mode Zoom in/out Turning the microphone on/off (sending/ not sending your voice to the other party) Switching cameras (Available only while sending the camera image) Turning your camera on/off (sending/not sending your - NEC e228 | Product Manual - Page 45
the MENU key and key. Emergency calls under the Key lock While the phone is locked, you can make emergency calls only to the designated numbers. emergency number correctly. Unlock instruction 2 Call the number Locking your e228 Press SK1 (Yes). Your e228 is unlocked temporarily and the emergency - NEC e228 | Product Manual - Page 46
list, depending on your USIM card (please ask 3 for details). The maximum number of contacts in the e228 is affected by the number of fields used in each contact entry. The following shows the data that you can enter under a name in the Contact list: Data Phone Contact List USIM Contact List - NEC e228 | Product Manual - Page 47
Contacts. Press the Options menu key and select Contact groups. Select a contact group entry and press SK1 (Edit) to fill in the profile data. You can edit the group name, set a group image and select ringtunes, illumination and vibration patterns for incoming voice calls, video calls or messages - NEC e228 | Product Manual - Page 48
entry then press the Enter key. Highlight the phone number or email address and press the SK2 ( data is extracted the last application (message writer, notepad, etc.). Press the Options menu key and select Memory status. The total number of contact entries allowed for the default memory, used memory - NEC e228 | Product Manual - Page 49
Entering Text This section describes how to enter and edit text. There are four types of text entry: • Multitap Text (ABC) Input: Where you press each key as many times as needed to display the character you want. • T9® Text Input: Where intuitive texting predicts the word you are trying to enter. • - NEC e228 | Product Manual - Page 50
Text entry Content type Remaining number of characters Input mode icons Text entry field To start messaging: Press the SK2 (Msg). Or press the MENU key, Messages and press the SK1 (New). (Refer to the Writing and Sending a New Message on page 43 for details) To change the input mode: Press the - NEC e228 | Product Manual - Page 51
Multitap Text (ABC) Input The following example shows how to enter the word dog in a text message: To Do this 1 Enter d Press the (3DEF) key once, then d appears. 2 Enter o Press the (6MNO) key three times, then o appears. 3 Enter g Press the (4GHI) key once, then g appears. Press the Right - NEC e228 | Product Manual - Page 52
the key. The temporary symbol menu disappears after inserting a symbol. The symbol menu is displayed as follows: Symbol menu Press Right/Left navigation key to go to Previous/Current/Next pages You can cancel the temporary symbol menu by pressing the C key. -35- Entering Text - NEC e228 | Product Manual - Page 53
Other things you can do when editing text To Enter a Space To enter a space in the text in the Multitap Text Input mode or the T9® text input mode, press the 0 key. To Insert a New Line To insert a new line in the text, move the cursor to the insertion point of the new line, press and hold the # key - NEC e228 | Product Manual - Page 54
e228 supports manually). Multimedia messaging is available in both 2.5G and 3G coverage. • Email allows you to send messages with attachments to email addresses. Up to 60 attachments are allowed per message, with the total data size not exceeding 100 KB including the message text. Attachable files - NEC e228 | Product Manual - Page 55
Attachment Types The following shows the supported attachment types that can be played/used by e228 (these files can be attached to messages and transferred between your phone and PC): • Video: MPEG4, WMV, H.263 baseline • Audio: MIDI, MPEG4-AAC, MP3, WMA, AMR • Image: JPEG, GIF, PNG, BMP, WBMP - NEC e228 | Product Manual - Page 56
. Up to 50 folders including the Inbox can be created in the Remote mailbox. Up to 1000 messages can be stored in the Remote mailbox. Memory card Accesses the messages stored in the memory card. Note: This menu is available while a memory card is inserted into the phone. -39- Using Messaging - NEC e228 | Product Manual - Page 57
Deletes all the messages and user-defined folders in the phone memory. Settings Changes the message settings (see the following the header sentence is automatically inserted. Setting Insert manually turns this function off. Heading text: Supports the header up to 128 characters. Enter - NEC e228 | Product Manual - Page 58
use Manual to manage the available memory: e.g., download messages once you know you have sufficient memory. When Automatic is selected, the e228 automatically downloads the contents of the video/multimedia messages. Maximum download size: Sets a maximum size of a multimedia message that the phone - NEC e228 | Product Manual - Page 59
centre address. This address is saved in the USIM card. Edits the proxy server address. The following describes Leave on server: Selects whether to leave the downloaded message on a POP3 email server or not. the maximum size of an email that the phone can receive. Message send timing: Selects whether - NEC e228 | Product Manual - Page 60
New message screen is displayed. Select the addressee field and press the Enter key. Enter the addressee's phone number and press the Enter key (you can enter up to 20 digits not including the international code +). Note: To search the Contact list for the addressee, press the SK2 (Find). Select the - NEC e228 | Product Manual - Page 61
KB, including the message text. You can send video messages to compatiable phones or email addresses subject to coverage availability. To Do this 1 Set Enter key. Select the attachment type from Video files, Image files, Music files, Sound files and Other files and press the SK1 (OK) . 3 Enter - NEC e228 | Product Manual - Page 62
data size not exceeding 100 KB, including the message text. Attachable files include ringtunes, images, audio, video and other types of files. You can attach files in the phone. With an IMAP4 server, the received email is stored on the email server, which provides the option to download the whole - NEC e228 | Product Manual - Page 63
Email. The New Message screen is displayed Select the attachment box and select the file type. Select a file from the list displayed. Select the message text field, enter the message and you send the message manually. Refer to Sending messages manually on page 47 for details. Using Messaging -46- - NEC e228 | Product Manual - Page 64
SK2 (Find) on the addressee entry box and select the T V M E contact entries (Handset addressee's phone number/email address. contacts) The selected phone number/email address is transferred in to To. Sending messages manually Press the Options menu key on the New/Edit message screen E and - NEC e228 | Product Manual - Page 65
be added. Press SK1 (Use). VME Attaching a video, an image, an audio file or a ringtune For video messages and email, select the attachment field on the New message screen. Press the Enter key to display the Handset memory screen. Select an attachment type folder and press Enter key. Select the - NEC e228 | Product Manual - Page 66
automatically from the message centre (when you are in 3G or 2.5G coverage). When Download timing is set to Manual: Press the SK1 (Receive) to download the contents of the Video message/Multimedia message or press the SK2 (Cancel) to receive the contents later. (Refer to To Receive a Video - NEC e228 | Product Manual - Page 67
and then select the unread message. Press the Enter key. To open the attachment, press SK2 (Attach.). Press the SK1 (Receive). The contents are downloaded from the message centre. Do this Press the SK2 (Msg). Alternatively, press the MENU key and select Messages. Select Inbox and select the unread - NEC e228 | Product Manual - Page 68
Useful Tips For Reading a Message The availability of each function is shown by the following abbreviations: T: Text message V: Video message M: Multimedia message E: Email, EP is POP3 only and EI is IMAP4 only Task Steps Checking newly received messages Press the SK2 (Check). Refreshing - NEC e228 | Product Manual - Page 69
Copying or moving a message between USIM card memory and the phone memory Select the message, press the Options menu and select View address list. Displaying the attachment file list Select the message, press the Options menu key and select View file list. Copying or moving a message Select - NEC e228 | Product Manual - Page 70
key and select Add to contacts. Use Add to Contacts to save the phone number/email address. (Refer to Contacts section on page 29 for details.) SK2 (Stop). Press Options menu key and select Add to contacts. Adding a phone number/ email address in the message text to the contact list Select the - NEC e228 | Product Manual - Page 71
the message text. Select the attachment to save. Press the SK2 (Attach). Alternatively, press the Options menu key and select View file list to display the list of attached files and select a file to be attached, and then press the SK1 (Save) or press the Options menu key and select Save. Select the - NEC e228 | Product Manual - Page 72
To Control the Multimedia Message Player Task Steps Starting the slide show Press the SK1 (Play). Pausing the slide show While playing, press the SK1 (Pause). Displaying the text message Press the Enter key. Stopping the slide show Press the SK2 (Stop). Replying and Forwarding The - NEC e228 | Product Manual - Page 73
. Select and display the message to forward. Press the Options menu key and select Forward. Forward Message is displayed with the text contents, attached files and Fw: original subject for Multimedia messages and Video messages. Select To address, enter the address and press the Enter key. Note: To - NEC e228 | Product Manual - Page 74
that you move or delete unwanted messages regularly. Or store them on a memory card, available as an optional accessory. Creating Folders To manage your message data, create folders under My folders, Remote mailbox or Memory card. You can copy/move the messages in Inbox, Outbox, Draft, Sent or - NEC e228 | Product Manual - Page 75
using a new memory card, format the card in advance. Refer to Format mem. card on page 89 for details. Deleting all messages in the current list To delete the whole folder, select a folder, press the Options menu key and select Manage folders, Delete folder. To delete all phone messages, press - NEC e228 | Product Manual - Page 76
Changing the Settings on your e228 This section describes how to change the settings on your e228. Screen image sample Press MENU key → Select Settings icon or Press 8 → User settings menu (see below). User settings menu -59- Changing the Settings on your e228 - NEC e228 | Product Manual - Page 77
Settings (Press the MENU key → select Settings icon → select Handset settings or press 1 on User settings menu screen) Handset settings allows you to customise the handset profile to suit different situations (handset profile) and change the settings for call time information and call options - NEC e228 | Product Manual - Page 78
make it more useful. You can also change the active Handset profile from the Home Screen. Press the Options menu key phone is being charged. Other settings Key tones: Turns on/off keystroke sounds. Coverage tone: Turns the coverage tone on/off. The service tone notifies that e228 is in a service - NEC e228 | Product Manual - Page 79
information. Video calls Displays video call information. Reset call timer Resets the call time to zero. Call options Item pauses inserted. For example, after entering a number with the touch tone service, you can send out the numbers you entered beforehand. Pause dial entry your e228 -62- - NEC e228 | Product Manual - Page 80
Ignore if no ID Voicemail Making calls Item Send tones Fixed dialling Description Selects the ringtune output from the phone. • Speaker rings too: Sets the ringtune to be played from both the earphones on the headset and . Lets you dial the set number only. -63- Changing the Settings on your e228 - NEC e228 | Product Manual - Page 81
Video calls Select Video calls or press 2 on User settings menu screen Video calls allows you to change various settings for video telephony. Video calls menu Changing the Settings on your e228 -64- - NEC e228 | Product Manual - Page 82
My side is smaller, Other side only, My side is larger and My side only. Picture quality The quality of the image captured by e228 can be selected from Standard, Better picture (priority given to the image quality), and Faster movement (priority given to capturing movement). Camera mode Selects - NEC e228 | Product Manual - Page 83
animation displayed when e228 is turned on. Built-in animations and captured or downloaded images can be e228. Wallpaper Power save time Selects the Home screen image. Note: You cannot set an image file larger than 100KB as your wallpaper. Sets how long your phone can remain idle before going - NEC e228 | Product Manual - Page 84
mobile phone network: Item Description Network select Selects the network operator (Public Land Mobile Network, PLMN) automatically/ manually. When Automatic is selected, e228 for the e228: Automatic: e228 automatically selects the available service. 3G only: The service area is manually set - NEC e228 | Product Manual - Page 85
/PIN2 entry screen when e228 is turned on. Note: If you enter your PIN incorrectly three times in a row, the USIM card is locked. You can unlock it by using your Personal Unlock Key (PUK). Please contact 3 for your PUK code. New handset code Changes the handset code required to confirm important - NEC e228 | Product Manual - Page 86
services: Turns the call waiting service on/off. Shows the Video calls/Fax calls/Data calls. Available under these service on/off, makes an enquiry and displays the current service status. Restrict calls: Turns on the restriction service the service. Status: Shows the current service status - NEC e228 | Product Manual - Page 87
(e.g. 09/15/2003) or yyyy/mm/dd (e.g. 2003/09/15). Shows the current time for Home time and Dual time. Changing the Settings on your e228 -70- - NEC e228 | Product Manual - Page 88
Item Description Display Language Selects the display language. All text in your e228 is displayed in the selected language. Word wrap Turns the wordwrap Clear settings function allows you to reset the settings you have made and clear the phone's memory. Clear settings is not available while - NEC e228 | Product Manual - Page 89
, services and information from 3. For example, viewing the latest news and weather, downloading games, phone number/email address to the Contact list. The Add contact screen is displayed with the phone . Save page Saves the displayed page as an offline file. Up to 20 pages can be saved. To avoid - NEC e228 | Product Manual - Page 90
screen appears with the phone number/email address/URL inserted. • Save image: registers an image on the file to the Image files. • Edit title: Check URL displays the URL. Check certificate displays the certificates saved with the file. Press the Enter key to start copy. Press Down key to select - NEC e228 | Product Manual - Page 91
Save image Send as message Current page URL Image URL Image file Refresh Enter URL History Encoding Latin-1 US ASCII UTF-8 UCS2 the page displayed. Provides a URL entry field. You can directly enter a URL to go to the site. Displays the URL history input from the Enter URL menu. Highlight a - NEC e228 | Product Manual - Page 92
page have been downloaded without a page with/without image files or to ask Reset Clear settings Restores the default settings. Browser reset Restores the default condition of browser, including Saved Pages, History, Bookmarks, and Settings. Note: Refer to Set codes on page 68 for Handset code - NEC e228 | Product Manual - Page 93
link and press the Enter key. In accordance with the file type, the downloaded file is stored in either Video files, Image files, Music files, Sound files or Other files folders according to the file type under the Handset memory or Memory card folders. To find these folders, press the MENU key and - NEC e228 | Product Manual - Page 94
: • Jump to the URL • Make a voice/video call to the phone number • The link or anchor is automatically entered into the addressee field on the New message screen to create a new message • Download the multimedia file • Download the Java™ application Note: To register the highlighted, press and hold - NEC e228 | Product Manual - Page 95
transfer data from a PC (Intellisync software is also available, which allows synchronisation between a PC and your e228), or store and manage your video/image/ audio data on the memory card, which is available as an accessory video clip to a message and send Go into Messages and select the message - NEC e228 | Product Manual - Page 96
downloaded to your e228 or received attached to a message. Such images can be used as a home screen wallpaper or contact picture. Refer to To View an Image File on page 102 for details. Video/Audio Player You can play video and audio data saved in the e228 talking on the phone? e228's multi-call - NEC e228 | Product Manual - Page 97
. PC Connection requires e228 PC Synchronisation and File Transfer software, as well as a USB data cable (available as an accessory). To install the software, attach the USB cable between your e228 and a PC, and install the e228 USB driver from the "Utilities/Tools" section of your e228 CD-ROM (also - NEC e228 | Product Manual - Page 98
be stored in your phone. If you try to download an 11th application, you must delete one of the stored applications. Refer to Java™ section on page 90 for details. Synchronisation A USB cable and CD are available for the e228 as an accessory which allow PC File Transfer and Synchronisation. Please - NEC e228 | Product Manual - Page 99
). You can transfer the videos you recorded and the photos you took using your e228's camera on to the memory card. In addition, you can manage downloaded video/image/audio files, voice recordings, calendar entries, To Do entries and any other files you may have on your phone. Refer to File manager - NEC e228 | Product Manual - Page 100
under the File manager. As e228 supports Memory Stick Duo™ (see page 87), memory card status can also be checked from this menu. Please contact 3 for more information. You can also check the memory card from this menu. Always insert/remove the memory card with the phone switched off. Handset memory - NEC e228 | Product Manual - Page 101
: Downloads Data type: Downloaded audio files with copyrighted settings Supported files: WMA, MP3, AAC and MID Maximum number of files per folder: 100 (including the number of user folders) Maximum number of user folders: five Data type: Downloaded and captured voice files Supported files: AMR - NEC e228 | Product Manual - Page 102
more space to manage your files. Memory card is available as an accessory. Please contact 3 for more information. Insert the memory card with its back facing you. Refer to Inserting the Memory card on page 9. Memory card displays the list of data files on the memory card. The following shows the - NEC e228 | Product Manual - Page 103
Data type: To Do entries Maximum number of files: 100 Other files Downloaded files with formats other than the above are stored here. Up to 100 files can be stored under this folder. No user folders can be created in this folder. The maximum number of files may change according to the memory card - NEC e228 | Product Manual - Page 104
and sizes to meet various requirements. Memory Stick Duo is the only format compatible with the e228. Memory Stick Duo is available as an accessory. Please contact 3 for more information. Front Memory Stick Duo™ Overview Back Memory erasure prevention switch Memory Stick Duo Adapter Label Memo - NEC e228 | Product Manual - Page 105
options are available for File manager H: Available for Handset memory M: Available for Memory card Task Executing a file New folder menu option Copy menu option Delete menu option Move menu option Sort files menu option Send as message menu option Using the File Manager Description You can - NEC e228 | Product Manual - Page 106
for the selected file. Displays the amount of free/used memory space in the handset/ memory card in bytes. Available for H M H M H M H M H M H M Memory card tool Memory card is available as an accessory. Please contact 3 for more information. Memory card tool provides the helpful - NEC e228 | Product Manual - Page 107
Run Downloaded Applications To 1 Select an application you want to run 2 Do any of the following: • End the application • Pause the application • Resume the application • End the paused application Do this Select an application from the Java™ screen and press the Enter key. Then select the file to - NEC e228 | Product Manual - Page 108
the following items: Item Description File properties Displays information on the selected file. Edit name Edits the name options: Item Description Net access Selects the phone's response to a Java™ application requesting connection when downloading a Java™ application or not. - - NEC e228 | Product Manual - Page 109
profile. Refer to Handset profile on page 61 for details. Application control: Allows the backlight operation to be controlled through the application. It continues to be controlled by the setting on the phone unless it has been set through the application. Selects which is applicable vibration - NEC e228 | Product Manual - Page 110
Using the Multimedia Centre This section describes how to use your e228's multimedia centre to capture and play back multimedia files. You can also use it to play back files that have been downloaded or sent to you. Use of MPEG4 files is restricted to non-commercial purposes. Use of this product in - NEC e228 | Product Manual - Page 111
MPEG4-AAC, WMA, MP3, AMR, WAV (ulaw), WAV (linear) MIDI (SMF) Maximum file size and resolution -20KB Multimedia centre provides the following functions: Capture: • Camera (Take photo) • Video camera (Make video) • Voice recorder (Record sound) Player: • Image viewer ( - NEC e228 | Product Manual - Page 112
) Item Navigation key indicator Operation icons Capture preview screen Camera setting icons Picture quality Number of files saved/ Total number of files that can be saved in the current memory location Image size Viewer/Capture switch Description Indicates what the navigation keys do. Up and Down - NEC e228 | Product Manual - Page 113
Camera Icons: or Memory card (120 x 120) Using the Multimedia Centre -96- - NEC e228 | Product Manual - Page 114
Selects the image quality. Economy: Low image quality to keep the data size small Standard: Normal image quality High: High image quality Memory location: Selects the location to save image/video files. Select Memory card or Handset memory. Memory status: Displays the number of image/video files - NEC e228 | Product Manual - Page 115
97 for details. 2 After taking a photo, the capture completion screen appears. You can do the following from this screen: To Do this Send the file attached to a Multimedia message/Email Press the SK1 (Send). Note: Refer to Writing and Sending a New Message on page 43 for details. Return to - NEC e228 | Product Manual - Page 116
key to stop recording. After making a video, the capture completion screen appears. You can do the following from this screen: To Do this Send the file attached to a Multimedia message/Email Press the SK1 (Send). Note: Refer to Writing and Sending a New Message on page 43 for details. Return to - NEC e228 | Product Manual - Page 117
location: Selects the destination of the saved voice file. Select Memory card or Handset memory. Memory status: Displays the number of audio files that can be stored, memory used, memory available and the number of free file slots. Multimedia centre Activates the Multimedia Player. Recording - NEC e228 | Product Manual - Page 118
status Image viewer The image viewer function of Multimedia centre allows you to view JPG, GIF, PNG, BMP, WBMP, JFIF and DCF image files. The image files can be captured by the phone, downloaded from a browser or received attached to a message. You can choose to view either one particular image - NEC e228 | Product Manual - Page 119
selects the repeat target. Select Repeat on or Repeat off. This function repeats the playlists on the View image. Edits the file name. Displays information about the file Deletes the selected file. Do this Select View images and press the Enter key. Press the Right key. Press the Left key. Press the - NEC e228 | Product Manual - Page 120
MPEG4, AAC, AMR, WMV and H.263 video files captured by the phone, downloaded from a browser or received attached to a message. You can choose to play either one particular video file or several video files registered in a playlist. If you download a file using the browser or receive/send a message - NEC e228 | Product Manual - Page 121
attached to a message and saved in the phone memory or in the memory card. You can choose to play either one particular audio file or several audio files registered in a playlist, using the headset connected to the phone if you wish. If you download a file using the browser or receive/send a message - NEC e228 | Product Manual - Page 122
Fast forward • Rewind • Skip to the next file • Skip to the previous file • Repeat • Control the sound volume • Send the audio file as a message Description Turns on/off the e228's speaker and the headset. Changes the ringtune settings for each phone mode: Meeting profile, Standard profile, Outdoor - NEC e228 | Product Manual - Page 123
and save them as a playlist. You can create 20 playlists, each containing up to 20 files in the phone memory and 50 playlists, each containing up to 100 files in the memory card. The memory card is available as an accessory. You can add a new playlist by pressing the SK1 (Add). In addition, you can - NEC e228 | Product Manual - Page 124
and PC. Your e228 may not be supplied with a USB cable or PC Synchronisation and Transfer software. These are available as accessories. When using the USB cable for the first time, ensure the USB Drivers are installed. See the Software Manual on the CDROM for further instructions. Check that your - NEC e228 | Product Manual - Page 125
228 PC File Transfer Tool. To install the software, refer to the Software manual on the optional CD-ROM accessory. You cannot use any other applications while data is being exchanged between your e228 and a PC. Please note that certain recurring appointments are not supported by this phone and as - NEC e228 | Product Manual - Page 126
Æ USB Æ Handset memory/Memory card. 3 Run PC File Transfer Tool Start the 228 PC File Transfer Tool application on the PC. 4 Transfer data between your e228 and the See the 228 PC File Transfer Tool section in the Software Manual on the PC optional CD-ROM (available as an accessory) for - NEC e228 | Product Manual - Page 127
the selected server. Synchronise all Starts the synchronisation of all data with the selected server. Copy settings Copies the settings of Please check that this service is supported by your service provider - contact 3 for further details. To Register a Server The NEC e228 allows you to set - NEC e228 | Product Manual - Page 128
password. For details see below. Please check that this service is supported by your service provider - contact 3 for further details. Synchronisation Settings Press server password. Please check that this service is supported by your service provider - contact 3 for further details. - - NEC e228 | Product Manual - Page 129
Calendar • Server three: "3" Sync server and To Do • Server four: Local USB and Contacts • Server five: Local USB and Calendar • Server six: Local USB and To Do Please check that this service is supported by your service provider - contact 3 for further details. Connecting your e228 to a PC -112- - NEC e228 | Product Manual - Page 130
Using the Toolbox This section describes how to use your e228 to help manage your time and tasks. You can use your e228 at home or work as a calendar with appointments and to do lists, as an alarm clock, as a calculator and much more. There are six features - NEC e228 | Product Manual - Page 131
Calendar (press "MENU" key → select "Toolbox" → select "Calendar") You can save up to 200 calendar entries, ranging from appointments, multiday events, special occasions and days off. A multiday event is an event which lasts for two days or more. Calendar To display the calendar, press the MENU key - NEC e228 | Product Manual - Page 132
To add a new calendar entry To add a new calendar entry, press the SK1 (New) from the Monthly or Weekly screen or press the Options menu key and select New. You can store the following types of calendar entries, an appointment, a multiday event a special occasion or a holiday (Days off). To Do - NEC e228 | Product Manual - Page 133
To Do this • Set the Special occasion items (You must enter information marked with a *.) Filter view: Select the filter type from Public or Private. Press the Enter key. Contents*: Enter the contents (up to 150 single-byte characters) and press the Enter key. Date*: Enter the date. Reminder: - NEC e228 | Product Manual - Page 134
format Synchronisation and vCalendar. Select the location in which the vCalendar file to be stored from Handset memory and Memory card. The vCalendar format data is stored in Other files folder in the selected memory location. 2 Synchronise calendar entries Press the Options menu key and select - NEC e228 | Product Manual - Page 135
Delete, Delete day off and press the Enter key. Select Up to date, press the Enter key and select the day. To reset holidays to the default settings To reset holidays to the default settings (only Saturdays and Sundays are set as holidays), press the Options menu key, select Delete, Delete day - NEC e228 | Product Manual - Page 136
To Do (press "MENU" key → select "Toolbox" → select "To Do") This feature allows you to set up To Do tasks that should be finished by a certain date. You can save up to 200 To Do entries. To Add a New To Do Task In To Do list, press the SK1 (New), or press the Options menu key and select New to open - NEC e228 | Product Manual - Page 137
Adding a new task 2/2 Set reminder date Set reminder time Set reminder on or off. Select a reminder tone. Useful Tips You can use an old To Do task as a template to create a new task. Select the task you want to copy on To Do list or display the Detail screen. Press the Options menu key, select - NEC e228 | Product Manual - Page 138
Enter key. When displaying the Details screen, you can also press the SK1 (Edit). Select an item you want to change and edit. Follow the instructions in To Add a New To Do Task other than the following: To Do this 1 Set the day when the To Do event was completed Select - NEC e228 | Product Manual - Page 139
conditions, press the Options menu key, select Filter view and press the Enter key. Select To Do box and press the Enter key. Follow these instructions: To Do this 1 Set the list condition by selecting To Do task Select status of To Do tasks you want to display from To Do - NEC e228 | Product Manual - Page 140
SK1 (Edit). You can set a recurring alarm to ring at a specific time on several days of week. The Alarm tone will only sound if the phone is switched on. Setting alarm Set time Repeat setting Pop-up contents Alarm tone -123- Using the Toolbox - NEC e228 | Product Manual - Page 141
change it, press the SK2 (On/Off/Disable). Refer to To Change alarm clock status on page 125. Useful Tips • When the alarm and vibrate go off, press the SK1 (Turn off) to stop the alarm. • When the alarm goes off and you have set snooze, do any of the following - NEC e228 | Product Manual - Page 142
To Edit an Alarm To edit your alarm clock setting, press the SK1 (Edit) and edit. Follow the instructions in To Set an Alarm on page 123. To Change alarm clock status You can change alarm clock status on/off/disable on the Alarm - NEC e228 | Product Manual - Page 143
entry you want to copy and press the Options menu key. Select Calendar item or To Do item and press the Enter key. Follow the instructions in To add a new calendar entry on page 115 or To Add a New To Do Task on page 119. You can also start the message - NEC e228 | Product Manual - Page 144
To 3 Edit contents To Delete a Notepad Entry To Delete a notepad entry Delete all the notepad entries Do this Select Note contents and press the Enter key. Edit a text message (up to 512 single-byte characters) and press the Enter key. Note: You can save the notepad entry by pressing SK1 (Save). Do - NEC e228 | Product Manual - Page 145
key → select Toolbox → select Calculator Calculator Your e228 has a built-in calculator, which can add, key • Use the SK2 to switch to the currency converter To Use the Calculator In this example, we are going to multiply 10.5 by 10. To Do this 1 Enter 10.5 Press 1, 0, and 5 keys. 2 Multiply - NEC e228 | Product Manual - Page 146
by using either the exchange rate which is built in or one you enter. To Convert one Currency to Another In this example, we are going to convert 100 Pounds Sterling to Euros. Press SK2 (Convert/Calc) to switch between the Calculator and the Currency converter. To Do this 1 Enter amount - NEC e228 | Product Manual - Page 147
store phone numbers, addresses or reminders. You can save up to five call memos in your e228. To record a call memo during a call, press the Options menu key and select Call memo to start recording the conversation. You cannot attach a call memo to messages or copy them to the memory card. To - NEC e228 | Product Manual - Page 148
Shortcut Keys Shortcut keys can help you access some things more easily. The following table shows the shortcut keys that are available and explains what you can use them for in various modes. The word "long" means pressing and holding a key. Mode Key Function In Home screen SK1 Activates - NEC e228 | Product Manual - Page 149
Mode While dialling While receiving Key SK1 SK2 UP Down Left Right Start Triangle MENU MENU (long) End End (long) C C (long) 0 (long) # (long) Options menu SK1 SK2 MENU MENU (long) Start End End (long) Options menu C Other than above Function Makes a video call to the entered number Saves the - NEC e228 | Product Manual - Page 150
Mode During a call Key SK1 SK2 Up Down Left Right Start Start (long) Triangle MENU MENU (long) End End (long) 0 (long) Options menu Function Holds the call Displays the Contact list Turns the volume up Turns the volume down Incoming calls list Missed calls list Outgoing calls list Switches - NEC e228 | Product Manual - Page 151
box: Deletes one character to the left of the cursor No character is in the text box: Cancels the deletion and returns to the saved data In Delete mode: Deletes all the characters after the cursor In Backspace mode: Deletes all the characters before the cursor Enters 0-9 Inserts symbols Inserts - NEC e228 | Product Manual - Page 152
entry: Displays the next T9 combination No unconfirmed entry: Quits text editing Unconfirmed entry: Displays the previous T9 combination Last combination: Go back to the previous combination Displays the Options menu Completes text editing and closes the editing text screen Returns to the Home - NEC e228 | Product Manual - Page 153
box: Deletes one character to the left of the cursor No character is in the text box: Cancels the deletion and return to the saved data In Delete mode: Deletes all the characters after the cursor In Backspace mode: Deletes all the characters before the cursor Enters 0-9 Inserts + Starts a new line - NEC e228 | Product Manual - Page 154
67 Appointment 114 Attachment types 38 Audio player 104 Auto lock 68 Auto reconnect 67 B Battery 7 Bookmarks 72 Browser 72 C Calculator 128 Calendar 114 Call forwarding 69 Call logs call 18, 28 Exposure setting 98 F File manager 83 Fixed dialling 63 Folder 57, 83 Format memory card 89 -137- Index - NEC e228 | Product Manual - Page 155
66 Grouptalk 24 H Handset code 68 Handset memory 83 Handset profile 61 Handset settings 60 Handsfree call Language setting 71 Lighting settings 97 Locks 68 Low battery alarm 8 M Main menu 13 Making calls 63 Memory card 9, 85 Memory card tool 89 Memory Stick Duo™ 9 Menu list 13 Messages 39 Microphone - NEC e228 | Product Manual - Page 156
list 13 Outbox 39 Outgoing calls 20 Outgoing calls list 19 Own number 12 P Pause dial 20 Photo 98 Picture quality 65, 97 PIM data 86 PIN 68 PIN code 12 Player 101 Playlist 106 POP3 42 Portrait display 63 Power on/off 11 Power save time 66 Power saver 12 Pref. networks 67 - NEC e228 | Product Manual - Page 157
Text edit 36 Text message 37, 81 Third call 25 To Do Task 119 U UMTS 1 USB 107 USIM Card 5 V Video 99 Video call 25, 78 video call 82 Video call options 64 Video call settings 64 Video camera 94 Video message 37, 81 Video - NEC e228 | Product Manual - Page 158
-141- Index - NEC e228 | Product Manual - Page 159
v1.3 MDS-000054-EAA0 June 2004 1st edition
-
 1
1 -
 2
2 -
 3
3 -
 4
4 -
 5
5 -
 6
6 -
 7
7 -
8
-
9
-
10
-
11
-
12
-
13
-
14
-
15
-
16
-
17
-
18
-
19
-
20
-
21
-
22
-
23
-
24
-
25
-
26
-
27
-
28
-
29
-
30
-
31
-
32
-
33
-
34
-
35
-
36
-
37
-
38
-
39
-
40
-
41
-
42
-
43
-
44
-
45
-
46
-
47
-
48
-
49
-
50
-
51
-
52
-
53
-
54
-
55
-
56
-
57
-
58
-
59
-
60
-
61
-
62
-
63
-
64
-
65
-
66
-
67
-
68
-
69
-
70
-
71
-
72
-
73
-
74
-
75
-
76
-
77
-
78
-
79
-
80
-
81
-
82
-
83
-
84
-
85
-
86
-
87
-
88
-
89
-
90
-
91
-
92
-
93
-
94
-
95
-
96
-
97
-
98
-
99
-
100
-
101
-
102
-
103
-
104
-
105
-
106
-
107
-
108
-
109
-
110
-
111
-
112
-
113
-
114
-
115
-
116
-
117
-
118
-
119
-
120
-
121
-
122
-
123
-
124
-
125
-
126
-
127
-
128
-
129
-
130
-
131
-
132
-
133
-
134
-
135
-
136
-
137
-
138
-
139
-
140
-
141
-
142
-
143
-
144
-
145
-
146
-
147
-
148
-
149
-
150
-
151
-
152
-
153
-
154
-
155
-
156
-
157
-
158
-
159
 |
 |
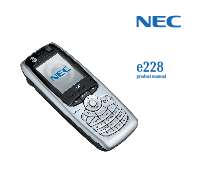
e228
product manual
e228
product manual