Netgear GS752TS GS7xxTS-TPS Hardware Installation Guide - Page 3

Table of Contents - gs752tp

Page 3 highlights

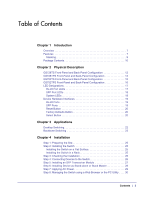
Table of Contents Chapter 1 Introduction Overview 7 Features 7 Stacking 9 Package Contents 10 Chapter 2 Physical Description GS728TS Front-Panel and Back-Panel Configuration 12 GS728TPS Front-Panel and Back-Panel Configuration 13 GS752TS Front-Panel and Back-Panel Configuration 15 GS752TPS Front-Panel and Back-Panel Configuration 16 LED Designations 17 RJ-45 Port LEDs 17 SFP Port LEDs 18 System LEDs 18 Device Hardware Interfaces 19 RJ-45 Ports 19 SFP Ports 19 Reset Button 20 Factory Defaults Button 20 Select Button 20 Chapter 3 Applications Desktop Switching 22 Backbone Switching 23 Chapter 4 Installation Step 1: Preparing the Site 25 Step 2: Installing the Switch 25 Installing the Switch on a Flat Surface 25 Installing the Switch in a Rack 25 Step 3: Checking the Installation 26 Step 4: Connecting Devices to the Switch 26 Step 5: Installing an SFP Transceiver Module 27 Step 6: Installing Device as Stand-alone or Stack Master 28 Step 7: Applying AC Power 29 Step 8: Managing the Switch using a Web Browser or the PC Utility . . . . 30 Contents | 3

  • 1
  • 2
  • 3
  • 4
  • 5
  • 6
  • 7
  • 8
  • 9
  • 10
  • 11
  • 12
  • 13
  • 14
  • 15
  • 16
  • 17
  • 18
  • 19
  • 20
  • 21
  • 22
  • 23
  • 24
  • 25
  • 26
  • 27
  • 28
  • 29
  • 30
  • 31
  • 32
  • 33
  • 34
  • 35
  • 36
  • 37
  • 38
  • 39
  • 40
  • 41
  • 42

Contents
|
3
Table of Contents
Chapter 1
Introduction
Overview . . . . . . . . . . . . . . . . . . . . . . . . . . . . . . . . . . . . . . . . . . . . . . . . . . . 7
Features . . . . . . . . . . . . . . . . . . . . . . . . . . . . . . . . . . . . . . . . . . . . . . . . . . . 7
Stacking. . . . . . . . . . . . . . . . . . . . . . . . . . . . . . . . . . . . . . . . . . . . . . . . . . 9
Package Contents . . . . . . . . . . . . . . . . . . . . . . . . . . . . . . . . . . . . . . . . . . . 10
Chapter 2
Physical Description
GS728TS Front-Panel and Back-Panel Configuration . . . . . . . . . . . . . . . 12
GS728TPS Front-Panel and Back-Panel Configuration . . . . . . . . . . . . . . 13
GS752TS Front-Panel and Back-Panel Configuration . . . . . . . . . . . . . . . 15
GS752TPS Front-Panel and Back-Panel Configuration . . . . . . . . . . . . . . 16
LED Designations . . . . . . . . . . . . . . . . . . . . . . . . . . . . . . . . . . . . . . . . . . . 17
RJ-45 Port LEDs . . . . . . . . . . . . . . . . . . . . . . . . . . . . . . . . . . . . . . . . . . 17
SFP Port LEDs . . . . . . . . . . . . . . . . . . . . . . . . . . . . . . . . . . . . . . . . . . . 18
System LEDs. . . . . . . . . . . . . . . . . . . . . . . . . . . . . . . . . . . . . . . . . . . . . 18
Device Hardware Interfaces . . . . . . . . . . . . . . . . . . . . . . . . . . . . . . . . . . . 19
RJ-45 Ports . . . . . . . . . . . . . . . . . . . . . . . . . . . . . . . . . . . . . . . . . . . . . . 19
SFP Ports . . . . . . . . . . . . . . . . . . . . . . . . . . . . . . . . . . . . . . . . . . . . . . . 19
Reset Button . . . . . . . . . . . . . . . . . . . . . . . . . . . . . . . . . . . . . . . . . . . . . 20
Factory Defaults Button . . . . . . . . . . . . . . . . . . . . . . . . . . . . . . . . . . . . . 20
Select Button . . . . . . . . . . . . . . . . . . . . . . . . . . . . . . . . . . . . . . . . . . . . . 20
Chapter 3
Applications
Desktop Switching . . . . . . . . . . . . . . . . . . . . . . . . . . . . . . . . . . . . . . . . . . . 22
Backbone Switching . . . . . . . . . . . . . . . . . . . . . . . . . . . . . . . . . . . . . . . . . 23
Chapter 4
Installation
Step 1: Preparing the Site . . . . . . . . . . . . . . . . . . . . . . . . . . . . . . . . . . . . . 25
Step 2: Installing the Switch . . . . . . . . . . . . . . . . . . . . . . . . . . . . . . . . . . . 25
Installing the Switch on a Flat Surface. . . . . . . . . . . . . . . . . . . . . . . . . . 25
Installing the Switch in a Rack. . . . . . . . . . . . . . . . . . . . . . . . . . . . . . . . 25
Step 3: Checking the Installation . . . . . . . . . . . . . . . . . . . . . . . . . . . . . . . . 26
Step 4: Connecting Devices to the Switch. . . . . . . . . . . . . . . . . . . . . . . . . 26
Step 5: Installing an SFP Transceiver Module . . . . . . . . . . . . . . . . . . . . . 27
Step 6: Installing Device as Stand-alone or Stack Master. . . . . . . . . . . . . 28
Step 7: Applying AC Power . . . . . . . . . . . . . . . . . . . . . . . . . . . . . . . . . . . . 29
Step 8: Managing the Switch using a Web Browser or the PC Utility . . . . 30